1. Introduction to Barcode Printers and Their Common Faults |
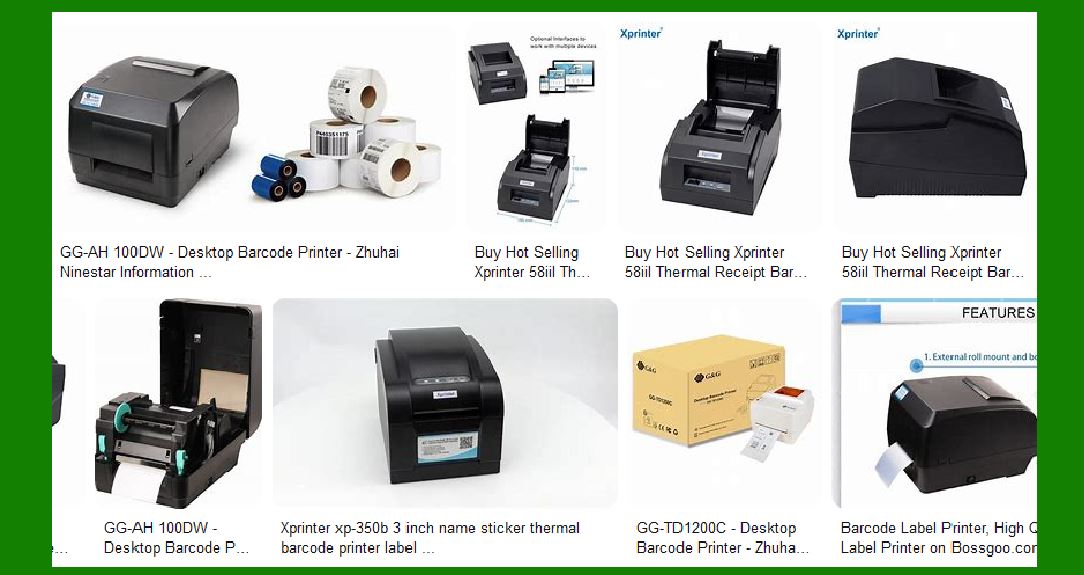
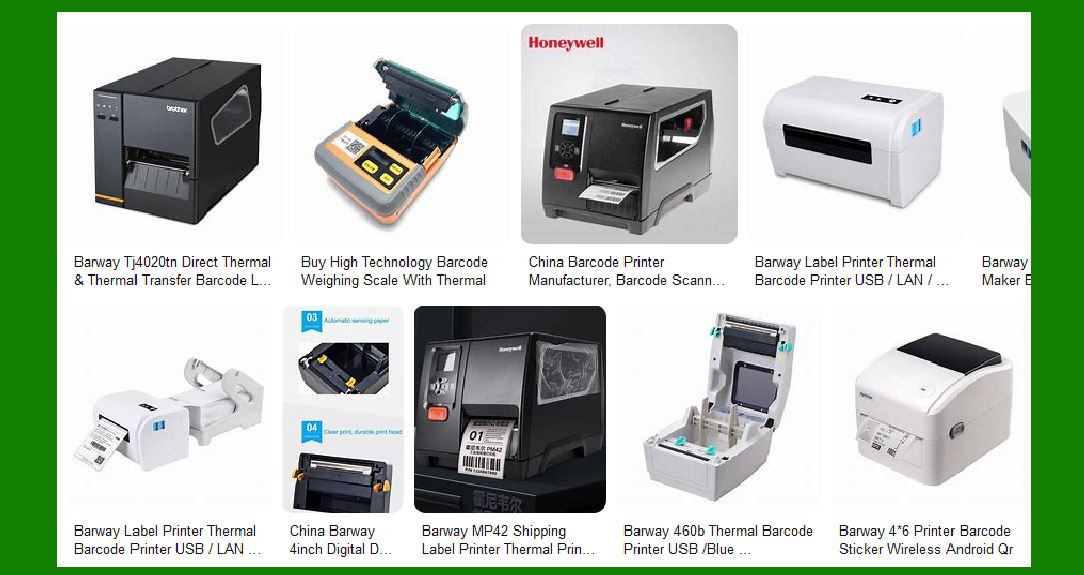
Barcode printers are specialized printing devices designed to produce barcode labels for product identification, asset tracking, and logistics. These printers can be divided into two main categories: thermal transfer printers and direct thermal printers. The performance of these printers can be affected by various issues such as print quality degradation, paper feed errors, and component failures. |
Common faults in barcode printers usually stem from: |
Mechanical wear and tear: Over time, components such as the print head, rollers, and sensors degrade. |
Software issues: Improper configuration, outdated drivers, or software conflicts can result in misprints or error messages. |
Environmental factors: Dust, heat, humidity, and even power fluctuations can affect printer performance. |
This section will provide insights into individual components and their typical failure modes. |
|
2. Print Head Failures and Repairs |
The print head is one of the most critical components in a barcode printer. It is responsible for applying heat to the thermal paper or ribbon to produce the printed barcode. |
Common Print Head Failures |
Burnt-out pixels: Overheating can cause individual elements in the print head to fail, resulting in faded or incomplete barcodes. |
Uneven printing: This may occur if the print head is misaligned or dirty. Uneven heat distribution can cause patches of darkness or lightness in the barcode, making it unreadable. |
Print head wear: In high-volume printing environments, the print head may wear out prematurely due to constant exposure to heat and friction. |
Repair and Maintenance Tips |
Cleaning: Regular cleaning with isopropyl alcohol and a lint-free cloth is essential to maintain print quality and prevent the build-up of dirt or ribbon residue. |
Print head replacement: If the print head is damaged beyond repair, it may need to be replaced. Ensure that the replacement part is compatible with your printer model. |
Preventive maintenance: To extend the lifespan of the print head, avoid excessive heat settings and ensure proper calibration. |
|
3. Paper Feeding Issues |
Another common fault in barcode printers is related to paper feeding. If the paper is not feeding correctly through the printer, it can cause paper jams or misalignment of the print. |
Common Paper Feeding Failures |
Paper jams: This occurs when the paper is caught or stuck in the feed mechanism. Often caused by improperly loaded paper, faulty rollers, or dust and debris accumulation. |
Misalignment: The paper may feed at an angle, causing printing errors, such as the barcode being misaligned on the label. |
Paper not feeding at all: The printer fails to grab the paper, which could be due to worn-out rollers or a misconfigured paper size. |
Repair and Maintenance Tips |
Roller cleaning: Clean the rollers regularly to ensure they are free from dirt, dust, and adhesive residue. |
Roller replacement: If rollers are worn out or damaged, they should be replaced to restore paper feeding functionality. |
Proper loading: Ensure the paper is loaded correctly and that the printer settings match the paper type and size. |

|
4. Ribbon and Media Issues |
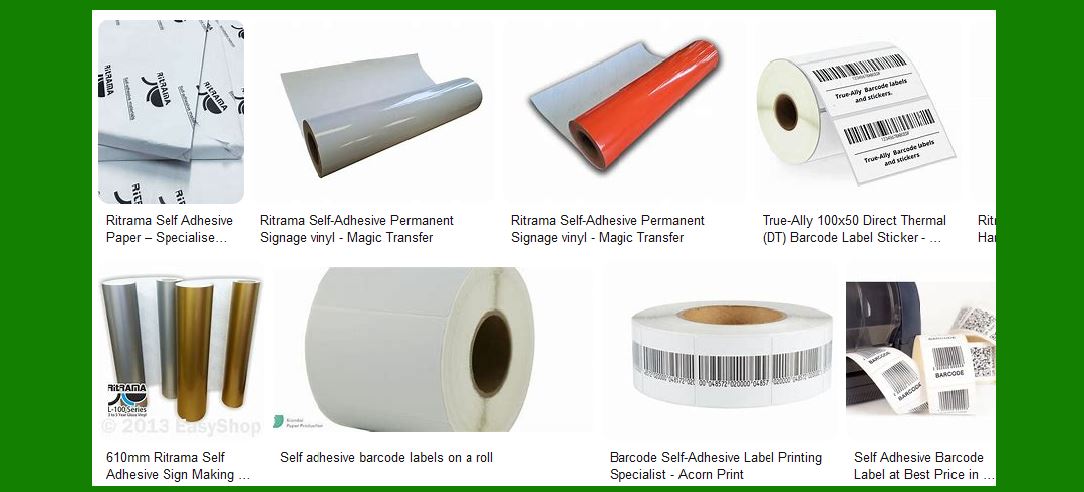
Barcode printers that use thermal transfer technology rely on ribbons to transfer ink onto the label material. Problems related to the ribbon and media can cause misprints and operational failures. |
Common Ribbon and Media Failures |
Ribbon wrinkle or misalignment: A ribbon that is not properly aligned can cause print quality issues and even damage the print head. |
Incorrect media type: Using the wrong media (e.g., paper with improper coating) can result in poor print quality or damage to the printer. |
Ribbon breaking: If the ribbon is too thin, it can break during printing, leading to incomplete barcodes or operational downtime. |
Repair and Maintenance Tips |
Ribbon alignment: Ensure that the ribbon is properly aligned and tensioned on the spool. |
Media compatibility: Always use the correct media recommended by the manufacturer for your specific printer model. |
Ribbon replacement: Replace the ribbon when it starts to show signs of wear, such as cracking or unraveling. |
|
5. Sensor Malfunctions |
Barcode printers rely on sensors for accurate label positioning, media detection, and print alignment. Sensor malfunctions are common, particularly in environments with high dust levels or improper calibration. |
Common Sensor Failures |
Label sensor failure: If the label sensor malfunctions, the printer may not detect when a label is in place, causing continuous printing or paper feed errors. |
Ribbon sensor failure: A malfunctioning ribbon sensor can lead to improper ribbon feeding, causing print quality issues. |
Gap sensor misalignment: Misalignment of the gap sensor can cause the printer to miss the edge of labels, leading to skewed printing. |
Repair and Maintenance Tips |
Sensor cleaning: Dust and debris can accumulate on sensors, causing false readings. Cleaning the sensors with compressed air or a soft brush can prevent this. |
Sensor recalibration: If the sensor is out of alignment, recalibrate it using the printer’s control panel or software interface. |
Replacing faulty sensors: If cleaning and recalibration do not resolve the issue, the faulty sensor may need to be replaced. |
|
6. Motor and Gearbox Failures |
Barcode printers use motors to drive the paper feed mechanism and other moving parts. If these motors fail, the printer will experience paper feeding problems or even complete operational failure. |
Common Motor and Gearbox Failures |
Motor burnout: Prolonged use or electrical issues can lead to motor burnout, rendering the printer inoperable. |
Broken gears: The gears responsible for moving the paper or ribbon can break or slip, causing mechanical failure. |
Motor misalignment: If the motor is not properly aligned, it may fail to engage the necessary components, leading to incomplete printing or failure to feed paper. |
Repair and Maintenance Tips |
Motor inspection: Regularly inspect motors for signs of wear, such as overheating or unusual noise. |
Gear lubrication: Keep the gears lubricated to reduce friction and prevent wear. |
Motor replacement: If the motor fails, it will need to be replaced. Consult the printer manual for compatibility with replacement parts. |

|
7. Electrical and Power Supply Issues |
Barcode printers require a stable power supply for proper functioning. Electrical faults are common in barcode printers, especially in environments with power fluctuations or inadequate grounding. |
Common Electrical Failures |
Power supply failure: If the power supply is faulty, the printer may not turn on or experience intermittent shutdowns. |
Electrical shorts: Power surges or improper connections can cause electrical shorts within the printer, potentially damaging internal components. |
Overheating: Prolonged use without proper ventilation can cause the printer’s internal components to overheat and malfunction. |
Repair and Maintenance Tips |
Power supply inspection: Check the power supply and cable connections for wear or damage. Replace any damaged cables immediately. |
Surge protection: Use surge protectors to shield the printer from power surges or fluctuations. |
Internal cooling: Ensure that the printer is operating in a well-ventilated area to prevent overheating. |
|
8. Software and Configuration Issues |
Software or configuration issues can also lead to print problems, such as incorrect barcode printing, poor resolution, or failure to print altogether. |
Common Software Failures |
Driver incompatibility: Using outdated or incompatible printer drivers can result in poor print quality or operational failures. |
Incorrect printer settings: Misconfigured settings, such as incorrect print density or resolution, can cause the printer to produce unreadable barcodes. |
Connection issues: Printer communication issues with the computer or network can cause printing delays or errors. |
Repair and Maintenance Tips |
Driver updates: Regularly update printer drivers to ensure compatibility with your operating system and software. |
Configuration verification: Double-check printer settings to ensure they match the requirements for the label size, resolution, and type of print media. |
Network troubleshooting: Ensure that the printer is properly connected to the network or computer. Troubleshoot any connection issues with cables or wireless settings. |
|
9. Conclusion |
Barcode printers are complex devices with many components that can fail over time. Regular maintenance, cleaning, and calibration are essential to ensure that the printer continues to operate efficiently and produce high-quality barcodes. The steps outlined above provide an overview of the most common faults and repairs for barcode printers |

|
10. Environmental Factors and Their Impact on Barcode Printers |
Barcode printers, like many other electronic devices, are sensitive to environmental conditions. Factors such as temperature, humidity, and dust can severely impact the performance of these printers and lead to common faults. |
Common Environmental Failures |
Temperature extremes: Excessive heat can cause components like the print head and internal circuitry to overheat, leading to burnout. In contrast, extreme cold can make materials brittle or cause condensation inside the printer. |
Humidity issues: High humidity can lead to paper curling, moisture buildup on internal parts, or corrosion of the metal components inside the printer. Conversely, extremely low humidity can cause static electricity buildup, leading to malfunction or even short circuits. |
Dust and debris accumulation: In environments with a lot of dust or particles (e.g., warehouses), debris can enter the printer and obstruct paper feeding, clog print heads, or cause sensor failures. |
Repair and Maintenance Tips |
Environmental controls: Ensure that the printer is placed in a controlled environment with moderate temperature and humidity. Avoid areas where dust accumulates frequently. |
Use air filters: If the printer is in a dusty environment, use air filters or protective covers to shield sensitive components. |
Regular inspections: Check for dust or debris buildup inside the printer. Use compressed air or a vacuum to clean internal components periodically. |
|
11. Barcode Quality Issues and Troubleshooting |
Barcode printers are specifically designed to print scannable barcodes. However, there are many instances where the printed barcode may not meet scanning standards, leading to scanning errors or failure to read the code. |
Common Barcode Quality Issues |
Fuzzy or unclear barcodes: If the print resolution is too low, or if the print head is misaligned, the barcode may appear fuzzy or indistinct, making it unreadable by scanners. |
Broken or incomplete bars: A malfunctioning print head or incorrect ribbon can cause missing bars or uneven printing in the barcode. |
Incorrect aspect ratio: Barcodes printed with incorrect proportions (e.g., too tall or too short) will fail to scan properly, often due to improper configuration or media incompatibility. |
Repair and Maintenance Tips |
Adjust print resolution: Ensure the printer is set to the appropriate print resolution for the barcode size. Barcodes need a minimum resolution of 200 DPI (dots per inch) for proper readability. |
Regular head calibration: Regularly calibrate the print head and adjust the density settings for clear, high-quality barcodes. |
Media and ribbon compatibility: Ensure that the ribbon and media are compatible with each other and with the printer. Low-quality media or ribbons can result in poor print quality. |
|
12. Sensor Calibration and Alignment Failures |
Barcode printers rely on sensors to detect the position of labels, determine the type of media being used, and monitor the printer's overall health. Sensor failure can cause print alignment problems, paper feed issues, or even failure to print altogether. |
Common Sensor Failures |
Label gap sensor misalignment: This sensor is responsible for detecting the gap between labels. If misaligned, it may cause the printer to misfeed or produce distorted prints. |
Reflective sensor failure: Reflective sensors, which detect the reflective surface of the label, may fail due to dirt, wear, or environmental factors. This can cause problems with positioning or sensor misreads. |
Ribbon sensor issues: A faulty ribbon sensor can cause problems with ribbon movement, leading to incomplete prints or damaged labels. |
Repair and Maintenance Tips |
Sensor cleaning: Regularly clean all sensors with a lint-free cloth and isopropyl alcohol. Be gentle, as sensors are delicate and can be easily damaged. |
Recalibrate sensors: Follow the printer’s user manual to recalibrate the label and ribbon sensors. This will ensure that the printer accurately detects media and ribbon. |
Sensor replacement: If cleaning and recalibration don’t solve the issue, you may need to replace faulty sensors. This typically requires removing the printer casing and carefully replacing the malfunctioning part. |

|
13. Connectivity and Network Communication Failures |
Barcode printers often communicate with computers or network systems to receive print jobs, monitor printer status, or synchronize data. Network connectivity failures or communication issues can result in printing errors or delays. |
Common Connectivity Failures |
Wi-Fi or wired network failure: If the printer is connected to a network, issues such as dropped connections, signal interference, or incorrect IP settings can cause printing delays or failures. |
Driver or software incompatibility: An outdated or incompatible printer driver can lead to miscommunication between the printer and the computer, resulting in printing failures or incorrect print jobs. |
USB connection failure: USB ports or cables can fail over time due to wear and tear, causing the printer to lose connection to the computer or fail to recognize print jobs. |
Repair and Maintenance Tips |
Network troubleshooting: Verify that the printer is correctly connected to the network and that the IP address or wireless settings are correct. Use ping tests to check the connection status. |
Driver updates: Keep your printer’s software and drivers up to date to ensure compatibility with the operating system and printing software. |
USB cable inspection: Inspect the USB cable for wear or damage. If necessary, replace the cable with a high-quality alternative. |
|
14. Print Mechanism Failures: Gears, Motors, and Rollers |
The internal mechanical parts of barcode printers, including motors, gears, and rollers, play a critical role in ensuring that the paper or media moves correctly through the printer. Failures in these components can cause paper jams, misfeeds, or total operational breakdowns. |
Common Mechanical Failures |
Gear slippage: If gears become worn, misaligned, or damaged, they may slip during operation, causing paper to jam or misfeed. |
Motor failure: Over time, the printer’s motor may wear out or become damaged, resulting in poor paper feed or failure to feed media altogether. |
Roller wear: Rollers are responsible for grabbing and moving the media. If they become worn, they may fail to grab the paper correctly, resulting in misfeeds, jams, or inconsistent print quality. |
Repair and Maintenance Tips |
Lubrication: Apply a small amount of lubricant to gears and rollers to reduce friction and prevent wear. Be careful not to over-apply, as this can cause dust and debris to stick to components. |
Roller replacement: Replace worn-out rollers as needed. Ensure that the new rollers are compatible with the printer model. |
Motor replacement: If the motor fails, it may need to be replaced entirely. Check the printer’s manual for the correct motor specifications and replacement procedures. |
|
15. Print Quality Degradation Over Time |
One of the most frustrating issues for barcode printer owners is the gradual decline in print quality over time. This can happen for a variety of reasons, including wear on the print head, incorrect calibration, or the use of low-quality materials. |
Common Causes of Print Quality Issues |
Clogged print head: Over time, dust, dirt, or ink residue can build up on the print head, affecting the quality of the print. |
Incorrect calibration: If the print head is not calibrated correctly, the print quality may degrade, resulting in uneven prints, low contrast, or unreadable barcodes. |
Poor media or ribbon: Low-quality media or ribbons can cause print quality issues, including smearing, fading, or poor adhesion of ink to the media. |
Repair and Maintenance Tips |
Head cleaning: Regularly clean the print head to remove any build-up of ink residue, dust, or dirt. Use a soft, lint-free cloth and isopropyl alcohol for best results. |
Recalibrate the printer: Ensure that the printer’s calibration is correct by adjusting the print density, resolution, and alignment settings. |
Use high-quality media and ribbons: Avoid cheap or incompatible ribbons and media. Always use products recommended by the printer manufacturer to ensure optimal print quality. |

|
16. Conclusion and Final Thoughts |
Maintaining and repairing barcode printers involves addressing a wide range of common faults, from mechanical failures to environmental influences. Regular inspections, cleaning, and preventive maintenance are essential to extending the life of your barcode printer and ensuring optimal performance. |
By understanding the key components and how they can fail, you can troubleshoot common problems effectively, reduce downtime, and prevent costly repairs. Additionally, keeping your printer’s software, drivers, and firmware up to date, along with using compatible and high-quality materials, will help ensure that your printer produces clear, reliable barcodes every time. |
|
Let's dive deeper into the Print Head Failures and Repairs section. The print head is one of the most crucial components in a barcode printer, and understanding its failures and repair procedures can significantly improve both the printer's performance and longevity. |
1. Understanding Print Head Functions |
The print head in a barcode printer is responsible for transferring heat to either a thermal ribbon (in thermal transfer printing) or directly to the thermal paper (in direct thermal printing). The print head consists of an array of tiny heating elements or 'dots' that create a pattern on the label, forming the printed image (such as a barcode or text). These dots must function precisely for clear, scannable barcodes. |
Key Functions of the Print Head: |
Heating elements: Responsible for applying heat to either the ribbon (thermal transfer) or the paper (direct thermal) to transfer the image. |
Resolution control: The density of these heating elements determines the resolution of the print. Common resolutions include 203 DPI (dots per inch), 300 DPI, and 600 DPI. |
Heat dissipation: Effective cooling of the print head is essential to prevent overheating and premature failure. |

|
2. Common Print Head Failures |
Over time, print heads can experience various types of failures, which can result in poor print quality or total inoperability. These failures can be caused by improper usage, environmental factors, or simple wear and tear. Here are some of the most common print head failures: |
a) Burnt-out Pixels |
A 'burnt-out pixel' refers to a situation where one or more heating elements in the print head fail. This is often due to excessive heat, which can occur if the print head is used at high temperatures for prolonged periods. When a pixel is burnt out, it will not print, resulting in missing parts of the barcode or text. |
Cause: Overheating due to incorrect temperature settings, prolonged high-speed printing, or low-quality print media. |
Effect: Missing dots or streaks in the printed barcode. This can make barcodes unreadable, leading to scanning failures. |
b) Uneven Printing |
This occurs when the print head is not distributing heat evenly, often due to dirt, dust, or wear on the heating elements. In some cases, uneven printing may also result from improper alignment or miscalibration of the print head. |
Cause: Build-up of residue (such as dirt, ink, or adhesive) on the print head, leading to unequal heat distribution. |
Effect: Inconsistent prints with areas that are too light or too dark, making the barcode difficult or impossible to read by scanners. |
c) Overheating or Burnt-out Print Head |
Overheating can occur when the print head is subjected to continuous high-intensity printing or is not given sufficient time to cool down between prints. In some cases, the print head may burn out completely if the cooling mechanism fails. |
Cause: Printing at high temperatures for long periods, insufficient cooling, or the printer's heat management system malfunctioning. |
Effect: The print head may burn out completely, rendering it unusable. This typically leads to the printer failing to print entirely or producing degraded prints. |
d) Print Head Misalignment |
The print head needs to be properly aligned with the paper or ribbon for optimal printing. Misalignment can lead to distortion or skewing of the print, causing the barcode to be printed in an incorrect position. |
Cause: Mechanical misalignment due to wear and tear, improper installation, or damage from rough handling. |
Effect: The barcode may appear slanted or misprinted, which can cause issues with scanning and tracking. |
e) Print Head Contamination |
Print heads can become contaminated with dust, dirt, ink, or adhesive residue from the ribbon or paper. This contamination can interfere with the heat transfer process, leading to print defects. |
Cause: Dust or paper residue buildup from the media, or ribbon debris from thermal transfer printing. |
Effect: Poor print quality, including streaks, smudges, or faded barcodes. |

|
3. Diagnosing Print Head Failures |
Proper diagnosis of print head failures is crucial to determining the necessary repairs or replacements. The following methods can help identify common issues: |
a) Perform a Print Test |
Many barcode printers have a built-in diagnostic feature that prints a test page to check for print head problems. This page often includes a series of lines, bars, or text that can help identify areas where the print head is failing. |
Missing sections of the test pattern: Indicates burnt-out pixels. |
Uneven lines or blotches: Suggests contamination or uneven heat distribution. |
b) Inspect the Print Head Visually |
Turn off the printer and remove the media to access the print head. Look for signs of visible damage, such as cracks, burnt areas, or discoloration. Also, check for dirt, debris, or residue. |
Residue: Cleaning may solve the issue. |
Burnt-out or damaged pixels: If significant damage is found, the print head may need to be replaced. |
c) Check Print Quality Settings |
Incorrect print quality settings in the printer software (e.g., high print speed with low quality) can also lead to print head issues. Make sure the settings match the type of media being used. |
Low-quality print settings: Can cause excessive heat buildup. |
High print speeds: May not give the print head enough time to transfer ink properly, leading to poor print quality. |

|
4. Print Head Cleaning and Maintenance |
Regular cleaning and maintenance can prevent many common print head issues. Here's a breakdown of how to maintain and clean the print head: |
a) Cleaning the Print Head |
To avoid contamination and prevent print quality degradation, it's essential to clean the print head regularly. This helps to remove ink, dust, adhesive residue, or paper fibers that accumulate during printing. |
Cleaning materials: Use isopropyl alcohol (preferably 99% concentration) and a lint-free cloth or soft cotton swabs. |
Steps to clean: |
Turn off the printer and allow it to cool down (if it’s a thermal transfer printer). |
Open the printer to access the print head. |
Dampen the cloth or cotton swab with isopropyl alcohol, ensuring it is not soaking wet. |
Gently wipe the print head in one direction (not back and forth) to remove any debris or ink residue. |
Allow the print head to dry completely before restarting the printer. |
b) Avoid Using Harsh Chemicals |
Do not use abrasive materials or harsh cleaning chemicals, as these can damage the delicate print head. Always stick to alcohol-based cleaners or cleaners recommended by the manufacturer. |
c) Perform Periodic Calibration |
Calibration ensures that the print head is aligned correctly and is using the proper heat levels. Periodically recalibrating the printer can prevent alignment issues and ensure the longevity of the print head. |
Calibration procedure: Follow the printer’s user manual to perform the calibration. It often involves adjusting settings like print density and alignment. |
d) Print Head Replacement |
Despite best efforts in cleaning and maintenance, print heads have a limited lifespan. When a print head is beyond repair due to extensive damage or wear, it will need to be replaced. |
Replacement procedure: |
Power off and unplug the printer. |
Remove the media and ribbon (if applicable). |
Locate and remove the screws or clips that hold the print head in place. |
Carefully disconnect the print head from the printer’s internal wiring. |
Install the new print head by reversing the steps, ensuring that it is securely attached and properly aligned. |
Tips for replacement: Always ensure that the replacement print head is compatible with your printer model. Most manufacturers provide print head replacement kits designed specifically for each printer model. |

|
5. Preventive Measures to Extend Print Head Life |
Taking proactive steps can help extend the lifespan of your print head and avoid costly replacements. Here are some tips for maintaining the print head's performance over time: |
a) Avoid Overheating |
Use appropriate print settings: Always use the recommended print density and speed for your label type. Avoid printing at excessively high temperatures. |
Allow cool-down periods: If your printer is running for extended periods, allow it to cool down between printing sessions to prevent heat buildup. |
b) Use Quality Media and Ribbons |
Proper media: Always use media that is compatible with your printer. Poor-quality paper or ribbon can lead to excessive residue buildup, damaging the print head over time. |
Avoid over-tightening ribbons: When loading thermal transfer ribbons, avoid over-tightening them, as this can put unnecessary strain on the print head. |
c) Regular Cleaning |
Routine cleaning: Perform routine cleaning as part of a regular maintenance schedule. This can prevent the accumulation of ink, dust, and paper debris on the print head. |
|
6. Conclusion |
The print head is a critical component of any barcode printer, and understanding its failure modes, common issues, and repair methods can help keep your printer functioning at its best. Regular maintenance, cleaning, proper handling, and using the correct materials are key to preventing print head failure. When failures do occur, timely diagnosis and proper repair or replacement procedures can ensure minimal downtime and continued high-quality barcode printing. |
By following these guidelines, you can significantly extend the life of your print head, reduce printing errors, and maintain the efficiency of your barcode printing operations. |
|
Let's dive into a more detailed exploration of Paper Feeding Issues in barcode printers. Paper feeding problems are some of the most common and disruptive issues in barcode printers, as they directly affect print quality and can cause downtime. Understanding the causes and repair methods for these issues will help you maintain a smooth operation in your printing process. |
1. Overview of Paper Feeding Mechanism |
The paper feeding mechanism in barcode printers is responsible for moving the media (whether paper or synthetic labels) from the roll or stack to the print head for proper printing. This system is composed of several components, including rollers, motors, sensors, and occasionally gears, that work together to move the paper in a controlled manner. |
Key Components in the Paper Feeding System: |
Feed Rollers: These are rubber-coated rollers that pull the media through the printer. They play a critical role in ensuring smooth and consistent paper movement. |
Tension Rollers: Used in thermal transfer printers to maintain the right amount of tension on the media as it is fed into the printer. |
Media Sensors: These sensors detect the presence of the media, paper gaps, or marks and ensure proper alignment and timing for feeding. |
Stepper Motor: The motor that drives the rollers and moves the media. Its accuracy is critical for preventing misfeeds or jams. |
Gears and Belts: These help move the rollers in a synchronized fashion to feed the media through the printer correctly. |

|
2. Common Paper Feeding Issues |
Several common faults can cause paper feeding issues, ranging from mechanical wear to incorrect settings. Here are the most frequent problems: |
a) Paper Jams |
A paper jam occurs when the paper is caught in the feed mechanism, causing a blockage that prevents the printer from functioning properly. |
Cause: Paper jams can occur when the paper gets stuck between rollers, gears, or other internal parts due to improper paper loading, worn-out rollers, or misalignment of the paper path. |
Effect: The printer will either stop working, display an error message, or produce partial prints on the labels. |
b) Misfeeds |
Misfeeding happens when the printer does not pull the paper in a straight line or skips labels, causing misalignment of prints. |
Cause: Misfeeds are often caused by warped or damaged media, worn feed rollers, or incorrectly loaded labels. Incorrect print settings that do not match the media type can also cause misfeeding. |
Effect: The print may appear skewed or misaligned, which can result in the barcode being printed in the wrong position on the label. |
c) Partial Label Feeds |
This problem occurs when the printer feeds the paper, but only part of the label is fed through the print area, causing incomplete printing. |
Cause: This is typically caused by the printer not recognizing the label gap correctly or the sensor not detecting the correct position for feeding. |
Effect: The result is an incomplete barcode or image on the label, which could lead to scannability issues. |
d) Paper Not Feeding at All |
This occurs when the media fails to feed into the printer, and no movement is observed in the paper path. |
Cause: Common causes include worn or damaged feed rollers, misalignment of the paper or ribbon, and paper loading errors. In some cases, issues with the stepper motor or a blocked sensor can cause the paper not to move. |
Effect: The printer will fail to print, and it may display an error message or refuse to start printing altogether. |
e) Multiple Sheets Feeding Simultaneously |
This happens when two or more sheets of paper are fed into the printer at once, leading to incorrect printing or a jam. |
Cause: This issue often arises due to paper that is too thin or sticky, poor-quality media with adhesive buildup, or damaged feed rollers that cannot grip the paper properly. |
Effect: Multiple labels may be printed with the wrong alignment or be stuck together, rendering the print unusable. |
|
3. Diagnosing Paper Feeding Issues |
Properly diagnosing paper feeding issues is essential to resolving them effectively. Here’s how to approach the diagnosis for the common feeding problems: |
a) Visual Inspection of Paper Path |
Start by inspecting the entire paper path from the paper tray to the print head. Look for any visible obstructions, misalignments, or damage that may be causing the issue. |
Misalignment: Check if the rollers are correctly aligned and that there is no debris obstructing the media path. |
Damage: Look for damaged rollers, torn labels, or any areas where the paper may be getting caught. |
b) Check Paper Roll and Loading |
Improperly loaded paper is one of the most frequent causes of paper feeding problems. |
Paper Orientation: Ensure that the paper is loaded correctly, with the proper side facing up (for thermal transfer printing) or the right edge feeding into the printer. |
Paper Tension: Make sure that the paper is taut enough, without excessive slack, which could cause slippage or skipping. |
c) Examine Feed Rollers |
The feed rollers are essential for moving the media through the printer. Worn or dirty rollers are a common cause of feeding issues. |
Signs of Wear: Check if the rubber surface of the rollers is cracked, worn down, or shiny (from excessive friction). These signs indicate the need for cleaning or replacement. |
Cleaning: If rollers appear dirty, clean them with isopropyl alcohol and a lint-free cloth. Be gentle to avoid damaging the surface. |
d) Test Media Sensors |
The media sensors detect the presence of the label and gaps in the media. If these sensors malfunction, the printer may not properly align the labels or detect when a new label is ready. |
Sensor Cleaning: Dust or residue buildup on sensors can lead to inaccurate readings. Use compressed air or a soft brush to clean the sensors. |
Recalibration: Many printers have a recalibration feature that can help reset the sensors to ensure they detect labels and gaps correctly. |

|
4. Repair and Maintenance of Paper Feeding Issues |
Now that we’ve identified the potential causes of paper feeding issues, let’s discuss how to repair and maintain the printer to prevent and fix these problems. |
a) Paper Jam Repairs |
Paper jams often require careful attention to remove the media without damaging the printer. Here’s how to do it: |
Turn off the Printer: Always turn off the printer before attempting to clear a paper jam to avoid injury or damaging the components. |
Remove the Paper Carefully: Gently pull the paper out of the printer, ensuring you don’t tear the media. Be cautious around sharp edges or small components inside the printer. |
Check for Residue: After removing the jam, inspect the area for any bits of paper or adhesive residue that might cause future jams. Clean the rollers and the paper path with a soft cloth or compressed air. |
b) Misfeed or Partial Label Feed Repair |
If the paper is not feeding properly or is misaligned, check the following: |
Check Rollers: Inspect the rollers for wear or contamination. Replace them if they are damaged or excessively worn. Clean the rollers regularly to avoid issues. |
Check the Media Type: Ensure that the media size and type match the printer settings. Incorrect settings can cause misfeeds. Verify the configuration in the printer’s software or control panel. |
Check for Gaps: Misfeeds often occur due to improperly aligned or incorrectly sized labels. Check for gaps between the labels and ensure that they are correctly positioned in the printer. |
c) Paper Not Feeding Repair |
If the paper is not feeding at all, the problem could be with the motors, sensors, or rollers. |
Motor Inspection: Inspect the stepper motor to ensure it is working properly. If the motor is damaged or malfunctioning, it may need to be replaced. Check for loose wires or connections. |
Roller Replacement: Worn-out rollers may fail to grip the paper. If cleaning the rollers doesn’t solve the issue, replace them with compatible parts from the manufacturer. |
Sensor Check: If the sensor is not detecting the media, it could be dirty or misaligned. Clean or recalibrate the sensors as needed. |
d) Multiple Sheets Feeding Repair |
When multiple sheets are fed at once, the issue is typically related to the media itself or the rollers. |
Use the Correct Media: Make sure that the media being used is compatible with the printer. Thin, overly smooth, or sticky labels are more likely to stick together and cause multiple sheets to feed at once. |
Roller Replacement: If the feed rollers are worn, replace them. A lack of proper grip can cause sheets to slide together. |
Paper Separation: In some printers, adding a separation pad between sheets can prevent the problem of multiple sheets feeding at once. |
|
5. Preventive Measures to Avoid Paper Feeding Issues |
Preventing paper feeding issues requires proactive maintenance and attention to detail. Here are some key preventive measures: |
a) Regular Cleaning |
Cleaning is the most effective way to prevent paper feeding problems. Regularly clean the rollers, sensors, and paper path to avoid dirt, dust, and adhesive buildup. |
b) Proper Media Handling |
Ensure that paper or labels are stored correctly and handled with care to avoid warping, curling, or sticking. Always use the recommended media for your printer model. |
c) Routine Inspections |
Inspect the printer’s internal components regularly, including the rollers, sensors, and motor. Look for signs of wear, misalignment, or other issues that could lead to paper feeding problems. |
d) Avoid Overloading Paper |
Avoid overloading the paper tray, as this can cause paper to feed incorrectly or misalign. Always ensure that the media is loaded within the recommended capacity. |
|
6. Conclusion |
Paper feeding issues are a common challenge in barcode printers, but understanding the causes, diagnosing the problem, and performing the necessary repairs can help keep your printer running smoothly. Regular maintenance, proper media handling, and routine inspections will go a long way in preventing feeding problems and ensuring high-quality prints every time. |
By staying proactive with care and understanding the mechanics of the printer’s feeding system, you can minimize downtime, improve print accuracy, and extend the life of your barcode printer. |
|
Let's delve deeper into Sensor Malfunctions in barcode printers. Sensors are crucial for ensuring that the printer accurately detects media, aligns the print job, and performs optimally. If the sensors fail, it can lead to a variety of issues, ranging from paper misfeeds to poor print quality. Understanding how these sensors work, common problems, and how to troubleshoot and repair them is essential for keeping your barcode printer in good working condition. |
1. Overview of Sensors in Barcode Printers |
Barcode printers are equipped with several types of sensors that detect various media-related parameters, such as paper gaps, label presence, and print position. The most common types of sensors in barcode printers are: |
Gap Sensors: Detect the gap between individual labels on a roll of media. These sensors ensure that the printer feeds each label separately for accurate printing. |
Reflective Sensors: Detect reflective surfaces on the label to help position the print job. This sensor is typically used with continuous or non-gapped media, such as plain paper or labels without gaps between them. |
Black Mark Sensors: Detect black marks or registration marks on the back of the label. These marks help ensure accurate positioning and alignment of the label during printing. |
Ribbon Sensors: In thermal transfer printing, ribbon sensors monitor the presence of the ribbon to ensure proper print quality. |
Head Alignment Sensors: Ensure that the print head is correctly aligned with the media or ribbon, allowing for precise printing. |
Media Sensors: These sensors monitor the presence of media, ensuring that the printer is only attempting to print when the media is in place. |
Each of these sensors plays a critical role in ensuring that the printer operates correctly, feeding paper properly and printing accurately. |
|
2. Common Sensor Failures |
Despite their importance, sensors in barcode printers are prone to malfunction due to factors such as dust buildup, wear and tear, or incorrect calibration. Let's examine the most common sensor-related problems and their causes: |
a) Dirty or Contaminated Sensors |
One of the most common causes of sensor failure is contamination from dust, dirt, or adhesive residue. This debris can obscure the sensor’s ability to detect media or gaps, leading to printing errors. |
Cause: The accumulation of dust from the environment, adhesive from labels, or ink from thermal printing can cover the sensor, causing it to misread or fail to detect the media. |
Effect: The printer may fail to detect when a label is present, misalign labels, or cause paper feeding errors. |
b) Misaligned Sensors |
Sensors are typically calibrated to detect certain marks, gaps, or media positions. If the sensor becomes misaligned, it may no longer correctly detect the presence of labels or gaps, leading to issues like misfeeds or incomplete prints. |
Cause: Mechanical vibrations, physical shock to the printer, or improper handling can cause the sensors to shift out of alignment. |
Effect: Misaligned sensors can cause the printer to misfeed media, print barcodes in incorrect positions, or fail to print altogether. |
c) Faulty or Burnt-Out Sensors |
Sensors can fail due to electrical issues, manufacturing defects, or excessive use. A burnt-out or malfunctioning sensor may not respond to incoming signals properly, causing the printer to stop working or print incorrectly. |
Cause: Overheating, power surges, or electrical malfunctions can damage a sensor’s circuitry, leading to complete sensor failure. |
Effect: The printer may stop responding to media detection, leading to no printing or misalignment. |
d) Sensor Calibration Issues |
Sensor calibration ensures that the printer is aligned with the media and can detect gaps, marks, or labels correctly. If the sensor is out of calibration, it may fail to detect the correct media size or gap, leading to problems with printing. |
Cause: Incorrect printer settings, improper media loading, or changes in the media type can throw the sensor calibration off. |
Effect: The printer may misfeed labels, print out of alignment, or produce incomplete prints. |
e) Damaged or Broken Sensor Components |
In some cases, the physical components of a sensor—such as the housing, wires, or connection points—can become damaged, causing the sensor to malfunction. |
Cause: Physical damage due to mishandling, excessive pressure on the sensor, or rough operation of the printer can cause sensor components to break. |
Effect: The printer may fail to detect the label, resulting in blank spaces, misalignment, or paper jams. |
|
3. Diagnosing Sensor Malfunctions |
Properly diagnosing sensor malfunctions is essential to understanding what needs to be repaired or replaced. Here are some common diagnostic methods to identify sensor issues: |
a) Printer Diagnostics and Test Prints |
Many barcode printers come with built-in diagnostic tools that help identify sensor problems. Test prints typically include patterns, barcodes, or alignment marks that can help determine whether the sensor is detecting the media correctly. |
Example: Perform a test print where you intentionally leave gaps or reflective marks in the media. If the printer doesn’t detect these gaps or marks, it indicates a sensor malfunction. |
Effect: Print patterns will show if labels are misaligned, skipped, or not detected by the sensor. This is an easy way to determine if the sensor is working. |
b) Visual Inspection of Sensors |
Inspecting the sensors visually can often reveal issues such as contamination or misalignment. |
Check for dust: Use a flashlight to check the sensor’s surface for dust or dirt that may be blocking the sensor’s view. Cleaning may solve this issue. |
Check for misalignment: Verify that the sensor is positioned correctly and that it aligns with the media, ribbon, or marks as per the printer’s specifications. |
Check for physical damage: Inspect the sensor housing for cracks, loose wires, or broken components. |
c) Calibration Tests |
If you suspect that the sensor is out of calibration, performing a calibration test can help resolve the issue. Most printers have a calibration function in their software or control panel. |
Print calibration patterns: After performing the calibration procedure, print a few labels to check if the printer now aligns the media correctly. |
Adjust calibration manually: If necessary, fine-tune the sensor’s calibration to match the media or ribbon type. |
|
4. Repairing and Replacing Sensors |
Once a sensor malfunction has been diagnosed, the next step is to repair or replace the faulty sensor. Here’s how to go about repairing or replacing different types of sensors: |
a) Cleaning the Sensors |
In many cases, dirty sensors are the root cause of the malfunction. Cleaning can restore functionality without the need for replacements. |
Cleaning materials: Use isopropyl alcohol (99% concentration) and a lint-free cloth or soft brush. Avoid harsh chemicals that may damage the sensor surface. |
Cleaning procedure: |
Turn off and unplug the printer. |
Open the printer and locate the sensors. |
Gently clean the surface of each sensor using the cloth or brush to remove dust, adhesive residue, or ink buildup. |
After cleaning, allow the sensors to dry completely before reassembling the printer. |
b) Re-aligning Misaligned Sensors |
If a sensor has become misaligned, it will need to be repositioned to ensure it can detect the media or marks correctly. |
Adjustment procedure: Depending on the printer model, some sensors can be manually adjusted by loosening a screw or shifting the sensor position. Refer to the user manual for your printer model to learn how to realign the sensor. |
Alignment check: Once realigned, perform a test print to verify that the sensor is correctly detecting the media and labels. |
c) Replacing Faulty Sensors |
If cleaning and realigning the sensor don’t resolve the issue, it may be necessary to replace the faulty sensor. |
Identifying the faulty sensor: Use diagnostic tests to pinpoint which sensor is malfunctioning. The most common sensors to fail are the gap, reflective, and black mark sensors. |
Replacement procedure: |
Turn off and unplug the printer. |
Remove any media, ribbon, or labels from the printer. |
Access the sensor by removing any necessary panels or covers. |
Disconnect the wiring from the faulty sensor and remove it. |
Install the new sensor, ensuring that it is properly connected and aligned with the media path. |
Test the printer by running a calibration and printing a test label to verify functionality. |
d) Checking Sensor Wiring and Connections |
Sometimes, the issue isn’t the sensor itself, but the wiring or connectors that are faulty. |
Inspect wiring: Look for any frayed wires, loose connections, or short circuits that could be affecting the sensor’s performance. |
Reconnect or replace: If you find any issues with the wiring, re-secure the connections or replace damaged wires. |
|
5. Preventive Measures to Avoid Sensor Failures |
Preventing sensor malfunctions requires regular maintenance and proper handling of the printer. Here are some tips to help prevent sensor failures: |
a) Regular Cleaning |
Perform regular cleaning of the printer, especially the sensors, to prevent dust or adhesive buildup. Cleaning the sensors and other critical components will improve sensor reliability and prevent many malfunctions. |
b) Proper Calibration |
Ensure that the printer is calibrated correctly for the type of media being used. Miscalibrated sensors can cause various feeding or printing issues. Regularly recalibrate the printer when changing media types or after heavy usage. |
c) Handling Media Carefully |
Ensure that the media is loaded correctly and not damaged. Warped, improperly loaded, or non-standard media can cause the sensors to misread or fail altogether. Always use compatible media for your printer. |
d) Proper Printer Usage |
Avoid excessive vibration, shocks, or rough handling of the printer. Sensors are delicate and can become misaligned or damaged if the printer is not treated carefully. |
|
6. Conclusion |
Sensor malfunctions in barcode printers can cause significant operational issues, from misfeeds to misalignments and print quality degradation. Understanding the causes of sensor problems, diagnosing them properly, and performing regular maintenance can help ensure that your printer runs smoothly. |
By cleaning, recalibrating, and replacing faulty sensors as needed, you can prevent downtime and ensure that your barcode printer consistently delivers high-quality prints. |
Motor and gearbox failures are among the more complex and critical issues in barcode printers. These components are essential for driving the paper through the printer, moving the print head, and ensuring proper label alignment. Failures in the motor or gearbox can lead to misfeeds, poor print quality, or even complete operational failure of the printer. |
|
Let’s dive deeper into Motor and Gearbox Failures in barcode printers, exploring their functions, common causes of failure, symptoms, troubleshooting techniques, and repair procedures. |
1. Overview of Motors and Gearboxes in Barcode Printers |
Barcode printers typically rely on stepper motors and gearboxes to move media through the printer. Here’s a breakdown of the primary components and their functions: |
Stepper Motors: A stepper motor is used to precisely control the movement of components, such as feed rollers or the print head. Stepper motors are designed to move in discrete steps, providing high precision and control over the media. |
DC Motors: Some printers use direct current (DC) motors to control the movement of the media or other mechanical parts. These motors are generally used for tasks requiring smooth and continuous movement. |
Gearboxes: The gearbox is responsible for transmitting power from the motor to the rollers, gears, or other moving parts. It reduces the speed and increases the torque, ensuring that the rollers and other components move the media through the printer at a steady pace. |
Together, motors and gearboxes ensure the smooth operation of a barcode printer. If either fails, the entire print operation can be disrupted. |
|
2. Common Motor and Gearbox Failures |
Let’s explore the most common types of failures that can occur with motors and gearboxes, their symptoms, and potential causes. |
a) Motor Failures |
Motor failures can be caused by several factors, including electrical issues, mechanical wear, overheating, or improper use. These failures can result in incomplete or misaligned prints, or the printer might fail to print at all. |
Overheating: Continuous or high-load printing can cause the motor to overheat, especially in stepper motors. This leads to thermal stress on the internal components. |
Electrical Issues: Faulty wiring, power surges, or short circuits can damage the motor’s internal components, leading to malfunctions. |
Wear and Tear: Motors that have been used for a long time may experience wear on bearings or other moving parts, reducing their efficiency. |
Mechanical Obstructions: Objects or debris in the printer can prevent the motor from operating smoothly, causing it to stall or fail. |
Symptoms of Motor Failures: |
No movement of media: The printer attempts to print, but the media is not feeding or moving. |
Erratic movement: The motor moves irregularly, causing misfeeds or uneven print quality. |
Complete stoppage: The printer stops printing entirely, often accompanied by error messages related to the motor or paper feed. |
Overheating: If the motor is hot to the touch, it may indicate overheating, leading to performance degradation or failure. |
b) Gearbox Failures |
The gearbox in a barcode printer connects the motor to the mechanical parts responsible for media movement. If the gearbox fails, the printer can suffer from a range of issues, including slow paper feeds, skipping, or even complete failure to print. |
Worn Gears: Over time, the gears inside the gearbox can wear down, leading to slippage or inefficient transmission of power. |
Gear Misalignment: If the gears are not properly aligned, they may fail to engage properly, resulting in poor movement control. |
Lubrication Issues: Lack of proper lubrication or dried-up lubricant can cause excessive friction inside the gearbox, leading to gear failure. |
Damaged Gear Teeth: Gear teeth can become chipped or broken due to excessive force or mechanical failure, causing the gears to skip or fail. |
Symptoms of Gearbox Failures: |
Slipping gears: If you hear a grinding or slipping noise, it could indicate that the gears are not meshing properly. |
Uneven media feed: Media may not feed consistently, or the printer may make erratic movements due to power not being transmitted properly from the motor to the rollers. |
Difficulty in printing: The printer may produce inconsistent prints or miss certain areas due to misaligned or damaged gears. |
Excessive noise: If the printer makes louder-than-usual grinding, whining, or clattering noises, it may indicate a problem with the gearbox. |
|
3. Diagnosing Motor and Gearbox Failures |
Proper diagnosis is key to understanding the root cause of motor or gearbox failures. Below are steps to help you troubleshoot these issues: |
a) Visual and Physical Inspection |
Begin by visually inspecting the motor and gearbox. Look for any obvious signs of wear or damage, including: |
Motor overheating: Check if the motor feels unusually hot, which could be a sign of overheating. |
Damaged or worn gears: Look for chipped or cracked gears inside the gearbox. Worn gears may have a shiny or smooth appearance where the teeth are supposed to be. |
Obstructions: Ensure there are no foreign objects blocking the motor or gearbox from operating smoothly. |
Loose or disconnected wires: Check for loose connections, frayed wires, or disconnected cables that may be affecting the motor’s electrical supply. |
b) Testing the Motor |
Power-on test: Turn on the printer and listen for unusual noises from the motor. A healthy motor should run smoothly without excessive noise. |
Movement test: Manually rotate the rollers or other components driven by the motor. If they don’t move smoothly or feel stiff, there may be an issue with the motor or gearbox. |
c) Checking for Gear Slippage |
Manual rotation test: Turn the printer’s media feed by hand while the printer is powered off. If you feel resistance, grinding, or uneven movement, it could point to a gearbox issue. |
Gear misalignment: Inspect the gears for any misalignment or irregularity. A simple realignment may fix the issue. |
d) Run a Diagnostic Print |
Some printers have diagnostic tools or software that can help pinpoint motor or gearbox issues. Running a diagnostic print will often give you feedback on whether the motor or gears are working properly. Look for issues like skipped prints, misalignment, or the printer stopping mid-job. |
|
4. Repairing and Replacing Motors and Gearboxes |
If you’ve identified motor or gearbox failures, here are the steps you can take to repair or replace these components: |
a) Repairing Motors |
If the motor is the source of the failure, you can try the following: |
Clean the motor: Dirt, dust, and debris can accumulate on the motor, causing it to overheat or underperform. Use compressed air or a soft brush to clean the motor. |
Lubricate the motor: Some motors may need light lubrication to run smoothly. Use a small amount of appropriate lubricant on the bearings or moving parts. |
Replace faulty components: If the motor is damaged beyond repair, you will need to replace it. Consult the printer’s user manual for the correct specifications and follow the steps for motor replacement. |
Disconnect the printer from power and remove any labels or media. |
Access the motor by removing the printer cover or side panels. |
Disconnect the motor’s wiring and remove any mounting screws. |
Install the new motor and reconnect the wiring. |
Test the motor’s functionality with a diagnostic print or by running the printer. |
b) Repairing Gearboxes |
Repairing a faulty gearbox often requires replacing worn-out gears or lubricating the internal components. Here's how to address common gearbox issues: |
Replace damaged gears: If you find broken or worn gears, replace them with compatible parts. Be sure to replace all gears in the affected assembly to avoid further damage. |
Lubricate the gears: If friction is causing the gears to slip or wear prematurely, lubricating the gearbox may solve the problem. Use a light machine oil or grease that is suitable for small mechanical components. |
Re-align gears: If the gears are misaligned, carefully adjust them to ensure proper meshing. This may require loosening screws and repositioning the gears inside the gearbox. |
Gearbox replacement: In some cases, the gearbox may need to be completely replaced. This is typically the case if the gears are severely worn or damaged beyond repair. |
Disconnect the printer from power and remove any media or ribbon. |
Access the gearbox by removing the printer's casing or covers. |
Disconnect the gearbox from the motor and other components. |
Install the new gearbox, ensuring it is correctly aligned with the motor and other gears. |
Test the new gearbox by running a test print. |
|
5. Preventive Measures to Avoid Motor and Gearbox Failures |
Preventing motor and gearbox failures involves regular maintenance, proper usage, and proper care of the components. Here are some key preventive measures: |
a) Regular Cleaning |
Keep components clean: Regularly clean both the motor and the gearbox to prevent dust, dirt, or adhesive buildup, which can cause premature wear. |
Lubricate moving parts: Apply appropriate lubricants to gears and motors to ensure smooth movement and reduce friction. |
b) Proper Calibration and Settings |
Optimize print settings: Avoid using excessive print speeds or high print densities that might cause unnecessary stress on the motor or gearbox. |
Correct media handling: Use media that is compatible with your printer and avoid overloading the printer with heavy or improperly loaded rolls. |
c) Monitor Printer Usage |
Avoid excessive use: Give the printer adequate time to cool down between printing jobs. Overuse without breaks can lead to motor overheating. |
Use surge protectors: Protect your printer from power surges that could damage the motor’s electrical components. |
|
6. Conclusion |
Motor and gearbox failures in barcode printers can lead to a wide range of operational issues, from paper misfeeds to complete printer malfunctions. By understanding the symptoms and causes of motor and gearbox problems, diagnosing issues effectively, and performing regular maintenance, you can extend the lifespan of these critical components and keep your printer running smoothly. |
If your printer is experiencing motor or gearbox failure, carefully inspect, clean, repair, or replace the necessary components to restore its performance. Regular maintenance and preventive care will go a long way in avoiding costly repairs and downtime. |
|
Detail about the Electrical and power supply issues of barcode printers |
1. Introduction to Electrical and Power Supply Issues in Barcode Printers |
Barcode printers rely heavily on a stable and sufficient power supply to operate correctly. When electrical and power issues arise, they can affect various aspects of the printing process, leading to operational failures. Common problems in the power supply system include power surges, inadequate voltage, fluctuating power, and issues with the internal power components like the power supply unit (PSU), cables, and connectors. |
|
2. Common Power Supply Issues in Barcode Printers |
2.1 Power Surges and Spikes |
Power surges or spikes are sudden increases in voltage that can occur due to lightning strikes, power grid fluctuations, or issues within the printer itself. These surges can damage sensitive components like the power supply unit (PSU) and motherboard of the barcode printer. |
Symptoms: Sudden power-offs, erratic printer behavior, or complete failure to turn on. |
Causes: Overvoltage from the power source or internal short circuits. |
2.2 Insufficient Voltage (Undervoltage) |
Undervoltage occurs when the supplied voltage is lower than the required value for the printer to operate properly. This can cause inconsistent operation, poor print quality, or failure to print altogether. |
Symptoms: The printer might power on but fail to produce the correct output or function intermittently. |
Causes: Poor-quality power sources, damaged internal components, or faulty power adapters. |
2.3 Power Fluctuations |
Frequent fluctuations in the power supply (from normal voltage levels to higher or lower than usual) can cause instability in the operation of barcode printers. |
Symptoms: The printer may restart unexpectedly, display error codes, or fail to complete a print job. |
Causes: Fluctuating power grid issues, especially in areas with poor electrical infrastructure. |
|
3. Internal Components Affected by Power Supply Issues |
3.1 Power Supply Unit (PSU) |
The PSU is the core component responsible for converting the incoming AC voltage from the power source into the DC voltage required by the printer’s internal circuits. Any failure or degradation in the PSU can result in the printer failing to operate correctly. |
Symptoms: Printer not powering up, power fluctuations, or failure to print. |
Causes: Overheating, wear and tear, or component failure within the PSU. |
3.2 Cables and Connectors |
Damaged or poorly connected power cables and connectors can cause intermittent power loss or failure to power up the printer altogether. The connections between the power supply and the printer's internal circuits must be secure to prevent these issues. |
Symptoms: Power lights flickering, printer cutting off during operation, or failure to start. |
Causes: Frayed wires, loose connections, or corroded connectors. |
|
4. External Power Supply Issues |
4.1 Faulty Power Adapter |
Some barcode printers, especially portable or smaller models, use external power adapters. If the adapter is faulty or not providing the correct voltage, the printer will not operate. |
Symptoms: Printer not powering on, or the printer shuts down unexpectedly during printing. |
Causes: Faulty power adapter, damaged power cords, or wrong voltage specifications. |
4.2 Electrical Interference |
Electrical interference from nearby equipment (like other electronic devices, large motors, or fluorescent lights) can cause noise in the power supply, affecting the performance of barcode printers. |
Symptoms: Random errors, printer freezing during operation, or incomplete printouts. |
Causes: Electrical noise from other equipment or inadequate power conditioning. |
5. Impact of Electrical Issues on Print Quality |
Electrical issues not only affect the printer's operation but can also influence print quality. Inconsistent power can cause problems such as: |
Dim or faded print: Insufficient voltage can result in weak or inconsistent heat applied to the thermal printhead. |
Jagged or uneven print lines: Power fluctuations may cause the print mechanism to malfunction, leading to poor quality output. |
Paper feeding problems: Erratic voltage supply can result in problems with the motor driving the paper feed mechanism. |
|
6. Diagnosis and Troubleshooting |
6.1 Checking the Power Source |
Before diving into internal issues, it’s important to check the external power source. Use a multimeter to verify the voltage output from the power outlet or adapter. |
Solution: If you find fluctuating or incorrect voltage, consider installing a surge protector, uninterruptible power supply (UPS), or voltage stabilizer. |
6.2 Testing the Power Supply Unit (PSU) |
If the printer is powered by an internal PSU, use a multimeter to check if the PSU is providing the correct voltage outputs to different components. |
Solution: If the PSU is faulty, it may need to be replaced. |
6.3 Inspecting Cables and Connectors |
Visually inspect the power cables, adapters, and connectors for any signs of wear, damage, or corrosion. Replace any faulty cables or connectors. |
6.4 Testing Internal Components |
Check other internal components, such as fuses, circuit boards, and the power input board, for signs of failure or damage. |
Solution: If a component is damaged, replace it with a compatible part. |
 cs@easiersoft.com