1. Introduction to Barcode Scanners |
1.1 Overview of Barcode Scanners |
Definition and function |
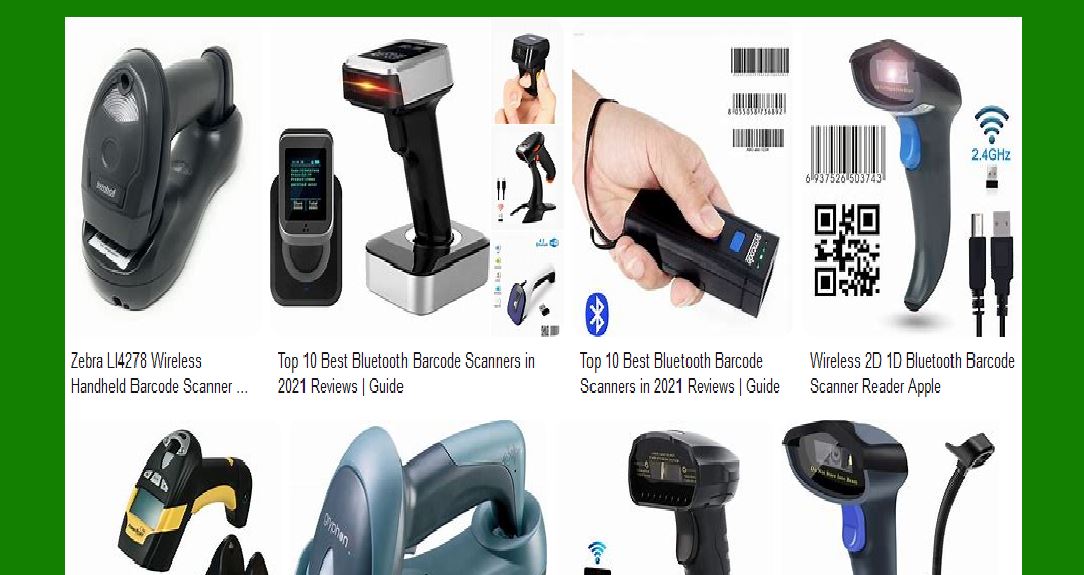
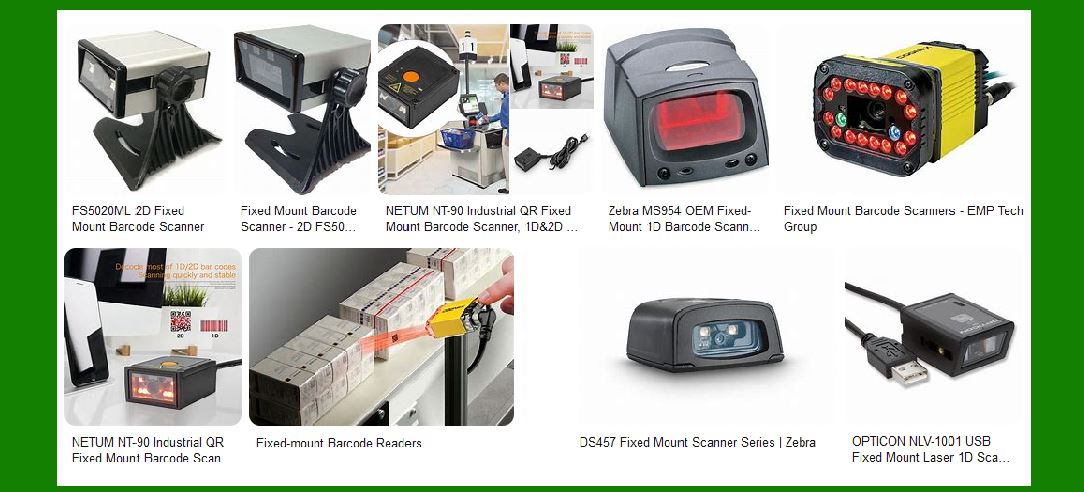
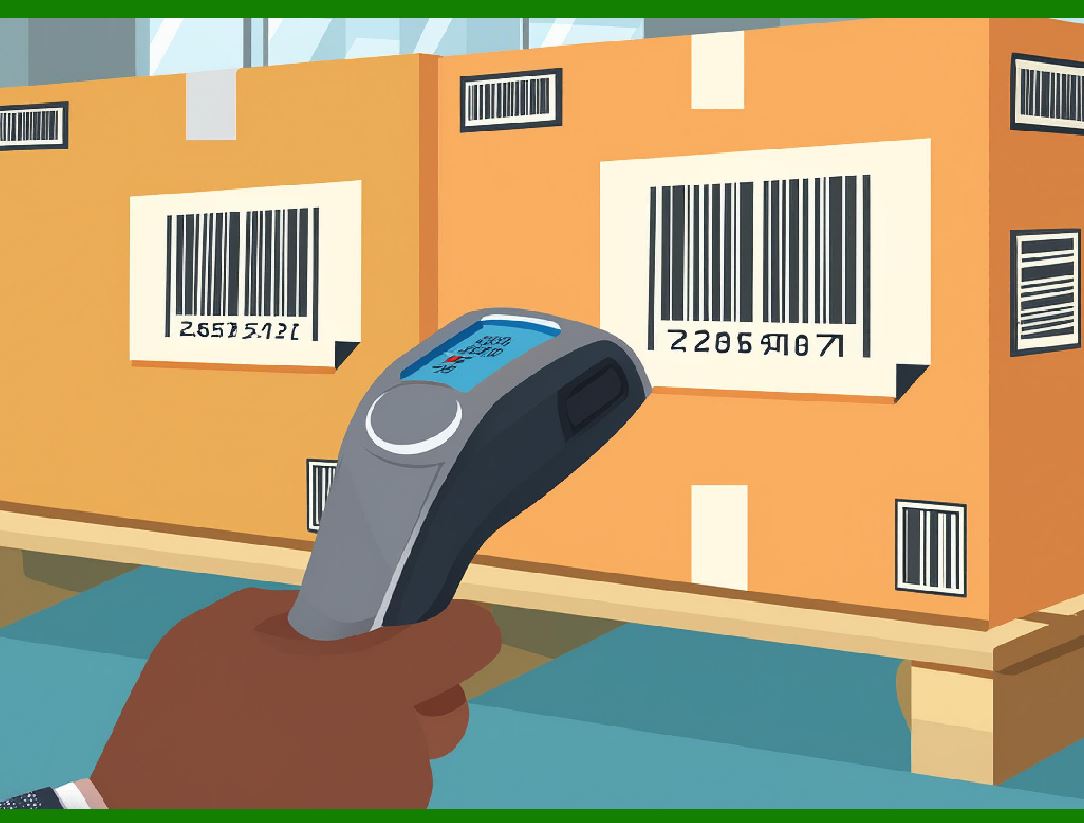
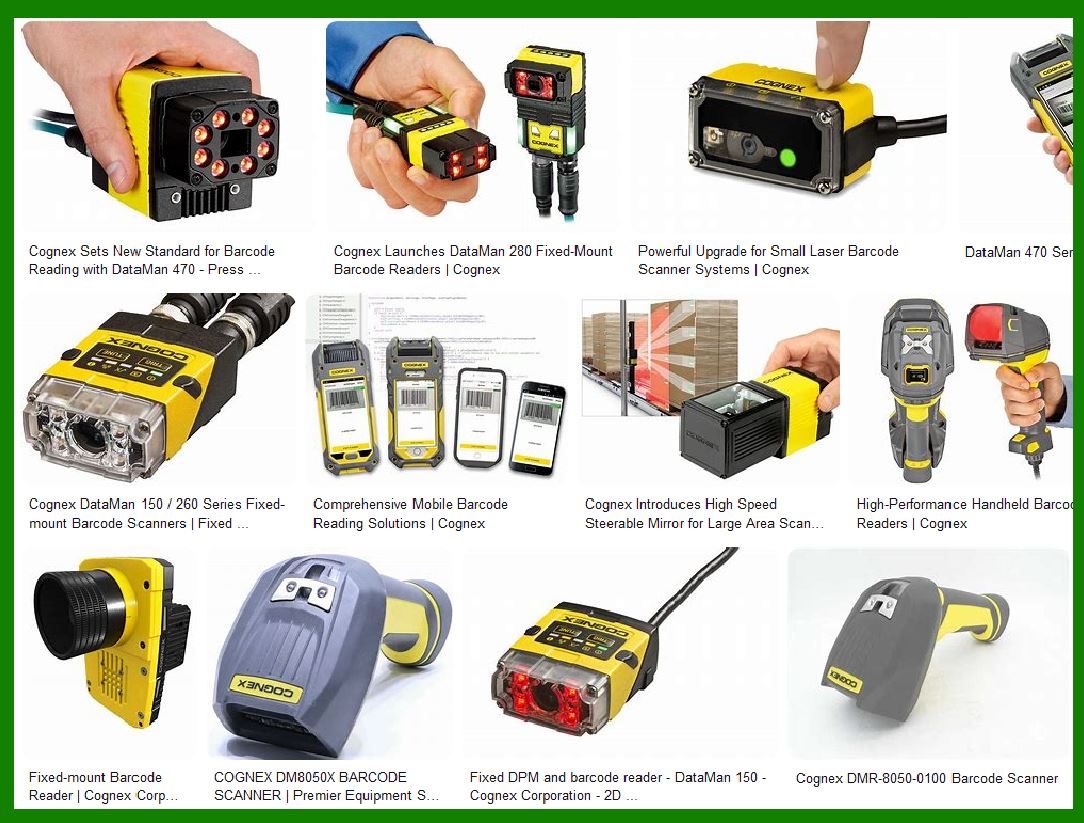
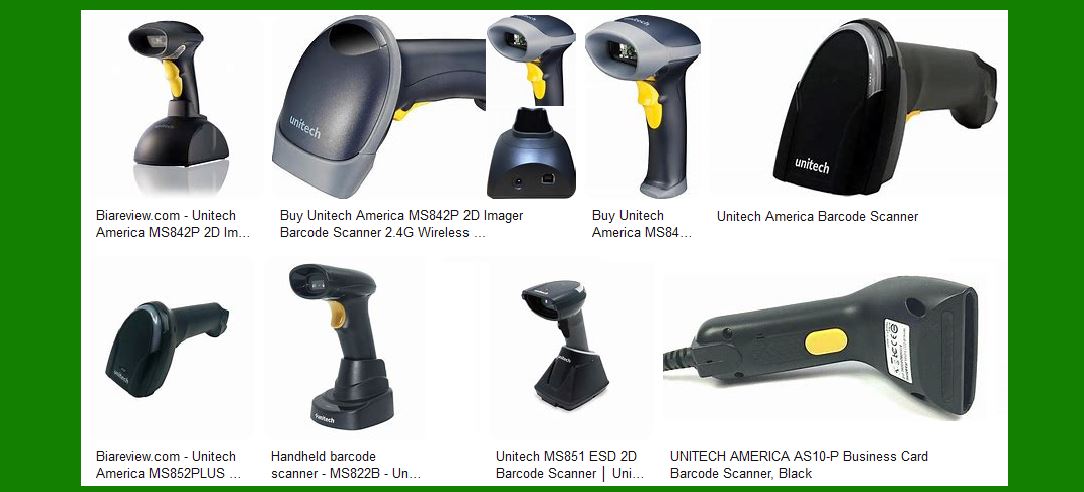
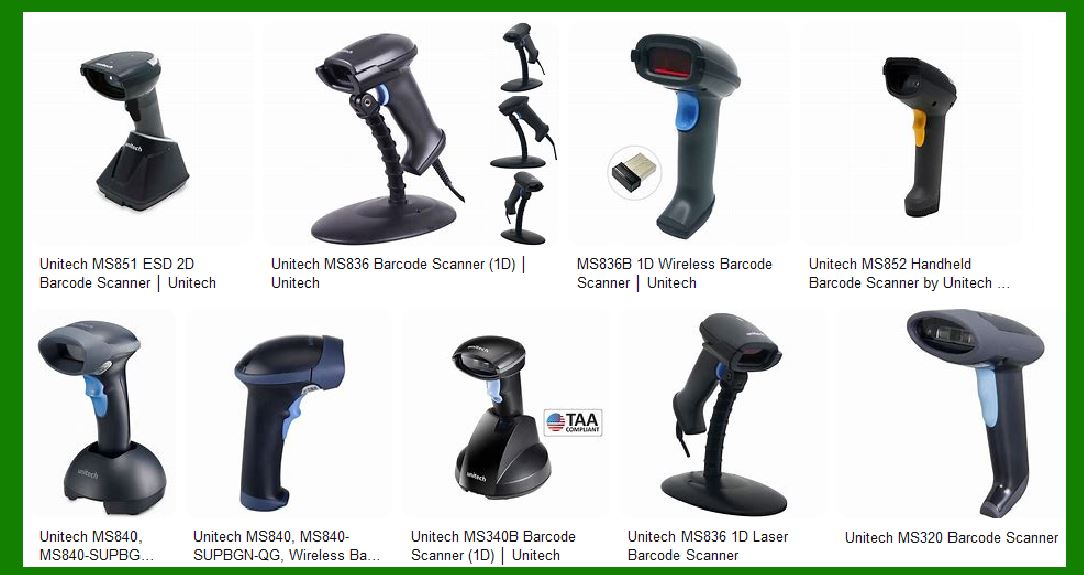
Types of barcode scanners: handheld, fixed mount, wireless, etc. |
1.2 Importance of Barcode Scanners in Various Industries |
Retail, logistics, manufacturing, healthcare, etc. |
1.3 Common Issues Encountered in Barcode Scanners |
Types of faults (hardware, software, operational errors) |

|
2. Common Faults in Barcode Scanners |
2.1 Hardware Failures |
2.1.1 Malfunctioning Laser or LED |
Causes: damage, dust, or alignment issues |
Symptoms: weak or no scan |
Repair options: lens cleaning, recalibration, or component replacement |
2.1.2 Faulty Trigger Button |
Causes: physical wear and tear, dust buildup |
Symptoms: failure to scan upon pressing the button |
Repair options: cleaning or replacing the trigger mechanism |
2.1.3 Broken or Loose Cable Connections |
Causes: wear, accidental tugging, or connector issues |
Symptoms: scanner not receiving power or data |
Repair options: reconnecting, replacing cables |
2.2 Software Issues |
2.2.1 Incorrect Scanner Configuration |
Causes: incorrect settings during installation or changes in the system |
Symptoms: scanner not responding correctly or failing to read specific codes |
Repair options: resetting or reconfiguring software settings |
2.2.2 Firmware Errors |
Causes: outdated or corrupted firmware |
Symptoms: failure to recognize new barcode types |
Repair options: firmware updates or reinstallations |
2.3 Environmental Issues |
2.3.1 Inadequate Lighting |
Causes: insufficient or harsh lighting conditions |
Symptoms: scanner struggles with reading barcodes |
Repair options: adjusting lighting or using reflective labels |
2.3.2 Dirty or Obstructed Scanner Lens |
Causes: dust, fingerprints, or debris on the lens |
Symptoms: weak or inaccurate scans |
Repair options: cleaning the lens with proper materials |
2.4 Physical Damage |
2.4.1 Impact Damage |
Causes: dropping or mishandling the scanner |
Symptoms: visible cracks, no functionality, or erratic performance |
Repair options: inspecting for internal damage, component replacement |
2.4.2 Wear and Tear |
Causes: prolonged use, heavy duty cycles |
Symptoms: scanner becoming slow or unresponsive |
Repair options: replacing worn parts or entire units |
2.5 Communication Issues |
2.5.1 Wireless Connectivity Problems |
Causes: interference, weak signals, outdated drivers |
Symptoms: scanner disconnecting or failing to sync with the system |
Repair options: resetting connection, troubleshooting Bluetooth or Wi-Fi |
2.5.2 USB or Serial Connection Failures |
Causes: incompatible cables or ports |
Symptoms: scanner not communicating with the system |
Repair options: testing with different cables, port repairs |
|
3. Diagnostics for Barcode Scanner Failures |
3.1 Identifying the Root Cause |
General steps for troubleshooting: isolating hardware vs. software issues |
Using diagnostic tools for deeper analysis |
3.2 Testing Procedures |
Functional testing for laser/LED |
Firmware and software diagnostic tools |
Testing the environment: lighting, positioning, and surface type |
3.3 Common Symptoms and How to Identify Them |
Scanners not turning on |
Scanner beeping without scanning |
Unstable or inconsistent scanning |
|
4. Preventive Maintenance for Barcode Scanners |
4.1 Regular Cleaning and Upkeep |
Cleaning lenses, buttons, and connectors |
Proper storage to avoid physical damage |
4.2 Calibration and Configuration |
Ensuring correct settings for optimal performance |
Routine firmware updates |
4.3 Environmental Considerations |
Ensuring scanners are used in suitable conditions (lighting, temperature) |
Protecting scanners from dust and moisture |
4.4 Conducting Regular Tests |
Using test barcodes and performing dry runs |
Monitoring scanner performance over time |

|
5. Repairing Barcode Scanners |
5.1 Step-by-Step Repair Guide |
5.1.1 Handling Basic Hardware Issues |
Cleaning laser lens, replacing cables, or fixing buttons |
5.1.2 Dealing with Software Glitches |
Updating firmware, troubleshooting drivers |
5.1.3 Fixing Communication Problems |
Resynchronizing wireless devices, port repair |
5.2 When to Seek Professional Help |
Complex repairs that require specialized tools |
Warranty considerations and repair services |
|
6. Replacement of Barcode Scanners |
6.1 Identifying When Repair is Impractical |
High cost of repairs vs. buying a new unit |
Difficulty finding replacement parts |
6.2 Choosing the Right Replacement Scanner |
Factors to consider: application, environment, budget |
Comparing different models and technologies (laser vs. CCD vs. image-based) |
6.3 Disposal of Old Scanners |
Environmentally friendly disposal methods |
Recycling options and manufacturer take-back programs |
|
7. Troubleshooting Specific Brands and Models |
7.1 Common Faults in Popular Barcode Scanner Brands |
Zebra, Honeywell, Datalogic, Symbol, and others |
7.2 Model-Specific Issues and Solutions |
Brand-specific software and hardware problems |
Frequently asked questions for different models |
|
8. Conclusion |
8.1 Summary of Key Points |
Major issues in barcode scanners and general repair advice |
8.2 Importance of Regular Maintenance and Care |
8.3 Future Trends in Barcode Scanner Technology |
Advancements in durability, functionality, and ease of repair |
|
9. Glossary of Terms |
9.1 Key Terminologies Related to Barcode Scanners |
Scanning technologies, error codes, and repair terms |
|
Let's dive deeper into Section 2: Common Faults in Barcode Scanners and break down the common issues more thoroughly. I'll focus on the hardware, software, environmental, and physical damage-related problems, providing more granular details on how they manifest, how to diagnose them, and suggested repair methods. |
2. Common Faults in Barcode Scanners |
2.1 Hardware Failures |
2.1.1 Malfunctioning Laser or LED |
Symptoms: |
The scanner emits no light or an inconsistent scanning beam. |
The scanner may beep, but it fails to read barcodes, even under ideal conditions. |
The scanning range may become shorter than usual, or the scanner may fail to read certain barcode types. |
Causes: |
Laser/LED Wear: Over time, the laser or LED light source in barcode scanners deteriorates, reducing its brightness and scanning range. |
Misalignment: The laser or LED module may be misaligned, resulting in the beam not properly hitting the barcode. |
Dust or Dirt: Dirt or dust accumulation on the lens or in the optical path can cause the scanner to underperform. |
Overheating: Prolonged use in high temperatures or overuse can lead to the overheating of the scanning module. |
Diagnosis: |
Visual Inspection: Check for visible cracks, dirt, or discoloration around the lens. |
Testing on Different Barcodes: Test the scanner with a variety of barcode types and check its response. |
Laser Alignment Test: Some advanced scanners allow alignment calibration through internal settings or diagnostic tools. |
Repair Options: |
Cleaning the Lens: Use a microfiber cloth and, if necessary, lens cleaner to gently wipe the lens and remove dirt. |
Recalibration: Many scanners allow recalibration via a configuration utility. Follow manufacturer guidelines to realign the laser. |
Component Replacement: If the laser or LED module is damaged, replacing the entire module may be necessary, especially for high-end models. |
2.1.2 Faulty Trigger Button |
Symptoms: |
The scanner fails to trigger when the button is pressed. |
The scanner triggers intermittently or inconsistently. |
Sometimes, the scanner may continuously beep or remain in a state of 'scanning' mode without input. |
Causes: |
Wear and Tear: Over time, the mechanical button may wear out, leading to inconsistent or complete failure. |
Dirt or Debris: Small debris or dust can get stuck inside the button mechanism, blocking proper activation. |
Button Alignment Issues: The button may lose its alignment with the internal switch, causing it to either not engage or continuously stay engaged. |
Diagnosis: |
Button Press Test: If the scanner has a different mode of activation, such as an automatic scan function, test the button¡¯s response by switching between modes. |
Audible Feedback: Listen for the typical 'click' or 'beep' sound associated with a button press. A lack of feedback indicates a potential button issue. |
Repair Options: |
Cleaning: Use compressed air or a small brush to remove dust or debris inside the button housing. |
Component Replacement: If cleaning doesn't work, replacing the button or its underlying switch might be necessary. |
Testing the Switch Mechanism: If the button appears misaligned, open the scanner housing (if possible) and re-align the button with the switch. |
2.1.3 Broken or Loose Cable Connections |
Symptoms: |
The scanner doesn't power on when connected to the system. |
The scanner disconnects intermittently while in use. |
The scanner works for a short time and then stops, often requiring re-plugging. |
Causes: |
Physical Stress: Frequent plugging and unplugging, or pulling on the cable, can wear out the cable or connector. |
Faulty Connector Pins: Over time, the pins inside the cable connector may loosen, causing intermittent power or data transfer issues. |
Cable Insulation Wear: The insulation on the cable can crack, exposing wires that may short out. |
Diagnosis: |
Cable Inspection: Visually inspect the cable for signs of wear, kinks, or fraying. Look for visible damage at the connectors or any exposed wires. |
Testing with a Known Good Cable: Swap out the cable to confirm whether the issue is with the cable or the scanner itself. |
Port Inspection: Check the port for signs of wear or debris, and test the scanner in different USB or serial ports. |
Repair Options: |
Cable Replacement: If the cable is frayed or damaged, replacing it is often the simplest solution. |
Re-soldering or Replacing Connectors: If the connector is loose or damaged internally, re-soldering connections or replacing the connector may be necessary. |
Port Repair: If the scanner¡¯s port is damaged, repairing the port may involve replacing the port or re-soldering connections on the internal board. |

|
2.2 Software Issues |
2.2.1 Incorrect Scanner Configuration |
Symptoms: |
The scanner doesn¡¯t read certain types of barcodes, even though they are legible. |
The scanner outputs data in an incorrect format (e.g., reading as hexadecimal or alphanumeric characters instead of numbers). |
The scanner fails to communicate with the system or software. |
Causes: |
Incorrect Profile Selection: Many barcode scanners have different modes for different barcode types (UPC, EAN, QR, etc.). If the wrong profile is selected, the scanner might not interpret the barcode correctly. |
Region-Specific Settings: Some scanners are configured with regional settings, such as reading barcodes that follow a specific country¡¯s conventions (e.g., numeric-only barcodes for retail in the US vs. alphanumeric codes in Europe). |
Software Conflicts: Conflicts between the scanner¡¯s software and the operating system or other applications can cause malfunctions. |
Diagnosis: |
Checking the Scanner Configuration: Use the scanner¡¯s setup guide to ensure the correct configuration profile is selected. |
Software Compatibility: Test the scanner with a different software application to ensure there¡¯s no conflict. |
Test Barcodes: Use a variety of barcode types and check if they all fail or if the issue is limited to certain formats. |
Repair Options: |
Reset Configuration: Many scanners allow resetting to factory defaults. This can resolve incorrect settings. |
Reconfiguration: Reconfigure the scanner through its software or configuration utility, ensuring the proper barcode types and settings are enabled. |
Software Update: Ensure the scanner¡¯s driver and associated software are up to date, especially if a software conflict is suspected. |
2.2.2 Firmware Errors |
Symptoms: |
The scanner is unresponsive or frequently crashes. |
The scanner cannot read newly added barcode types. |
Performance degradation, such as slower scanning speeds. |
Causes: |
Corrupt Firmware: Firmware may become corrupted due to power failure, interrupted updates, or software bugs. |
Outdated Firmware: Older firmware may not support newer barcode types or features, leading to incompatibility. |
Failed Updates: If the firmware update process was interrupted or failed, the scanner may experience issues. |
Diagnosis: |
Firmware Version Check: Check the current firmware version against the manufacturer's website or support documentation to see if it¡¯s outdated. |
Reboot or Reset: Some scanners will reset their firmware on reboot if there is an issue. Try a reboot and check for changes in performance. |
Repair Options: |
Firmware Update: If the scanner supports firmware updates, follow the manufacturer¡¯s instructions to update to the latest version. |
Reinstall or Rollback Firmware: In some cases, a corrupted firmware can be rolled back to a previous working version. |
|
2.3 Environmental Issues |
2.3.1 Inadequate Lighting |
Symptoms: |
The scanner fails to read barcodes under certain lighting conditions, such as in dimly lit areas or under direct sunlight. |
The scanner requires multiple attempts to read the barcode, indicating it¡¯s struggling with the light levels. |
Barcodes might appear faded or hard to detect even if they are printed clearly. |
Causes: |
Low Ambient Light: If the environment is too dim, the scanner¡¯s optical sensor may not receive enough reflected light to properly decode the barcode. |
Harsh Direct Light: Glare from direct sunlight or bright artificial lighting can overwhelm the scanner¡¯s sensor, preventing proper scanning. |
Reflection from Surfaces: Reflective surfaces, such as glass or shiny packaging, can cause light interference, resulting in poor barcode visibility. |
Diagnosis: |
Lighting Adjustment Test: Change the light source in the environment to see if it impacts the scanner's ability to read barcodes. |
Barcode Placement: Experiment with placing the barcode on different surfaces (e.g., matte vs. glossy) and test the scanner in various lighting conditions. |
Repair Options: |
Improving Ambient Lighting: Adjusting the lighting conditions in the area, such as increasing ambient light or reducing glare, can help the scanner work better. |
Using Reflective Labels: Some scanners can handle reflective surfaces better with the right type of barcode label. Ensure the barcode used is suitable for the environment. |
Advanced Scanners with Adaptive Lighting: Some modern scanners can adapt to varying lighting conditions. If environmental issues persist, consider upgrading to a more advanced scanner with better light sensitivity. |
2.3.2 Dirty or Obstructed Scanner Lens |
Symptoms: |
The scanner is unable to scan barcodes at the usual range or with the usual accuracy. |
Frequent misreads or errors occur, even though the barcode itself is printed properly. |
The scanner¡¯s scanning beam appears weak or disorganized, indicating that the light source is blocked or scattered. |
Causes: |
Dust and Dirt Accumulation: Dirt particles, dust, and oil from fingers can easily build up on the scanner lens, obstructing the light and affecting performance. |
Fingerprints or Smudges: Oils and residues from handling the scanner can leave visible smudges on the lens. |
Environmental Debris: Scanners used in harsh environments like warehouses or production lines may accumulate debris from surrounding machinery or goods. |
Diagnosis: |
Visual Inspection: Perform a close visual inspection of the lens for dirt, fingerprints, or visible smudges. |
Test the Scanner: Test the scanner by scanning barcodes in controlled conditions. If the scanner performs well in ideal conditions but fails in a typical work environment, lens contamination is likely. |
Repair Options: |
Cleaning the Lens: Use a soft, lint-free cloth (like microfiber) and an appropriate lens cleaning solution. Carefully wipe the lens in circular motions to remove any contaminants. |
Compressed Air: If there is any dust inside the housing, carefully use compressed air to blow out the debris without damaging sensitive components. |
Regular Maintenance: Schedule routine cleaning to prevent buildup and maintain consistent scanner performance. |
|
2.4 Physical Damage |
2.4.1 Impact Damage |
Symptoms: |
The scanner may stop working entirely after being dropped or hit. |
Visible cracks in the scanner housing or lens may appear. |
The scanner¡¯s performance becomes erratic, such as failing to detect barcodes or providing false readings. |
Physical damage can cause the scanner to become unresponsive or intermittently stop functioning. |
Causes: |
Dropping the Scanner: Physical impact from dropping or bumping the scanner can cause internal components to break or become misaligned. |
Improper Handling: Storing or using the scanner roughly without proper care can lead to damage over time, especially in environments where scanners are constantly moved. |
External Environmental Stress: In industrial or high-traffic environments, scanners may be subject to continuous bumps or vibrations. |
Diagnosis: |
Physical Inspection: Inspect the housing and any vulnerable parts like buttons, lenses, or connectors for visible damage. |
Performance Test: If the scanner is still functional, test it on a variety of barcodes. If the issue only occurs sporadically or with certain conditions, internal damage is likely. |
Repair Options: |
Internal Component Check: If accessible, check for internal damage such as cracked circuit boards or misaligned components. This may require opening the housing or a professional repair service. |
Component Replacement: In cases of severe impact, replace damaged internal parts (like the optical module, button mechanism, or housing). |
Case Replacement: If the damage is primarily cosmetic, replacing the outer housing may restore the scanner¡¯s functionality. |
2.4.2 Wear and Tear |
Symptoms: |
The scanner becomes increasingly slow or unresponsive. |
Over time, the scanner may fail to read certain barcode types or require several attempts to scan a single barcode. |
The scanner¡¯s exterior shows signs of general wear such as fading labels, worn-out buttons, or cracked casings. |
Causes: |
Continuous Use: Long-term usage can lead to gradual wear, especially with high-volume scanning in industrial settings. |
Environmental Exposure: Exposure to harsh environments like extreme temperatures, moisture, and dirt can degrade the materials of the scanner, leading to wear. |
Component Fatigue: Mechanical parts like buttons, triggers, and moving internal components may suffer from fatigue and fail over time. |
Diagnosis: |
Performance Assessment: If the scanner gradually fails to perform as expected, it could be a sign of general wear. Test the scanner with various barcodes and compare its speed and accuracy to when it was new. |
Physical Check: Inspect for any noticeable wear on key components like the trigger button, display, and housing. |
Repair Options: |
Component Replacement: If the scanner¡¯s performance is degraded, but most of the internal hardware is still functioning, replacing specific worn parts like buttons or lenses can extend the life of the unit. |
General Maintenance: For scanners that are heavily used, regular maintenance (such as cleaning and calibration) can mitigate wear and prevent rapid deterioration. |
Upgrade: In cases of extreme wear or outdated models, it might be more cost-effective to replace the scanner altogether rather than perform repairs. |
|
2.5 Communication Issues |
2.5.1 Wireless Connectivity Problems |
Symptoms: |
The scanner intermittently disconnects or fails to communicate with the computer or system it is paired with. |
The scanner works fine when wired but fails when switched to wireless mode. |
The scanner shows a ¡°disconnected¡± or ¡°out of range¡± message on its display or software interface. |
Causes: |
Interference: Wireless scanners operating on Bluetooth or Wi-Fi can experience interference from nearby devices, such as microwaves, metal objects, or other wireless equipment. |
Weak Signal: If the scanner is used at the edge of the wireless signal range, connectivity may be unreliable. |
Outdated Firmware or Drivers: Sometimes, the issue can be caused by outdated firmware or drivers on either the scanner or the host system. |
Diagnosis: |
Signal Strength Test: Move the scanner closer to the receiving device to see if proximity resolves the issue. |
Interference Testing: Turn off other nearby wireless devices to see if they might be causing interference. |
Driver and Firmware Check: Ensure that both the scanner and host system are using the latest firmware and driver versions. |
Repair Options: |
Channel Change: If interference is suspected, changing the wireless channel (on Bluetooth or Wi-Fi networks) may help mitigate the problem. |
Firmware Update: Ensure both the scanner and host system firmware are up to date to prevent compatibility issues. |
Switch to Wired Connection: If wireless issues persist, using a wired connection (USB or serial) may be a temporary or permanent solution. |
2.5.2 USB or Serial Connection Failures |
Symptoms: |
The scanner is not recognized by the computer when plugged in. |
The scanner works intermittently or fails to transmit data to the system. |
The scanner gives no feedback (e.g., no beeping or flashing lights) when scanning. |
Causes: |
Faulty Cables or Ports: The cable connecting the scanner to the computer could be damaged, or the USB/serial port on the computer could be malfunctioning. |
Compatibility Issues: Some older scanners may have compatibility issues with newer USB or serial ports, especially if the system is running a newer operating system. |
Driver Conflicts: Improper or outdated drivers can cause communication failures between the scanner and the computer. |
Diagnosis: |
Cable Test: Swap the USB or serial cable with a known good one to see if the problem lies with the cable. |
Port Test: Test the scanner on a different port or computer to rule out port or driver issues. |
Device Manager Check: On Windows, check the Device Manager for any error codes or warnings related to the scanner¡¯s drivers. |
Repair Options: |
Cable or Connector Replacement: If the cable is damaged, replacing it will likely fix the issue. |
Driver Update: Ensure the scanner drivers are up to date by visiting the manufacturer's website or using automatic update tools. |
Port or USB Hub Repair: If the port is damaged, a repair or replacement may be necessary. |
|
2.6 Diagnostics for Barcode Scanner Failures |
2.6.1 Identifying the Root Cause |
General Troubleshooting Steps: |
Isolate the Problem: Start by narrowing down whether the issue is related to hardware, software, environment, or communication. This step helps in directing the diagnosis more efficiently. |
Symptom Evaluation: Pay close attention to what the scanner is doing, such as if it turns on but doesn¡¯t read barcodes, or if it reads slowly. Symptoms can provide a lot of insight into what¡¯s failing. |
Step-by-Step Approach: Begin by checking simple things, such as the connection, power supply, and cleanliness. Then, move on to more complex issues like software configuration or internal hardware. |
Use of Diagnostic Tools: |
Many barcode scanner manufacturers offer diagnostic tools or software utilities that can help detect hardware and software issues. These tools can: |
Test the functionality of the laser or LED |
Check scanner alignment |
Verify firmware version and update needs |
Provide error codes or logs that can guide troubleshooting |
Third-party diagnostic tools can also be used for more general issues like USB/serial communication, device recognition, and power issues. |
Common Diagnostic Techniques: |
Testing on Multiple Barcodes: Ensure that the scanner¡¯s issue is not related to specific barcode types. Test with different formats (UPC, QR, EAN, etc.) and physical conditions (varied distances and angles). |
Environmental Testing: Scan barcodes under various lighting conditions to rule out environmental factors like inadequate or harsh lighting. |
Power Cycle: Power off the scanner for a few seconds and power it back on. Sometimes, this simple reset can solve minor glitches or software-related issues. |
2.6.2 Testing Procedures |
Functional Testing: |
Laser or LED Test: Test the scanning beam to check if the laser or LED light is functioning. If no light is emitted, the problem could be with the light source or internal circuitry. |
Scan Quality Test: Scan a known, high-quality barcode to evaluate the scanner¡¯s ability to detect and decode. This can help in assessing the condition of the scanner¡¯s optical system. |
Scan Range Test: Move the scanner away from the barcode at varying distances to determine the range at which the scanner can still read the code. A decreased scanning range often points to lens or optical issues. |
Software Diagnostics: |
Device Manager (Windows): Use the Device Manager to check for any issues with the scanner¡¯s driver or software. Look for any error symbols (yellow triangles) indicating problems with device recognition or configuration. |
Scanner Utility Software: Use manufacturer-specific software utilities to check for firmware errors, misconfigurations, or failed communication between the scanner and the computer. |
Communication Testing: |
Wired Connection: If the scanner works fine when connected via USB or serial cable, but fails to communicate wirelessly, the issue is likely with the wireless connection or settings. |
Wireless Range Test: Test the scanner's wireless range by moving it further from the receiver. If the scanner fails to maintain a connection beyond a certain distance, signal strength or interference could be the culprit. |
Port Testing: Test the scanner on different ports (USB, serial, Bluetooth) and systems to rule out port-specific or system-specific problems. |
|
2.7 Preventive Maintenance for Barcode Scanners |
2.7.1 Regular Cleaning and Upkeep |
Lens Cleaning: |
Over time, dust, fingerprints, and smudges accumulate on the scanner lens. These can significantly reduce the scanner¡¯s ability to read barcodes. Clean the lens regularly using a microfiber cloth and lens cleaning solution. |
How to Clean: Use a lint-free microfiber cloth to wipe the lens gently in circular motions. If needed, use a small amount of lens cleaning solution. Avoid using paper towels or rough materials, as they can scratch the lens. |
Exterior Cleaning: |
The exterior of the scanner should be cleaned regularly to remove dirt, dust, and other contaminants. Use a soft cloth and a mild cleaning solution that won¡¯t damage the plastic casing or other materials. |
Button and Trigger Cleaning: Clean the buttons and trigger areas using compressed air or a soft brush to ensure that dust and debris do not affect the button¡¯s functionality. |
Connector and Cable Maintenance: |
Regularly inspect the cable and connector for signs of wear, fraying, or damage. Clean the connectors using compressed air to remove dust buildup. |
Ensure that all connectors are plugged in securely and that the cables are not twisted or bent. |
Periodic Dusting: |
Dust accumulation inside the scanner can block internal components such as the laser module or optics. Use compressed air to blow out dust from vents and cracks in the scanner housing. |
Be careful not to blow dust deeper into the device, which can cause more damage. |
2.7.2 Calibration and Configuration |
Automatic Calibration: |
Many barcode scanners allow automatic calibration, which ensures that the device is optimized for reading a variety of barcodes. Check the manufacturer¡¯s instructions for performing this calibration process. |
Manual Calibration: If automatic calibration is not available, manually adjust the scanner settings using configuration software. Set parameters like scan range, sensitivity, and barcode types according to the scanning environment and requirements. |
Firmware Updates: |
Regular firmware updates can fix bugs, enhance performance, and enable new barcode formats. Ensure that your scanner is running the latest firmware version by visiting the manufacturer¡¯s website and following the update process. |
Driver Updates: Keep drivers for your barcode scanner updated, as this ensures compatibility with the latest operating systems and software platforms. |
2.7.3 Environmental Considerations |
Optimal Lighting Conditions: |
Ensure that the environment where the scanner is used is well-lit but not overly bright. Scanners often perform poorly under low or excessively bright light conditions. |
Lighting Adjustments: Install adjustable light sources to help maintain optimal scanning conditions, especially in areas where barcodes are frequently scanned. |
Temperature and Humidity: |
Barcode scanners can be sensitive to extreme temperatures or high humidity. Ensure that scanners are used within the manufacturer's recommended temperature and humidity ranges. |
Storage Conditions: If the scanner is not in use for extended periods, store it in a cool, dry place away from extreme conditions. |
2.7.4 Conducting Regular Tests |
Test Barcodes Regularly: |
Create a set of standard barcodes for regular testing. These test barcodes should cover various formats, including 1D and 2D barcodes, to ensure the scanner is still functioning properly. |
Barcode Quality: Regularly check the quality of the barcodes you are scanning. Low-quality or damaged barcodes may lead to false readings, affecting the scanner¡¯s performance. |
Monitoring Scanner Performance: |
Implement a routine where the performance of each scanner is monitored. This helps identify scanners that may be deteriorating over time and need repair or replacement. |
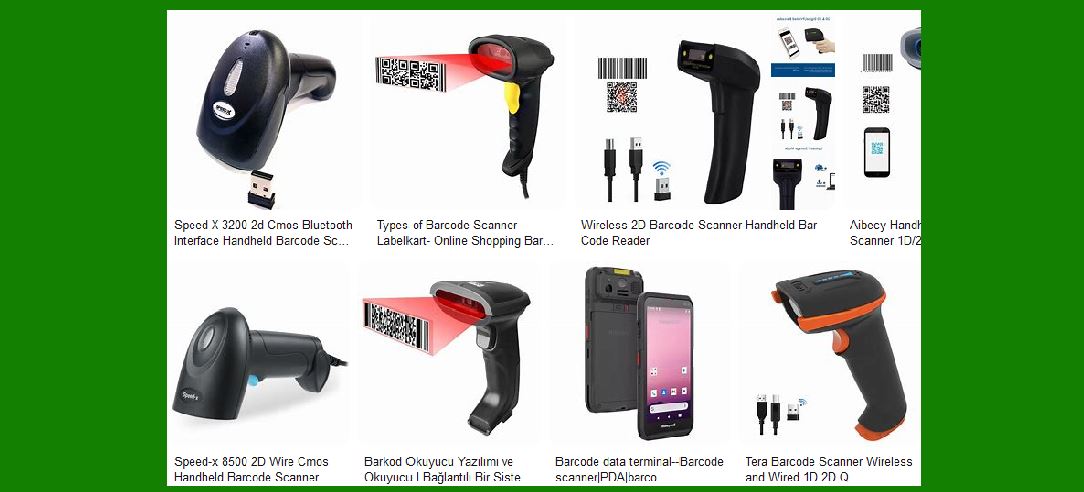
Use Diagnostics Tools: Use manufacturer-specific or third-party diagnostic tools to run regular checks on the scanner¡¯s calibration, alignment, and functionality. |
|
2.8 Repairing Barcode Scanners |
2.8.1 Step-by-Step Repair Guide |
Handling Basic Hardware Issues: |
Cleaning and Maintenance: Start with simple maintenance like cleaning the lens, buttons, and cable connections. Often, issues like poor scanning or intermittent connections can be resolved by cleaning the device. |
Trigger or Button Repair: If the button is stuck or unresponsive, clean the internal switch or consider replacing it. For more serious issues, replacing the entire button assembly may be necessary. |
Dealing with Software Glitches: |
Reinstall Drivers: If the issue appears to be software-related (e.g., scanning issues or driver errors), uninstall and reinstall the scanner¡¯s drivers. |
Reset Configuration: If the scanner is misconfigured, reset it to its factory default settings and reconfigure it according to the needs of the application. |
Fixing Communication Problems: |
Reconnect Cable: Check for loose or faulty cables and replace if necessary. If using a wireless scanner, reset the connection or re-pair the device with its receiver. |
Port Issues: If the scanner doesn¡¯t work with a particular USB or serial port, test it with another port on the computer. |
2.8.2 When to Seek Professional Help |
Complex Issues: |
Internal Component Damage: If the scanner has been dropped or physically damaged and you notice internal components like the circuit board are damaged, seek professional repair services. |
Firmware or Software Failures: If you are unable to fix software-related issues through the standard troubleshooting methods (e.g., firmware corruption or failed updates), professional help may be needed. |
Manufacturer¡¯s Warranty: |
If the scanner is still under warranty, contact the manufacturer for repair or replacement. Many manufacturers provide repair services or will replace the scanner if the issue is covered under warranty. |
Repair Services: |
Professional repair services are also available for barcode scanners. These services can handle more advanced issues, such as optical component replacements or internal circuit board repairs. |

|
3. Conclusion |
In this section, we've thoroughly explored the common faults found in barcode scanners, covering hardware failures, software glitches, environmental challenges, physical damage, and diagnostic techniques. We've also provided recommendations for preventive maintenance, repair procedures, and knowing when to seek professional help. |
Regular maintenance, such as lens cleaning and software updates, as well as prompt attention to faults, can significantly extend the lifespan of a barcode scanner and reduce downtime in operations. Whether dealing with simple issues like dirty lenses or more complex internal damage, early identification and resolution are key to ensuring that barcode scanners perform optimally. |
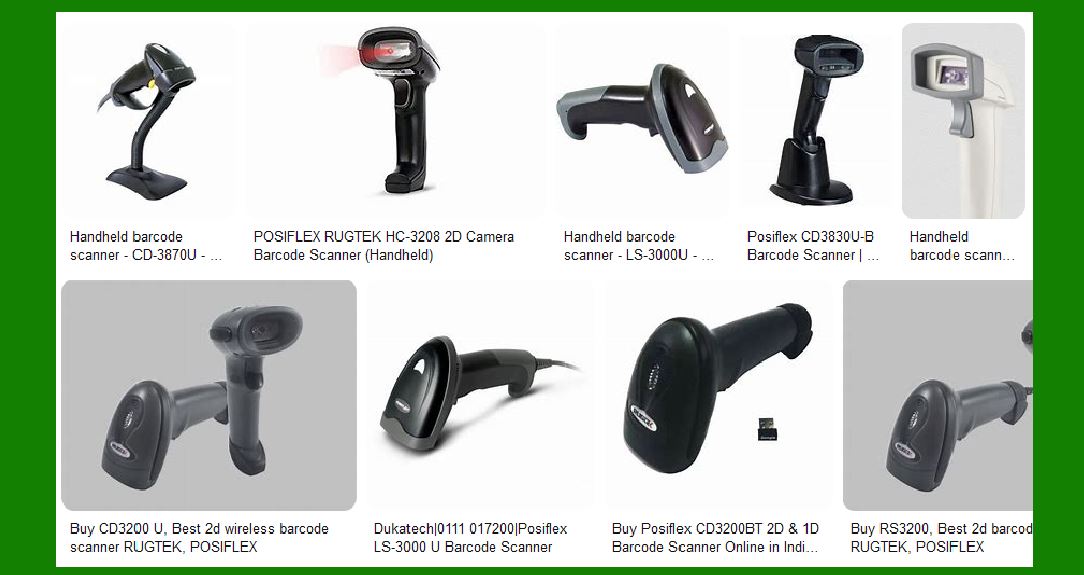
Let's continue by diving deeper into Section 3: Preventive Maintenance for Barcode Scanners, particularly focusing on calibration and configuration, environmental considerations, and the process of conducting regular tests. This section is crucial because it helps ensure that barcode scanners operate smoothly and remain in optimal condition over time. |
|
3. Preventive Maintenance for Barcode Scanners |
3.1 Calibration and Configuration |
3.1.1 Importance of Calibration |
Calibration is an essential process for ensuring that a barcode scanner functions correctly in its intended environment. Miscalibrated scanners may fail to read barcodes accurately, resulting in poor performance or frequent misreads. Calibration helps the scanner adjust its reading capabilities based on factors such as lighting, scanning distance, and the type of barcodes being read. |
Why Calibration Matters: |
Ensures accurate readings of various barcode formats (1D and 2D). |
Improves scanner sensitivity, which is vital for high-volume scanning environments. |
Prevents frequent errors and misreads that could disrupt workflow or result in inventory inaccuracies. |
Types of Calibration: |
Automatic Calibration: Many modern scanners offer automatic calibration through onboard systems. This may involve scanning specific calibration barcodes or performing system checks that adjust the scanner¡¯s laser or sensor to the best configuration for its current environment. |
Manual Calibration: For scanners that do not support automatic calibration, manual configuration is necessary. This can involve adjusting parameters such as scan range, sensitivity, and focus. |
3.1.2 Calibration Methods |
Laser Calibration: For laser-based scanners, recalibrating the laser beam ensures that it is aligned properly with the optical sensor. Misalignment can cause a significant decrease in scanning performance, especially at greater distances. |
Step-by-Step Process: |
Use the scanner¡¯s configuration utility or management software. |
Follow the manual or on-screen instructions to adjust the laser¡¯s beam pattern, ensuring it aligns with the barcode. |
Some scanners may also require specific barcode patterns to be scanned during the calibration process. |
CCD (Charge-Coupled Device) Calibration: For CCD scanners, calibration focuses on optimizing the sensor¡¯s sensitivity and focus. Misfocusing or poor sensor alignment can cause inconsistent readings, especially with barcodes printed at low resolution. |
Step-by-Step Process: |
Place the scanner at a fixed distance from the barcode. |
Adjust the focus settings until the scanner can read the barcode consistently across a range of distances. |
Imager Calibration: Image-based scanners or 2D imagers use advanced technology to capture and decode barcodes. Calibration for these scanners involves adjusting the camera¡¯s resolution, angle, and focus settings. |
Step-by-Step Process: |
Use software tools or built-in functions to adjust the imager¡¯s focal point and resolution. |
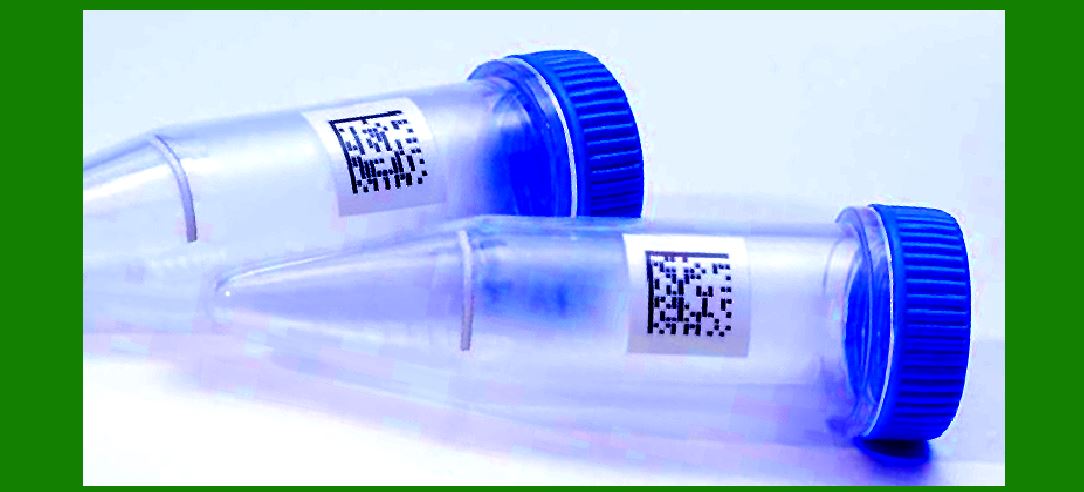
Perform tests to ensure the scanner can read various types of barcodes (such as QR codes and data matrix codes) at different angles and distances. |
3.1.3 Recalibration Frequency |
How Often Should Calibration Be Performed? |
Routine Calibration: Depending on usage, scanners should be recalibrated every 6 to 12 months. Scanners in high-volume environments or those used for specific applications (e.g., scanning poor-quality barcodes) may require more frequent calibration. |
Environmental Changes: Any significant changes in the environment (e.g., lighting, temperature, or humidity) could require recalibration to maintain optimal performance. |
After Physical Impact: If the scanner is dropped or subjected to physical stress, recalibrating may help restore its accuracy. |

|
3.2 Environmental Considerations |
3.2.1 Impact of Temperature and Humidity |
Barcode scanners are designed to work within a specific temperature and humidity range. Extreme temperatures or high humidity can damage internal components, degrade optical sensors, and affect performance. The scanner¡¯s casing may also be vulnerable to cracking or warping in such conditions. |
Optimal Temperature Range: |
Most barcode scanners function best at temperatures between 0¡ãC to 40¡ãC (32¡ãF to 104¡ãF). Scanners exposed to extreme cold may freeze or fail to operate, while high temperatures can cause overheating. |
Humidity Considerations: |
Excess moisture or humidity can lead to condensation forming on sensitive parts like the lens, making it difficult for the scanner to focus and read barcodes. It can also lead to corrosion on internal components. |
In contrast, low humidity can cause static buildup, potentially damaging the internal circuitry of the scanner. |
Environment-Specific Adjustments: |
In Cold Environments: If the scanner is used in low-temperature areas (such as cold storage), ensure that it is rated for such conditions. Many rugged or industrial scanners are built to withstand freezing temperatures. |
In Humid Environments: For environments with high humidity, use barcode scanners that are sealed or designed to prevent moisture from entering sensitive components. Alternatively, keep the scanner covered or in a protective case when not in use. |
3.2.2 Light and Reflection Management |
Lighting is one of the most important factors in the effective use of barcode scanners. Insufficient lighting or excessive glare can impair the scanner¡¯s ability to read barcodes, especially those printed with low contrast or on reflective surfaces. |
Ideal Lighting Conditions: |
Ambient Lighting: Scanners work best in environments with uniform, diffused lighting. Direct sunlight or harsh fluorescent lights can cause glare or reflection, interfering with the scanner¡¯s optical sensor. |
Artificial Lighting: Soft white lighting, such as LED or incandescent bulbs, is ideal. If using high-intensity lights, ensure that they are placed at an angle to avoid direct exposure to the scanner¡¯s lens. |
Reflective Surfaces: |
Reflective surfaces such as glass or shiny packaging can scatter the scanner¡¯s light, making it difficult to read barcodes. Consider using matte labels or placing barcodes on non-reflective surfaces. |
Adjusting for Various Barcode Types: |
Different barcode formats (1D vs. 2D, for example) may react differently under varying lighting conditions. Testing the scanner on multiple barcode types under different lighting setups will help identify the most effective configurations. |
3.2.3 Dust and Debris Control |
Dust and debris are common in environments like warehouses, factories, and distribution centers. These particles can accumulate on the scanner lens, optical sensors, or internal components, causing poor performance or complete failure. |
Dust Protection: |
Ensure that the scanner is used in a relatively clean environment, especially for image-based or laser scanners that require precise optical alignment. |
Regularly clean the lens and other external surfaces using compressed air or a microfiber cloth to remove dust buildup. |
Sealed Enclosures: |
For environments with high dust or debris levels, consider using scanners with sealed enclosures (IP ratings for dust and water resistance). These scanners are designed to resist dust entry, minimizing maintenance needs. |
|
3.3 Conducting Regular Tests |
3.3.1 Test Barcodes and Performance Checks |
Regular testing of barcodes and scanner performance helps identify any early issues with calibration, hardware, or environmental factors. Performing these tests regularly ensures that the scanner continues to work optimally and helps pinpoint potential problems before they lead to downtime. |
Types of Test Barcodes: |
Standard Test Barcodes: These include a variety of barcode types (UPC, EAN, Code 39, Code 128, QR codes, Data Matrix, etc.) that test the scanner¡¯s ability to handle different formats. |
Poor-Quality Barcodes: Use deliberately degraded or poorly printed barcodes to test how well the scanner handles lower-quality scans. This is important for industries where barcodes may be worn down or damaged over time. |
Barcode Orientation: Test scanning from various angles and distances to ensure the scanner can decode barcodes even in less-than-ideal positions. |
Routine Scan Performance: |
Perform speed tests to check if the scanner is reading barcodes at an acceptable rate. This is particularly important in high-volume environments like retail or logistics, where efficiency is critical. |
Check the accuracy of the scanner by comparing its readings to the actual barcode data. Inconsistent or incorrect readings could indicate an underlying issue with calibration, environment, or hardware. |
3.3.2 Monitoring Scanner Health Over Time |
Over time, barcode scanners may degrade in performance due to wear and tear, misalignment, or exposure to environmental factors. Monitoring their health regularly can help identify trends and catch potential issues early. |
Systematic Testing: |
Set up a schedule for testing all barcode scanners in use within a facility. Depending on usage volume, perform this testing on a weekly or monthly basis. |
Comparison to Baseline Performance: Track the performance of each scanner and compare it to baseline readings. Significant deviations from normal performance can indicate the need for calibration, maintenance, or replacement. |
Scanner Logs: |
Some scanners allow you to view logs of scanning activities or errors. Monitoring these logs over time can help identify patterns of failure or degradation. |

|
4. Conclusion |
The preventive maintenance of barcode scanners is essential to ensuring that they operate at peak efficiency and extend their useful lifespan. Proper calibration and configuration, environmental considerations, and regular testing play a critical role in maintaining scanner performance. |
By implementing regular cleaning, calibrating devices when necessary, ensuring the right environmental conditions, and running performance checks routinely, businesses can avoid unexpected failures, reduce downtime, and increase productivity. This approach also helps to extend the lifespan of the barcode scanner, ultimately saving on repair or replacement costs in the long run. |
 cs@easiersoft.com