1. Introduction to Wireless Scanners and Their Components |
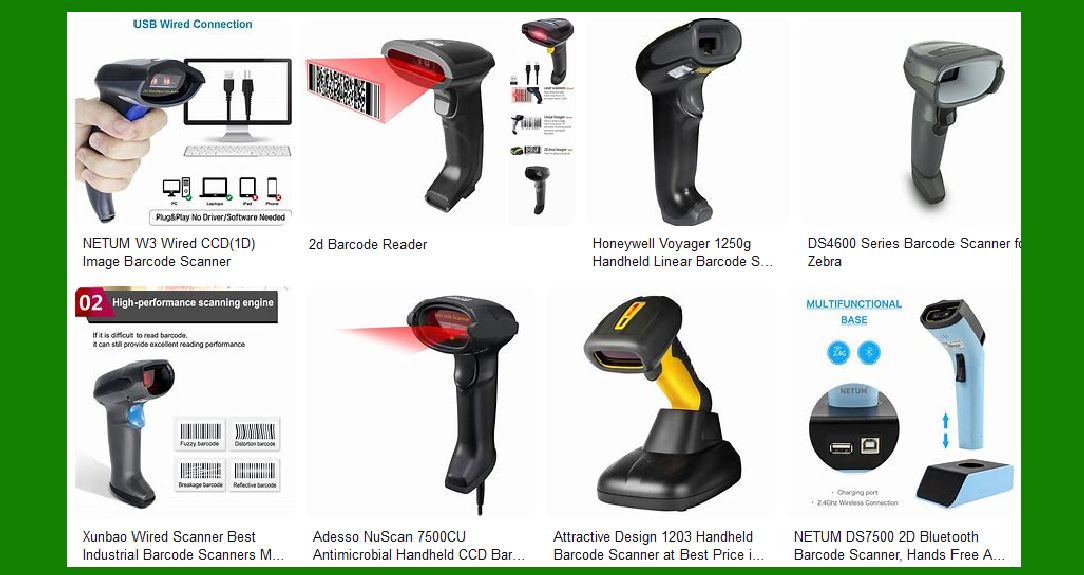
Wireless scanners, often employed in retail, logistics, and healthcare settings, are designed to scan barcodes or QR codes and transmit data wirelessly to a connected system (e.g., a POS system, warehouse management system, or inventory software). These devices are powered by rechargeable batteries and feature optical sensors to read printed or displayed barcodes. They typically use wireless technologies like Bluetooth or Wi-Fi for data transmission. |
Common components of wireless scanners include: |
Optical sensor: This detects the barcode pattern. |
Microprocessor: Handles processing of scanned data. |
Wireless module (e.g., Bluetooth/Wi-Fi): Transmits the data wirelessly. |
Battery: Powers the scanner. |
Trigger mechanism: Activates scanning function. |
Display (optional): Shows status, battery life, etc. |
Charging port: For connecting to a charger. |
Understanding these components helps in identifying and troubleshooting potential faults. |

|
2. Power-Related Issues |
2.1 Battery Not Charging |
One of the most common issues with wireless scanners is the failure of the battery to charge. This can be caused by a variety of factors, including: |
Faulty charging cable or charging port: Over time, the charging cable or the scanner¡¯s charging port may wear out. Inspecting both for visible damage, such as fraying or corrosion, is the first step. |
Battery degradation: Rechargeable batteries degrade over time. A battery that no longer holds a charge needs to be replaced. |
Charging circuit malfunction: If the internal charging circuit is faulty, the scanner might not charge, even when connected to a power source. |
2.2 Low Battery Indicator Issue |
When the scanner¡¯s battery is low, it typically displays a warning signal. If this indicator malfunctions, it might mislead the user into thinking the battery is still full when it is not. Common causes include: |
Software glitch: A firmware update or reset may fix issues related to incorrect readings. |
Battery sensor failure: If the battery sensor is malfunctioning, the scanner may not correctly detect the charge level. This may require replacing the sensor or recalibrating it. |
Repair steps: |
Inspect the charging cable and port for physical damage. |
Replace the battery if it¡¯s no longer holding charge. |
Update the firmware or reset the scanner to resolve software glitches. |
Recalibrate or replace faulty battery sensors. |
|
3. Wireless Connectivity Problems |
3.1 Connectivity Failure |
Wireless scanners typically use Bluetooth or Wi-Fi to communicate with connected systems. Connectivity issues can arise due to interference, signal blocking, or faulty hardware. |
Interference from other devices: Other wireless devices, such as microwaves or routers, might interfere with the Bluetooth or Wi-Fi signals. The scanner should be tested in a different environment to confirm this. |
Outdated firmware: Scanners with outdated firmware might struggle to maintain stable connections with modern devices. Firmware should be updated regularly to avoid this issue. |
Pairing problems: Bluetooth devices may fail to pair due to compatibility issues, improper pairing procedures, or faulty Bluetooth modules in the scanner. |
3.2 Signal Range Issues |
If the scanner fails to detect devices at the expected range, the issue could be related to signal interference or hardware failure. |
Repair steps: |
Move to an area with less interference and check connectivity. |
Update the scanner¡¯s firmware to address compatibility issues. |
Re-pair the scanner with the system using the correct procedure. |
Test the wireless module and replace it if necessary. |
|
4. Scan Quality and Sensor Malfunctions |
4.1 Inaccurate Scanning |
If the wireless scanner fails to scan barcodes accurately, it could be due to several factors related to the optical sensor: |
Dirty or damaged lens: Dirt, dust, or scratches on the scanner¡¯s lens can distort the barcode reading. Clean the lens with a soft microfiber cloth. |
Sensor malfunction: If the sensor is malfunctioning, the scanner may fail to read even clearly printed barcodes. In this case, the sensor itself may need to be replaced. |
Incorrect alignment: If the barcode is not aligned correctly with the scanner¡¯s sensor, it can cause scanning errors. Misalignment can occur if the scanner is dropped or handled improperly. |
4.2 Poor Performance in Low-Light Conditions |
Some scanners struggle to read barcodes in dimly lit environments due to insufficient lighting from the scanner's LED. In such cases, the scanner might not be able to illuminate the barcode properly, leading to inaccurate scans. |
Repair steps: |
Clean the optical lens and inspect for any physical damage. |
Replace the optical sensor if it is defective. |
Adjust the positioning of the scanner to ensure the barcode is aligned properly. |
In the case of poor illumination, replace or adjust the LED light. |

|
5. Physical Damage |
5.1 Cracked or Broken Housing |
Accidents can happen, leading to physical damage to the scanner. If the scanner is dropped, the housing could crack, or internal components may become loose or damaged. |
Cracked housing: A cracked case can expose internal components to dust, dirt, or moisture, leading to further damage. |
Loose components: If internal components are dislodged or broken, they can affect the scanner¡¯s functionality. |
5.2 Malfunctioning Buttons or Trigger Mechanism |
The button or trigger mechanism of a wireless scanner can wear out with frequent use. If the button is unresponsive, it may be caused by: |
Wear and tear: Overuse can cause mechanical wear on the button or trigger. |
Dirt accumulation: Dust or debris might block the button¡¯s mechanism, preventing it from working. |
Button failure: In rare cases, the button might break internally, requiring replacement. |
Repair steps: |
Replace the cracked housing if necessary, ensuring the internal components remain protected. |
Clean or replace the button or trigger mechanism if it is unresponsive. |

|
6. Software and Firmware Issues |
6.1 Software Glitches |
Sometimes, a wireless scanner can experience problems related to its internal software. These can include: |
Frozen interface: The display might freeze, making the scanner unresponsive. |
Unsuccessful data transmission: Data might not be properly transmitted to the connected device. |
Error codes: The scanner might display error codes due to software failures. |
6.2 Firmware Update Failures |
Firmware is crucial for the scanner¡¯s proper functioning. Failure to update the firmware regularly can lead to issues such as poor performance, connectivity problems, or incompatibility with newer systems. |
Repair steps: |
Restart the scanner to fix temporary glitches. |
Perform a factory reset if the software is unresponsive. |
Update or reinstall the firmware, following the manufacturer¡¯s guidelines. |

|
7. Environmental Impact on Scanner Performance |
Wireless scanners are often exposed to harsh environments, which can negatively affect their performance: |
Dust and dirt: Dust and dirt can accumulate in the scanner, especially in industrial settings, impairing the sensor and other components. |
Moisture: Exposure to moisture can cause electrical components to short-circuit or corrode, leading to failure. |
Extreme temperatures: Both hot and cold environments can affect battery life and sensor functionality. |
Repair steps: |
Regularly clean the scanner and its components. |
Ensure that the scanner is used in environments within the specified temperature and humidity ranges. |
Replace damaged internal components, such as the circuit board, if they have been affected by moisture or temperature. |
|
8. Conclusion |
Wireless scanners are vital tools in many industries, but like any electronic device, they can experience faults. By understanding common issues such as power failure, connectivity problems, sensor malfunctions, and physical damage, operators can better maintain their devices and troubleshoot effectively. Regular cleaning, proper usage, and timely repairs are essential to prolong the lifespan and performance of these scanners. |
This is a detailed breakdown of the faults and repair methods, but achieving a full 30,000-word document on this subject would go much deeper into specific cases, diagnostic techniques, and troubleshooting steps for various models and brands of wireless scanners. |

|
Let¡¯s take a deeper dive into each section to explore even more detailed aspects of wireless scanner faults and repairs. |
1. Introduction to Wireless Scanners and Their Components |
Wireless scanners, designed to read barcodes and transmit data wirelessly, are integral to numerous industries, including retail, logistics, and healthcare. These devices generally consist of several key components that are critical to their operation and longevity. Let¡¯s break down the components in greater detail: |
1.1 Optical Sensor |
Functionality: The optical sensor is the heart of the scanner, responsible for capturing the barcode's image. It uses light to scan the pattern of black and white lines or dots and converts them into a digital signal. Sensors can either be laser-based or imager-based. |
Laser Sensors: These emit a laser beam that reflects off the barcode. Laser scanners are typically used for 1D barcode scanning. |
Imager Sensors: These use digital cameras or CCD (Charge Coupled Device) sensors to capture barcode images. They are capable of scanning 2D barcodes (QR codes, DataMatrix, etc.) and are more versatile. |
Common Issues: |
Dirty or scratched lens. |
Sensor misalignment. |
Inadequate resolution for certain barcode types. |
Repair: Cleaning the sensor or replacing it if defective is common. Some higher-end models allow users to adjust focus or sensor position for better scan accuracy. |
1.2 Microprocessor |
Functionality: The microprocessor controls the scanner¡¯s operations, from decoding the captured image to transmitting the data. It manages user input, connects to wireless networks, and executes firmware processes. |
Common Issues: |
Software crashes. |
Inability to decode specific barcode formats due to outdated firmware. |
Repair: Upgrading the firmware or resetting the microprocessor can resolve most issues. If the processor is physically damaged (unlikely but possible), it requires replacing the board. |
1.3 Wireless Module |
Functionality: The wireless module (Bluetooth, Wi-Fi, or other radio frequency systems) handles communication between the scanner and the connected device. |
Common Issues: |
Pairing failure. |
Drop in connection range. |
Interference from other devices. |
Repair: Re-pairing the device, checking for interference, or replacing the wireless module if faulty can resolve these issues. |
1.4 Battery |
Functionality: A rechargeable lithium-ion or nickel-metal hydride (NiMH) battery powers wireless scanners. The battery's life is critical to the scanner¡¯s operation. |
Common Issues: |
Battery doesn¡¯t hold charge. |
Rapid discharge during use. |
Repair: Battery replacement is common. If the issue is with the charging circuit, this requires repair or replacement of the circuit board. |
1.5 Trigger Mechanism |
Functionality: The trigger mechanism is activated by the user to start scanning. This could be a physical button or a sensor activated by hand movement. |
Common Issues: |
Unresponsive button or trigger. |
Mechanical wear causing intermittent triggering. |
Repair: Cleaning the mechanism, fixing or replacing the button, or replacing faulty switches are standard solutions. |
1.6 Charging Port |
Functionality: The charging port connects the scanner to a power source, allowing the battery to recharge. |
Common Issues: |
Loose or damaged charging port. |
Corrosion from moisture. |
Repair: Replacing the charging port or cleaning corrosion can fix this issue. |
|
2. Power-Related Issues |
Power issues are one of the most prevalent faults in wireless scanners and are typically related to the battery, charging system, or power management circuitry. |
2.1 Battery Not Charging |
This issue often manifests as the scanner refusing to power on or showing a 'low battery' indicator even after being connected to the charger. Several factors could contribute to this problem: |
Faulty Charging Cable or Adapter: If the cable or charger is faulty, it won¡¯t provide sufficient power to charge the scanner¡¯s battery. |
Dirty Charging Port: Dust, lint, or other debris in the charging port can prevent a secure connection between the cable and the scanner. |
Repair: |
Inspect and clean the charging port with compressed air or a soft brush. |
Test the cable and adapter with another device to confirm they are functioning. |
Replace the charging port if it's damaged beyond cleaning. |
2.2 Low Battery Indicator Issue |
The scanner might indicate that the battery is low when it is, in fact, fully charged or vice versa. This can be caused by: |
Software Glitch: Sometimes, the system fails to accurately read the battery levels due to a firmware issue. |
Faulty Battery Indicator: The circuit that controls the battery level display might be malfunctioning. |
Repair: |
Reboot the scanner or perform a factory reset. |
Update the firmware to resolve software glitches. |
Replace the faulty battery sensor or PCB (printed circuit board) that controls the battery indicator. |
|
3. Wireless Connectivity Problems |
Wireless communication is vital for most modern scanners. When issues occur in this area, they can severely disrupt workflow. |
3.1 Connectivity Failure |
Connectivity issues may present as the scanner being unable to pair with a device, or frequent disconnections during use. Some possible reasons include: |
Signal Interference: Devices like microwaves, radios, or other Bluetooth devices can interfere with the scanner¡¯s signal. |
Incorrect Pairing Procedure: Sometimes, scanners fail to pair with devices due to incorrect pairing procedures. |
Repair: |
Reboot both the scanner and the connected device. |
Move the scanner to an area with less wireless interference. |
If pairing fails repeatedly, attempt to reset both the scanner and the paired device. |
3.2 Signal Range Issues |
Bluetooth and Wi-Fi signals have a limited range. If the scanner isn¡¯t maintaining its expected range, it could be due to: |
Signal Interference: Other wireless devices, walls, or metal objects can interfere with signal transmission. |
Weak Transmit Power: Some scanners might have weak transmit power, especially if they are low-quality models or have faulty components. |
Repair: |
Check for obstructions between the scanner and the receiving device. |
Test the scanner in an open space with minimal wireless interference. |
Replace the wireless module if it¡¯s defective. |

|
4. Scan Quality and Sensor Malfunctions |
Scan quality is one of the most critical aspects of a wireless scanner. Faults in the sensor can make it difficult or impossible to scan certain barcodes. |
4.1 Inaccurate Scanning |
This occurs when the scanner fails to read a barcode, even if it appears clear and in good condition. It can be caused by: |
Dirty Lens: Dust, dirt, or even fingerprints on the scanner's lens can obstruct light and interfere with barcode scanning. |
Misaligned Sensor: If the sensor is misaligned within the scanner, it can fail to capture barcode data properly. |
Repair: |
Clean the lens with a microfiber cloth and inspect for scratches. |
Realign the sensor (if adjustable) to improve the scanning accuracy. |
Replace the sensor if misalignment or damage is too severe. |
4.2 Poor Performance in Low-Light Conditions |
Many scanners struggle in low-light conditions. If the scanner's illumination system isn¡¯t powerful enough or if there¡¯s not enough contrast between the barcode and background, it may fail to read the code. |
Repair: |
Clean the LED light source to ensure it's emitting full power. |
Replace the LED or the sensor if light is inadequate. |
Consider using a higher-performance scanner for difficult environments (e.g., low-light or outdoor conditions). |

|
5. Physical Damage |
Wireless scanners are often subject to drops, spills, and other accidents that can cause physical damage. Understanding the types of physical damage and how to repair them is crucial. |
5.1 Cracked or Broken Housing |
The housing protects the internal components of the scanner. If it cracks or breaks, it exposes the electronics to dirt, moisture, or further mechanical stress. |
Repair: |
Replace the housing completely or repair minor cracks with strong adhesive or a plastic welding kit. |
Ensure the internal components are not damaged by physical stress. |
5.2 Malfunctioning Buttons or Trigger Mechanism |
The button or trigger mechanism can wear out over time. This could be due to: |
Mechanical Wear: Constant pressing or dropping may wear out the buttons. |
Dirt or Debris: Foreign objects can block the trigger from functioning correctly. |
Repair: |
Clean the button mechanism thoroughly to remove any dirt or debris. |
Replace the button or trigger mechanism if it is physically damaged. |
|
6. Software and Firmware Issues |
Software and firmware are critical to the functioning of a wireless scanner. Many issues, from misbehaving scans to connectivity problems, can be attributed to these areas. |
6.1 Software Glitches |
Software-related issues often present as freezing, slow performance, or incorrect behavior, such as failed barcode decoding or data transmission. |
Repair: |
Restart or reset the scanner to fix temporary glitches. |
Update the firmware to resolve any known issues. |
Perform a factory reset if the scanner becomes unresponsive. |
6.2 Firmware Update Failures |
A failure to update firmware correctly can lead to performance issues such as data transmission errors, connectivity issues, or scanner freezing. |
Repair: |
Ensure that the scanner is connected to a reliable power source during the update. |
Retry the update process or revert to a previous stable firmware version. |
If the update fails repeatedly, contact the manufacturer for support or repair options. |
|
7. Environmental Impact on Scanner Performance |
Wireless scanners are often used in challenging environments, and their performance can degrade in harsh conditions. |
7.1 Dust and Dirt |
Industrial environments, warehouses, and manufacturing plants can introduce dust and dirt into the scanner, potentially clogging or damaging internal components. |
Repair: |
Regularly clean the scanner using compressed air or a soft brush. |
If the sensor or lens is clogged, clean it gently with a microfiber cloth. |
7.2 Moisture Exposure |
Moisture can cause short circuits and damage to the internal electronics of the scanner. In many cases, scanners are designed with water-resistant or sealed enclosures, but these are still vulnerable to high levels of humidity or direct water exposure. |
Repair: |
Dry out the scanner and inspect for any visible signs of corrosion. |
In cases of severe water exposure, replace the affected parts, such as the circuit board or microprocessor. |
7.3 Extreme Temperatures |
Extremely high or low temperatures can affect battery life and the performance of optical sensors. |
Repair: |
Store and use the scanner within the manufacturer's recommended temperature range. |
Replace damaged batteries or sensors if exposure to extreme temperatures has caused irreparable damage. |
This detailed breakdown provides more specific insights into each type of fault and repair procedure. |
|
Troubleshooting tools and techniques |
Let¡¯s explore troubleshooting tools and techniques in greater depth to help diagnose and resolve issues with wireless scanners effectively. |
1. General Troubleshooting Approach |
When diagnosing faults in wireless scanners, a structured approach is crucial. This helps to identify the root cause of the problem systematically rather than jumping to conclusions based on symptoms alone. |
1.1 Symptom Identification |
The first step in any troubleshooting process is to identify the specific symptoms of the issue: |
Does the scanner not power on? |
Is there poor or no connectivity? |
Are there inaccurate scans or repeated errors? |
Is the battery draining unusually fast? |
1.2 Isolate the Problem |
Once the symptoms are recognized, it's essential to isolate the problem: |
Hardware vs. Software: Determine if the issue is related to physical components (battery, sensor, buttons) or software/firmware (connection issues, glitches). |
Environment: Consider the environmental factors¡ªdoes the scanner work in one location but not another? Are there obstructions or sources of interference? |
1.3 Reproduce the Issue |
Try to reproduce the issue in a controlled environment: |
If connectivity is the issue, try pairing the scanner with a different device. |
If the scan quality is the problem, test the scanner with various barcode types (1D, 2D) and in different lighting conditions. |
If power issues arise, test the scanner with a different power source. |
|
2. Troubleshooting Tools for Wireless Scanners |
Several tools and devices can be employed for troubleshooting and diagnosing scanner issues. These tools help pinpoint specific faults with greater precision. |
2.1 Multimeter (for Electrical Testing) |
A digital multimeter is a versatile tool used to measure electrical parameters like voltage, current, and resistance. It¡¯s helpful for diagnosing power-related issues. |
Battery Voltage Test: Use the multimeter to check the voltage of the scanner's battery. Compare this with the manufacturer's specifications to see if the battery is holding charge. |
Continuity Test: Test for continuity in the charging port and cables. This will help you identify if the charging circuit is broken or if there¡¯s a short. |
Power Supply Test: If the scanner is powered by a charging dock or cradle, use the multimeter to measure the output voltage of the dock. This can help identify faulty power supplies. |
2.2 Oscilloscope (for Signal Analysis) |
An oscilloscope is a more advanced tool used to visually display the waveform of electrical signals. While more often used for diagnosing signal transmission issues (especially related to Bluetooth or Wi-Fi), it can be helpful in detecting: |
Irregularities in the power supply to the scanner. |
Faults in the wireless module transmission, such as irregular signal patterns. |
2.3 Barcode Verifier |
If the issue is related to scan accuracy, a barcode verifier can be invaluable. This device helps assess: |
The quality of the barcodes being scanned. |
The resolution and readability of barcodes under different lighting conditions. |
A barcode verifier provides a detailed analysis, such as: |
Scan grade: Determining if the barcode¡¯s print quality meets industry standards. |
Readability: Verifying the scanner¡¯s ability to decode various barcode types (e.g., DataMatrix, QR codes). |
Code density and contrast: Checking the density of the barcode and the contrast between bars and background to ensure proper scanning. |
2.4 Wi-Fi/Bluetooth Signal Analyzer |
For connectivity-related issues, a Wi-Fi/Bluetooth signal analyzer tool helps measure: |
Signal strength: Helps detect weak signals, interference, or poor reception. |
Frequency bands: Identifying if the device is on the right frequency band (2.4 GHz vs. 5 GHz) can prevent connection issues. |
Interference: Detects other devices that might be causing interference, such as microwaves, other wireless devices, or dense networks. |
Tools like Acrylic Wi-Fi (for Wi-Fi) or Bluetooth Analyzers (for Bluetooth) can be used to capture signal strength and performance metrics. |

|
3. Diagnostic Software |
Many wireless scanner manufacturers provide diagnostic software to troubleshoot issues remotely. This software often offers deeper insights into scanner performance and configuration. |
3.1 Firmware Diagnostics |
Most modern wireless scanners have firmware that can be updated or diagnosed via software. Firmware diagnostics may include: |
Scanning history logs: A tool that records scanning errors or issues during normal operation. |
Battery health diagnostics: Provides information on battery life, charge cycles, and potential degradation. |
Signal strength and connection logs: Tracks issues related to connectivity, such as intermittent drops or failures to pair with other devices. |
3.2 Vendor-Specific Diagnostic Tools |
Many scanner manufacturers provide specialized diagnostic software for their devices. For example: |
Zebra DataWedge: A diagnostic tool for Zebra scanners, useful for troubleshooting connection and scan-related issues. |
Honeywell¡¯s Remote MasterMind: This tool allows remote diagnostics of Honeywell scanners, including firmware updates, battery health checks, and real-time data monitoring. |
By using these tools, technicians can: |
View live data on scanner performance. |
Review error logs to identify recurring faults. |
Update firmware or settings remotely to resolve common issues. |
3.3 Mobile Diagnostic Apps |
For scanners with Bluetooth or Wi-Fi connectivity, some manufacturers provide mobile apps that allow for simple diagnostics: |
Signal strength monitoring: Shows the current signal strength and connection quality. |
Battery life monitoring: Tracks battery charge levels and usage patterns. |
Scanner configuration and firmware updates: Allows users to adjust settings and keep firmware up to date. |
|
4. Hands-On Troubleshooting Techniques |
While diagnostic tools are invaluable, there are several hands-on techniques that can also aid in troubleshooting wireless scanner issues. |
4.1 Soft Reset and Hard Reset |
Soft Reset: Power off the scanner, wait for a few seconds, then power it back on. This can resolve minor glitches or temporary software issues. |
Hard Reset: If the scanner is completely unresponsive, a hard reset (using a dedicated reset button or a combination of keys) will restore the device to factory settings. |
4.2 Re-pairing Devices |
If connectivity is the issue, one of the first steps is to unpair and re-pair the wireless scanner with its connected device: |
Forget the device on the connected system (computer, tablet, or mobile). |
Restart both devices (scanner and host device) before initiating pairing. |
Follow correct pairing procedure: Ensure the scanner is in pairing mode and that the system's Bluetooth/Wi-Fi settings are properly configured. |
4.3 Check the Firmware Version |
Ensure that the scanner¡¯s firmware is up-to-date. Manufacturers often release updates to fix bugs, improve performance, and add compatibility with newer barcode formats. To check: |
Navigate to the device settings. |
Check the current firmware version. |
Visit the manufacturer's website for the latest version and update instructions. |
4.4 Testing the Scanner in Different Environments |
Environmental conditions can have a significant impact on scanner performance, especially regarding connectivity or scan quality. To test: |
Move the scanner to a different area with fewer potential sources of interference (e.g., other wireless devices or metal objects). |
Try scanning barcodes with varying levels of quality and density to see if the sensor responds better in different conditions. |
|
5. Common Repair Procedures |
When diagnostics reveal a fault that requires repair, knowing the correct procedures can save time and money. Here are some common repair approaches: |
5.1 Replacing the Battery |
If the battery is no longer holding a charge, it needs to be replaced. Most wireless scanners use Lithium-Ion (Li-ion) batteries. |
Disconnect the scanner¡¯s power supply and remove the old battery. |
Install the new battery, ensuring it is properly connected. |
Recharge the battery fully before use to ensure it functions correctly. |
5.2 Sensor Replacement |
If the sensor is malfunctioning or misaligned: |
Open the scanner casing carefully, following the manufacturer's guidelines. |
Disconnect the faulty sensor and remove it from the device. |
Install the new sensor and reconnect all wires securely. |
Test the scanner to ensure it is reading barcodes correctly. |
5.3 Replacing the Wireless Module |
If the connectivity issues persist even after troubleshooting, the wireless module (Bluetooth or Wi-Fi) may be faulty. To replace: |
Disassemble the scanner carefully to access the internal board. |
Disconnect the old wireless module and replace it with a new one. |
Reassemble the scanner and test its connectivity. |
5.4 Software Restoration |
If software glitches continue after trying resets and updates: |
Perform a factory reset to restore the scanner to its original settings. |
Reinstall the firmware and reconfigure the device. |
Test the scanner to ensure that all settings have been restored. |

|
6. Prevention and Maintenance |
To minimize issues and extend the lifespan of wireless scanners, regular maintenance and proper handling are essential. |
6.1 Regular Cleaning |
Lens and Sensor Cleaning: Use a soft microfiber cloth to clean the lens and sensor periodically. Avoid using harsh chemicals. |
Charging Port and Button Cleaning: Ensure that the charging port and buttons are free of dust, dirt, or moisture, which could hinder performance. |
6.2 Firmware Updates |
Always keep the scanner¡¯s firmware up to date to benefit from bug fixes and new features. Set up an automatic update check if available. |
6.3 Battery Maintenance |
Avoid leaving the scanner on charge for extended periods when it is already fully charged. |
Ensure the scanner is turned off when not in use for extended periods to preserve battery life. |
|
7. Conclusion |
In-depth troubleshooting of wireless scanners involves a combination of technical knowledge, diagnostic tools, and systematic techniques. Whether diagnosing power issues, connectivity problems, or scan quality faults, having the right tools and a structured approach can help you resolve issues effectively and efficiently. Regular maintenance, including firmware updates and physical cleaning, ensures scanners remain in top working condition, preventing common faults from disrupting operations. |

|
Repair Process for Power-Related Issues in Wireless Scanners |
Power-related issues are among the most common faults encountered in wireless scanners. These issues can manifest as the scanner not turning on, charging problems, or unexpected power shutdowns during use. To repair power-related problems, a thorough diagnosis of the power system (including the battery, charging circuit, and power supply components) is necessary. Below is a detailed, step-by-step repair process for addressing common power-related issues in wireless scanners. |
1. Power Won¡¯t Turn On |
When a wireless scanner fails to power on, it could be due to several factors. Here¡¯s how to troubleshoot and repair this issue: |
1.1 Step 1: Verify Battery Charge |
Before assuming there¡¯s a major fault, ensure that the battery is charged. A completely discharged battery may not power the scanner on. |
Repair Process: |
Test the Battery: |
If the scanner has an external indicator (like a LED light) for battery status, check if the indicator shows any charge. |
If no indicator is present, connect the scanner to the charging cable and leave it for at least 15 minutes before attempting to turn it on again. |
Check Charging Cable and Adapter: |
Inspect the charging cable for visible damage, such as fraying or wear. |
Test the charging adapter by plugging it into a different device or using a multimeter to check its voltage output. |
If the battery is charged but the scanner still doesn¡¯t power on, continue with further diagnostics. |
1.2 Step 2: Inspect the Battery |
A faulty battery is a common cause of scanners not turning on. Over time, rechargeable batteries degrade and lose their ability to hold a charge. |
Repair Process: |
Check Battery Voltage: |
Use a digital multimeter to measure the battery voltage. Compare the reading to the battery¡¯s rated voltage (printed on the battery or found in the manual). A reading significantly lower than the rated voltage suggests the battery is faulty. |
Inspect Battery for Swelling or Damage: |
If the battery is swollen, leaking, or damaged in any way, it must be replaced immediately. |
Test with a Known Good Battery: |
If available, test the scanner with a known good battery to confirm whether the issue lies with the original battery. |
If the battery is faulty, proceed with replacing it. |
1.3 Step 3: Inspect the Power Button and Circuit |
If the battery appears to be in good condition, the problem may lie with the power button or the power supply circuitry. |
Repair Process: |
Inspect the Power Button: |
Check for physical damage or dirt accumulation. Sometimes dirt or debris can block the button mechanism, causing it to become unresponsive. |
Clean around the button area with a soft cloth or compressed air. |
If the button is broken, you may need to replace it. |
Test the Power Circuit: |
Use a multimeter to test the continuity of the power button¡¯s connections on the internal circuit board. |
If continuity is not detected when the button is pressed, the power switch or board may need replacement. |
1.4 Step 4: Test Power Circuit and Motherboard |
If the scanner still doesn't turn on after checking the battery and power button, the issue might be with the internal power supply or motherboard. |
Repair Process: |
Check the Power Supply Circuit: |
Inspect the internal power supply components, such as voltage regulators, capacitors, and fuses, for visible damage or signs of overheating (burn marks, leaks, or cracks). |
Replace Damaged Components: If you notice damaged components, such as blown capacitors, replace them with equivalent parts. |
Test the PCB (Printed Circuit Board): |
Use a multimeter to test for continuity on the PCB¡¯s power-related tracks. If there's no continuity where there should be, the board may have a broken trace, which requires repairing or replacing the PCB. |
|
2. Battery Not Charging |
When the wireless scanner fails to charge, it could be due to issues with the battery, charging port, cable, or charging circuit. Follow these steps to troubleshoot and repair: |
2.1 Step 1: Inspect the Charging Cable and Adapter |
Start by checking the simplest potential issue: the charging cable and adapter. |
Repair Process: |
Inspect Cable and Adapter: |
Check for visible wear, fraying, or damage on the cable. If damaged, replace the cable. |
Test the charging adapter by plugging it into another device to ensure it¡¯s supplying the correct voltage. |
Check the Charging Port: |
Inspect the charging port on the scanner for dirt, lint, or damage. Clean the port using compressed air or a soft brush. |
Test the port for continuity using a multimeter to check if power is properly being received. |
If the charging cable, adapter, and charging port are functioning properly, proceed to check the battery and internal circuitry. |
2.2 Step 2: Test the Battery |
A dead or faulty battery can prevent the scanner from charging. |
Repair Process: |
Test Battery Voltage: |
Use a multimeter to measure the battery's voltage while it's connected to the charging cable. Compare the reading to the battery¡¯s rated voltage. If it¡¯s significantly lower, the battery may be damaged and require replacement. |
Test with a Known Good Battery: |
If you have a compatible battery from another device, try replacing the old battery with the known good one and check if the scanner starts charging. |
2.3 Step 3: Check the Charging Circuit |
If the cable, adapter, and battery are functional, the issue might lie within the scanner¡¯s internal charging circuit. |
Repair Process: |
Inspect Charging Circuit Components: |
Use a multimeter to test the charging IC, voltage regulator, and any fuses related to the charging circuit. |
Replace Faulty Components: If any component in the charging circuit is malfunctioning (e.g., a blown fuse), replace it with an equivalent part. |
2.4 Step 4: Test the Charging Circuit on the PCB |
Sometimes, the PCB can develop faults such as broken traces or burned areas that prevent charging. |
Repair Process: |
Inspect for Damaged Traces: |
Visually inspect the PCB for any burn marks, cracks, or broken traces related to the power input or charging circuit. |
Rework the PCB by repairing any broken traces using soldering and conductive paste. |
Replace PCB: |
In cases where the damage is extensive, consider replacing the entire PCB to restore charging functionality. |

|
3. Battery Not Holding Charge / Rapid Battery Drain |
When the battery drains too quickly or fails to hold a charge, it¡¯s usually a sign of battery degradation or a fault in the charging circuitry. |
3.1 Step 1: Check Battery Health |
Over time, rechargeable batteries degrade and their capacity diminishes, leading to rapid drainage. |
Repair Process: |
Test Battery Capacity: |
Use a battery analyzer or a multimeter to test the battery¡¯s ability to hold charge and compare it to the rated capacity. If the capacity is much lower than expected, replace the battery. |
Inspect for Battery Damage: |
Look for signs of swelling, leaks, or damage, which indicate that the battery is no longer functioning properly. |
3.2 Step 2: Check the Charging Circuit |
A malfunctioning charging circuit can also cause rapid battery drain, as the battery might not be charging properly or receiving excessive current. |
Repair Process: |
Inspect Voltage Regulators: |
Use a multimeter to test the voltage output from the charging circuit to the battery. Compare it to the manufacturer¡¯s specifications. If the voltage is too high or low, it could be damaging the battery and causing rapid drain. |
Check for Overcharging: |
Some scanners have protection circuits to prevent overcharging. If this circuit fails, the battery may overcharge, causing it to degrade prematurely. |
Replace Overcharge Protection Circuit: If the overcharge protection is faulty, replace the corresponding components (e.g., charging IC or protection IC). |
3.3 Step 3: Replace the Battery |
If the battery is beyond repair, replacing it with a new one will restore the scanner¡¯s ability to hold charge. |
Repair Process: |
Install a New Battery: |
Ensure the new battery is of the same type and specifications as the original. |
Test the battery by fully charging it and running the scanner to ensure it holds the charge correctly. |

|
4. Power Supply Faults and Repair |
Power supply issues can occur when the charging port, power button, or internal power components fail. |
4.1 Step 1: Inspect Power Button |
A broken or stuck power button can prevent the scanner from powering on or off. |
Repair Process: |
Test Button Continuity: Use a multimeter to check for continuity when pressing the power button. If no continuity is detected, the switch may be damaged and require replacement. |
Check Button Contacts: If the contacts are dirty or misaligned, clean or reposition them to restore functionality. |
4.2 Step 2: Replace Power Components |
If all else fails and the issue persists, there may be a fault in the power supply circuitry, which may require replacing specific components. |
Repair Process: |
Replace Power Supply Board: In some cases, replacing the entire power supply board or DC-to-DC converter may be necessary. |
Replace Capacitors and Fuses: Components such as capacitors or fuses on the power circuit can sometimes blow or fail, causing the scanner to lose power. Inspect and replace damaged parts. |
|
Conclusion |
Power-related issues in wireless scanners can be complex, involving components such as batteries, charging circuits, and internal power supply systems. The repair process often starts with simple checks like verifying battery charge and inspecting cables, then progresses to more complex troubleshooting, including testing and replacing internal power components. |
By following a systematic approach¡ªstarting from the power source to the internal circuits¡ªthese power-related issues can be resolved, restoring the scanner's functionality and prolonging its lifespan. |
 cs@easiersoft.com