EasierSoft Barcode Label Designer |
Barcode Label Design & Bulk Label Printing Software |
How to Add Barcode Elements When Designing a Label |
1. Create a New Blank Label Profile |
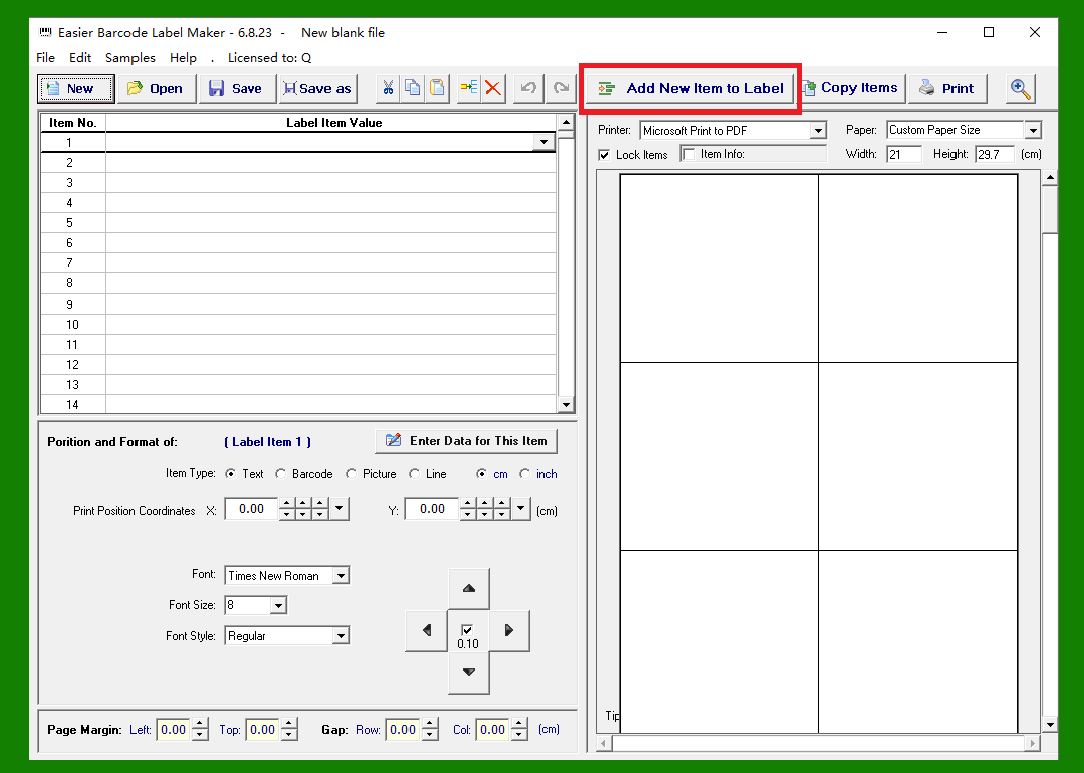
As shown in the figure, we start by creating a new blank label profile. This label sheet contains six labels arranged in two columns and three rows. You only need to design the layout on the first label. When printing, the software automatically replicates this layout to the remaining five labels on the sheet. |
On the left side of the window, the Data Editor allows you to enter multiple rows of data. This makes it easy to print a batch of labels that share the same layout but display different content. |
|
2. Add a New Barcode Element |
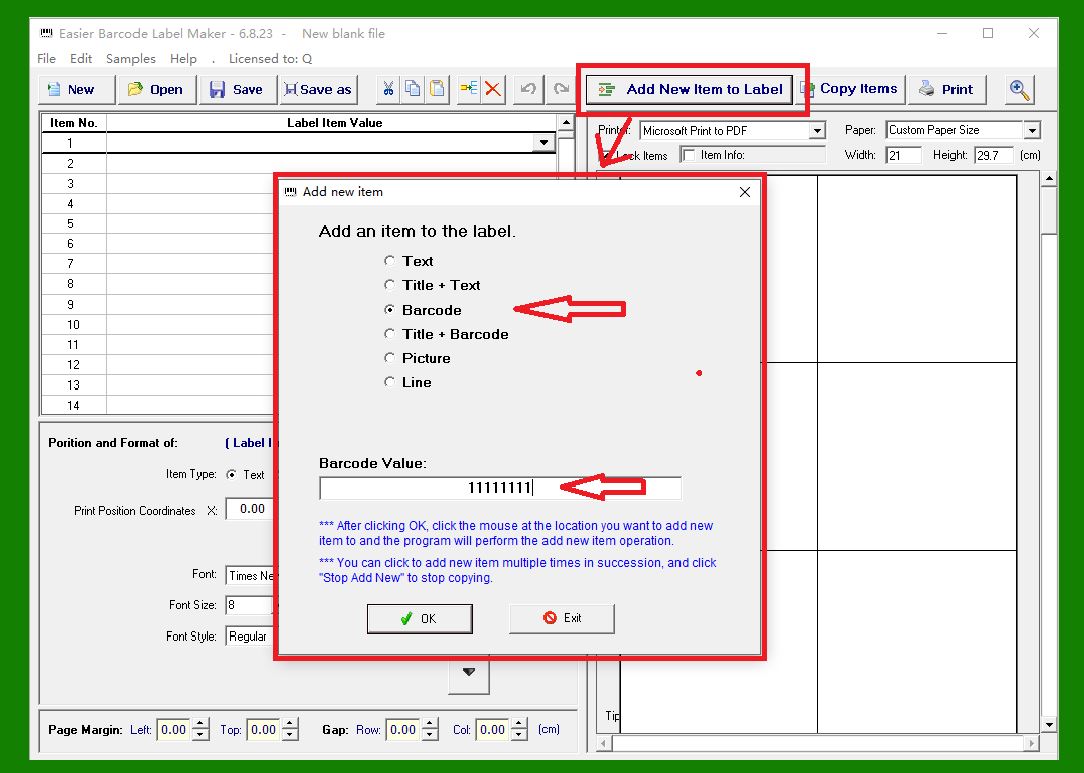
Click the 'Add New Item to Label' button. In the pop-up dialog, choose Barcode as the element type. The input box underneath is used to enter the barcode value. This field accepts only a single barcode value. |
If you need to print multiple labels with different barcode values, please enter all your data in the left Data Editor. You may also paste multiple rows of data directly from an Excel file. |
|
3. Place the Barcode on the Label Layout |
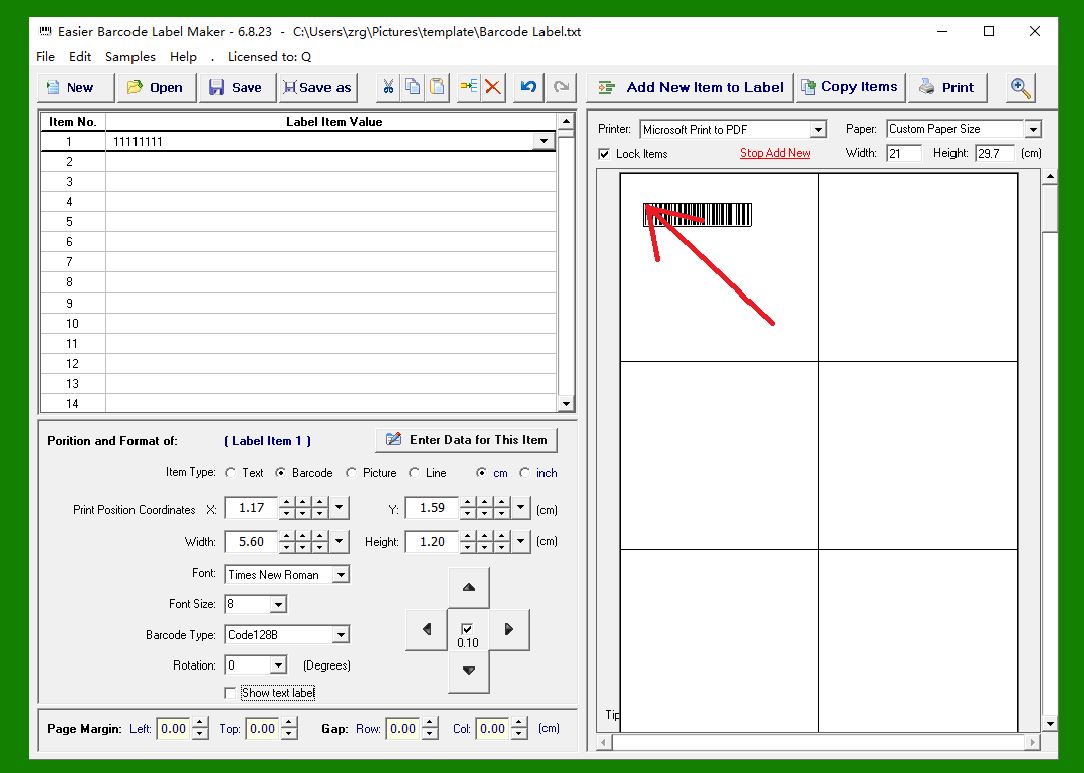
After clicking OK, the barcode element is not yet placed on the label. To insert it, click anywhere on the right-side label design canvas where you want the barcode to appear. The software will add the barcode element at the exact position you click. |
|
4. Barcode Added After First Click |
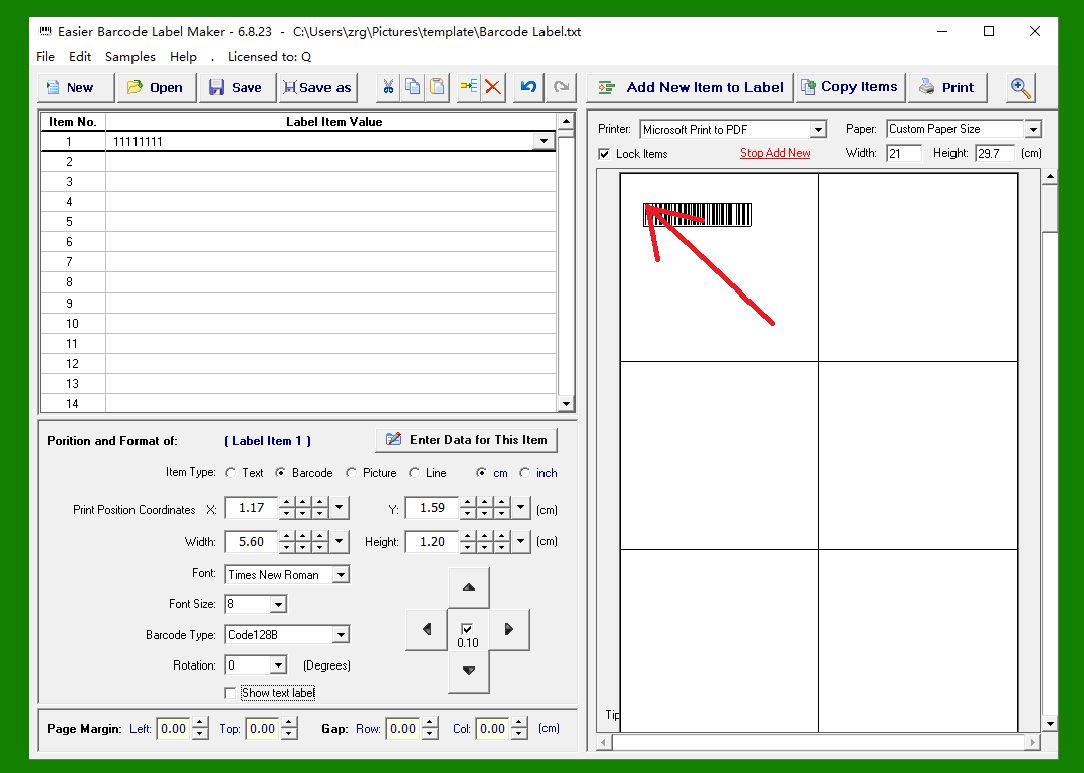
As shown in the figure, a single mouse click adds one barcode element to the label. |
|
5. Multiple Barcode Elements |
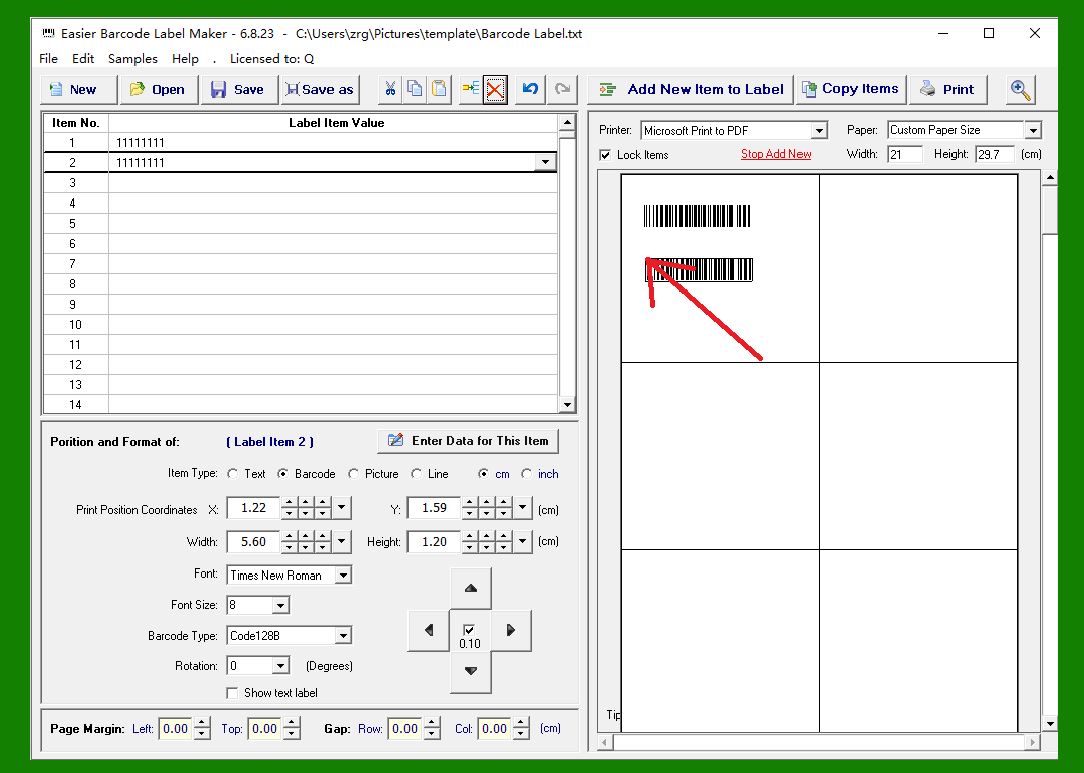
A second mouse click adds another barcode element. Each additional click inserts one more barcode element onto the design canvas. This makes it possible to place multiple barcodes on the same label if needed. |
|
6. Finish Adding Elements |
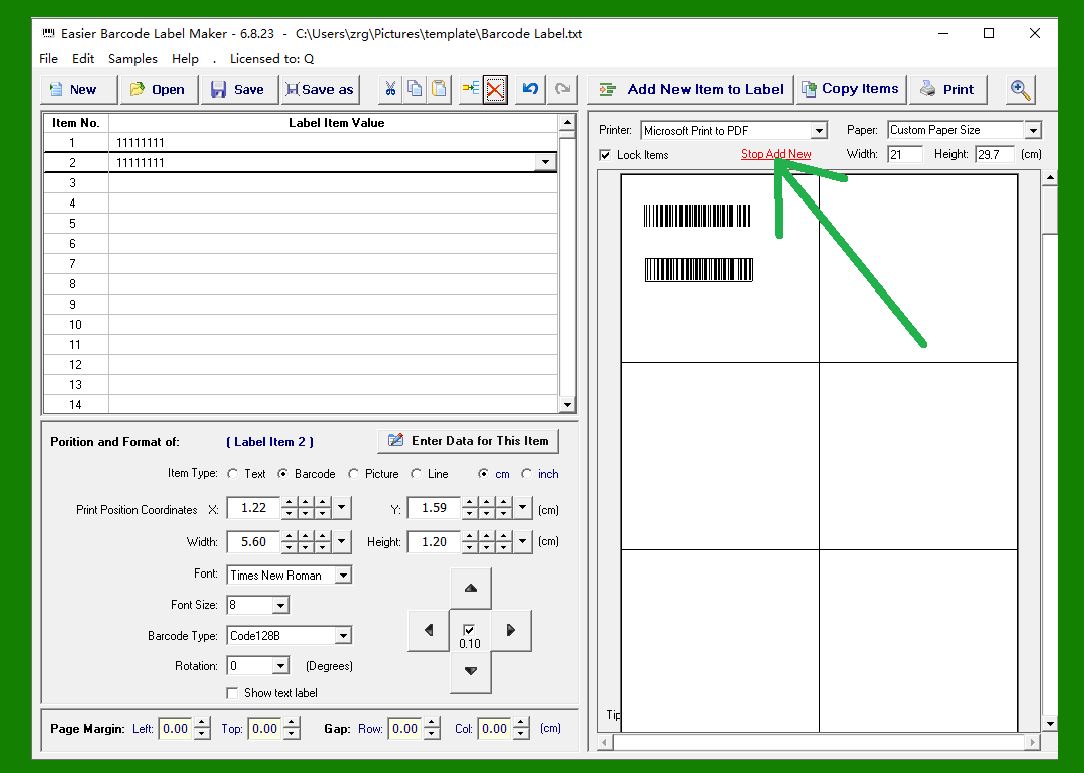
When you are done adding barcode elements, click 'Stop Add New' to complete the operation. |
|
Once the barcode elements are added, you can input multiple barcode values in the Data Editor (upper-left panel) and modify each element's position, size, and other properties in the Element Properties panel (lower-left). These configuration details will be covered in the next article. |
 cs@easiersoft.com