EasierSoft Barcode Label Designer |
Barcode Label Design & Bulk Label Printing Software |
Configuring Image Elements on a Label |
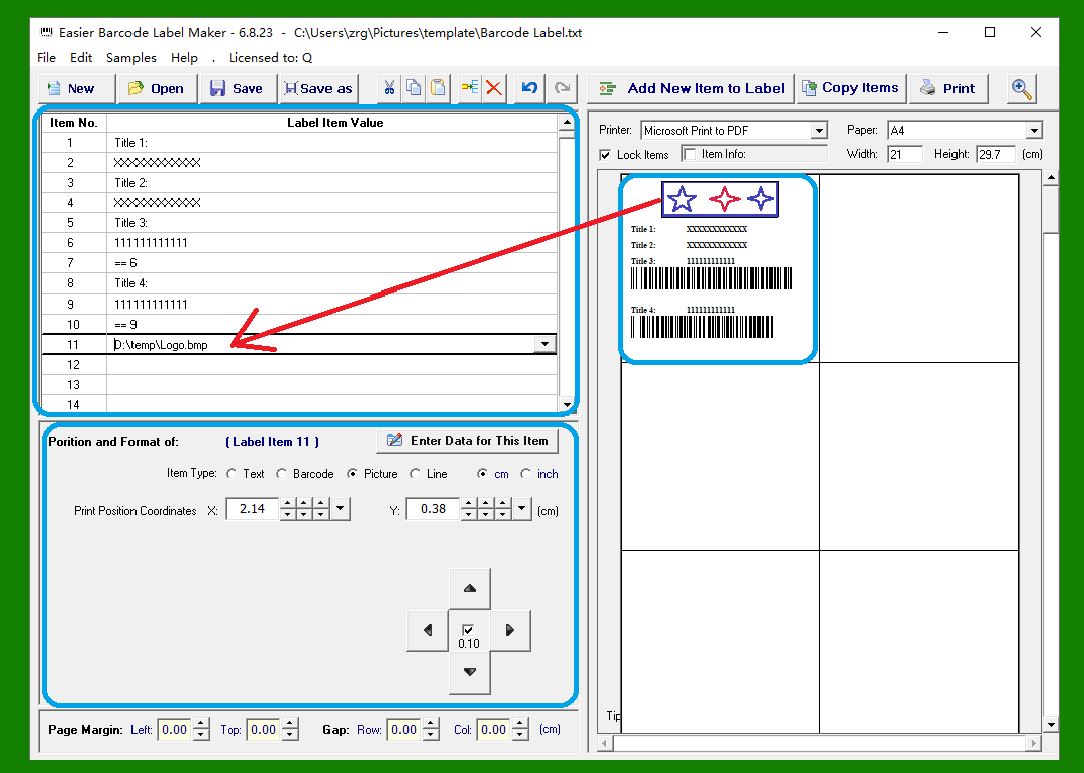
1. The software interface is divided into three primary sections: |
Right panel: the visual Label Designer, where you can preview and arrange all elements that will appear on the printed label. |
Upper-left panel: the Data Editor, which displays a structured list of all elements currently placed on the label. |
Lower-left panel: the Properties Form, which shows detailed configuration options for whichever label element is selected. |
|
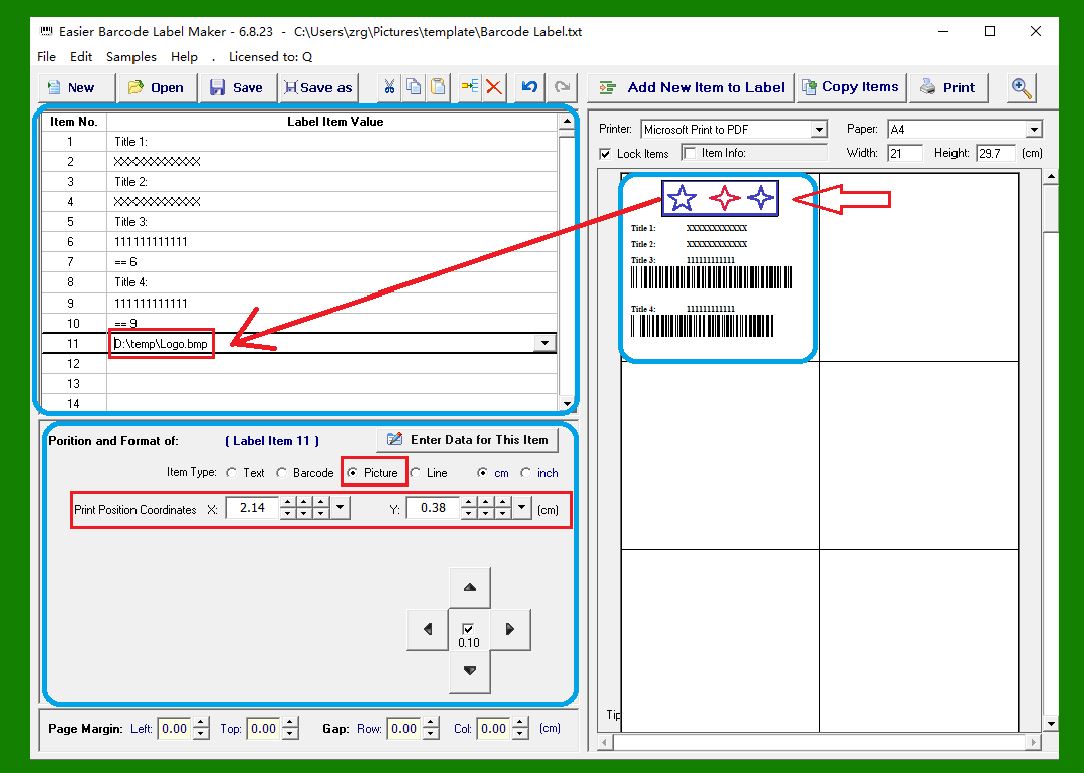
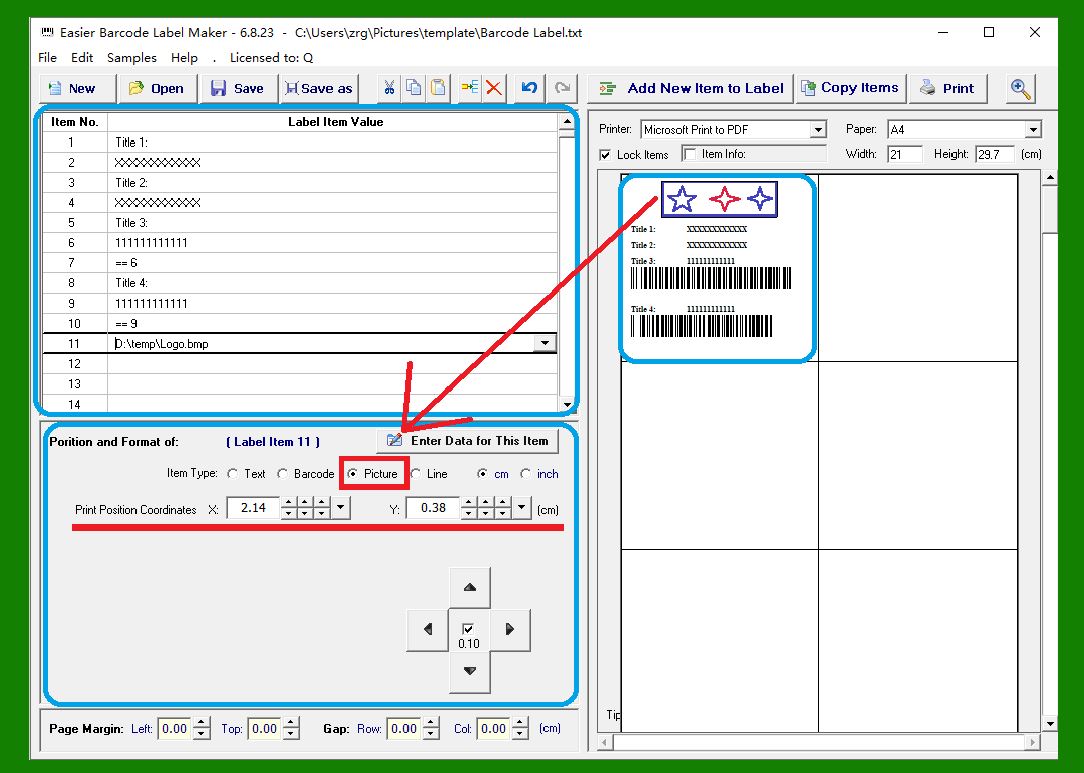
2. As shown in the illustration, selecting an image element in the Label Designer automatically highlights the corresponding row in the Data Editor. |
At the same time, the Properties Form in the lower-left panel updates to display the element¡¯s coordinates parameters. |
In the Data Editor, the value you enter represents the file path of the image being used. |
The program supports BMP format only for image elements. |
If your artwork is saved in another format (such as PNG or JPG), you can easily convert it using any third-party image editor for example, the built-in Windows Paint application by saving the file as a BMP before loading it into the software. |
|
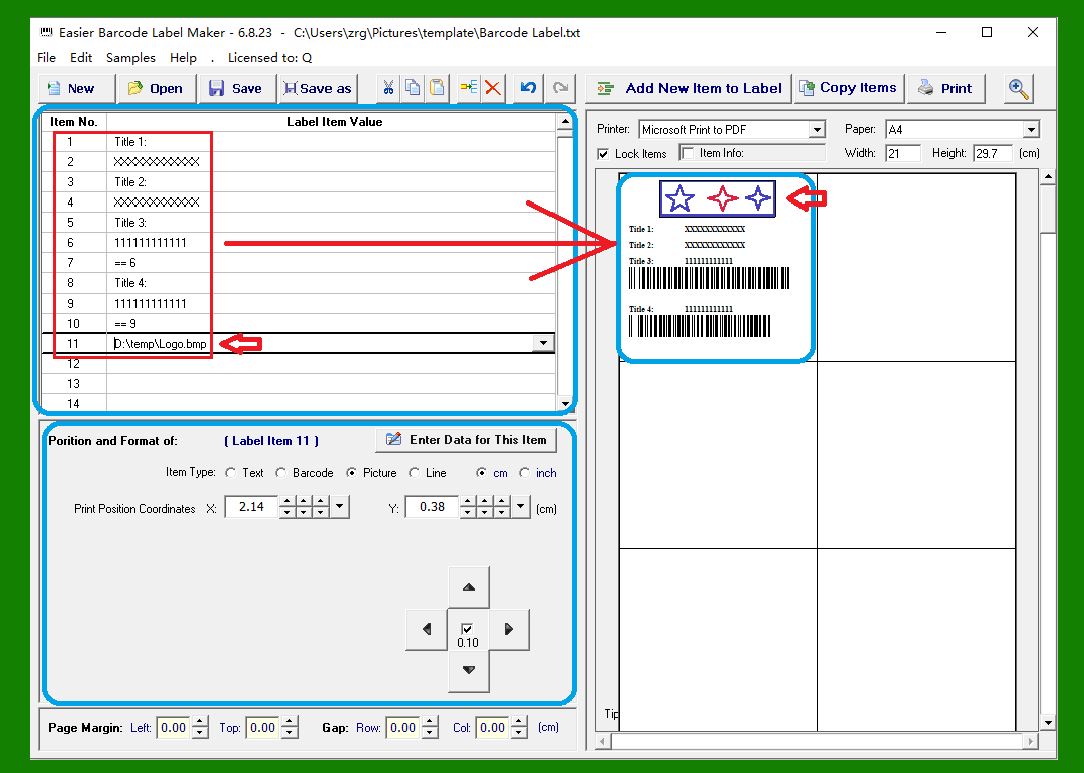
3. As illustrated, the Label Designer on the right contains eleven elements, which can include images, text objects, and barcode objects. |
The Data Editor displays these same eleven items in eleven rows, each one directly linked to a specific element on the label. |
|
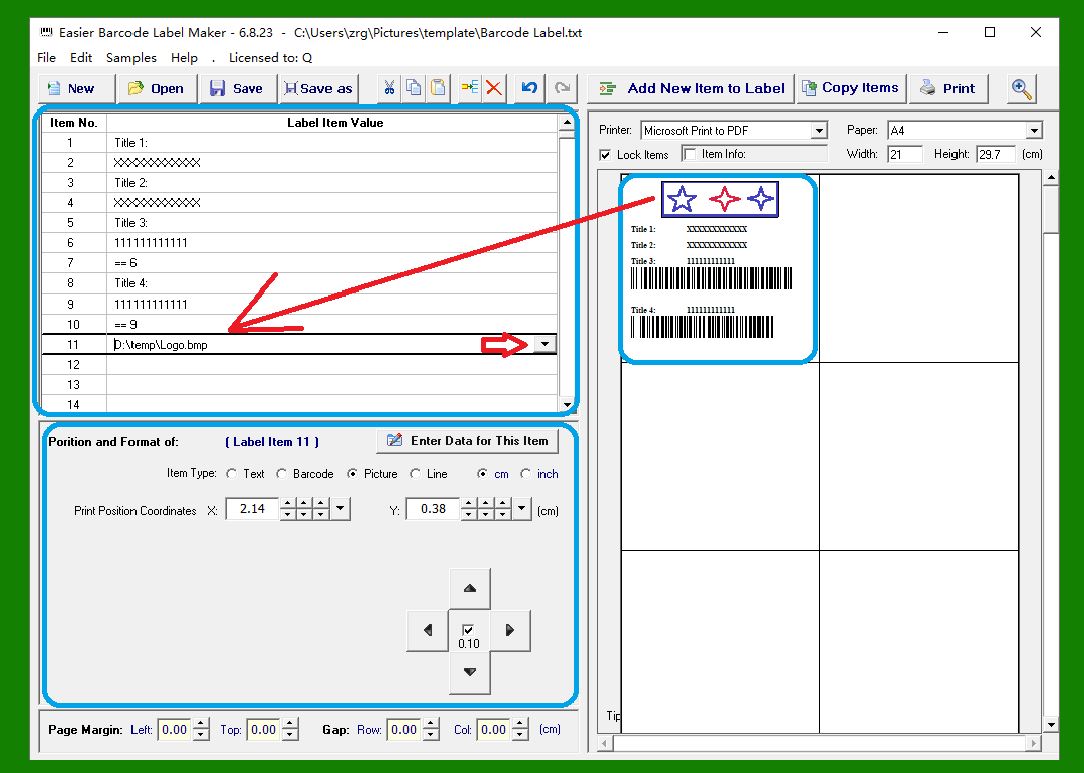
4. When you select a row in the Data Editor, a small button appears at the end of that row. |
Clicking this button opens a file-selection window where you can browse your computer and choose a BMP image to assign to that element. |
|
5. When any label element is selected, the Properties Form in the lower-right area displays all configurable parameters for that element. |
For an image element, this typically includes its X and Y position on the label. |
For text or barcode elements, additional parameters appear for example, font choices, alignment, or barcode formatting options. |
Note: The software does not support resizing an image element directly. If you need the image to be larger or smaller, you must adjust its dimensions using an external image editor before importing it into the program. |
|
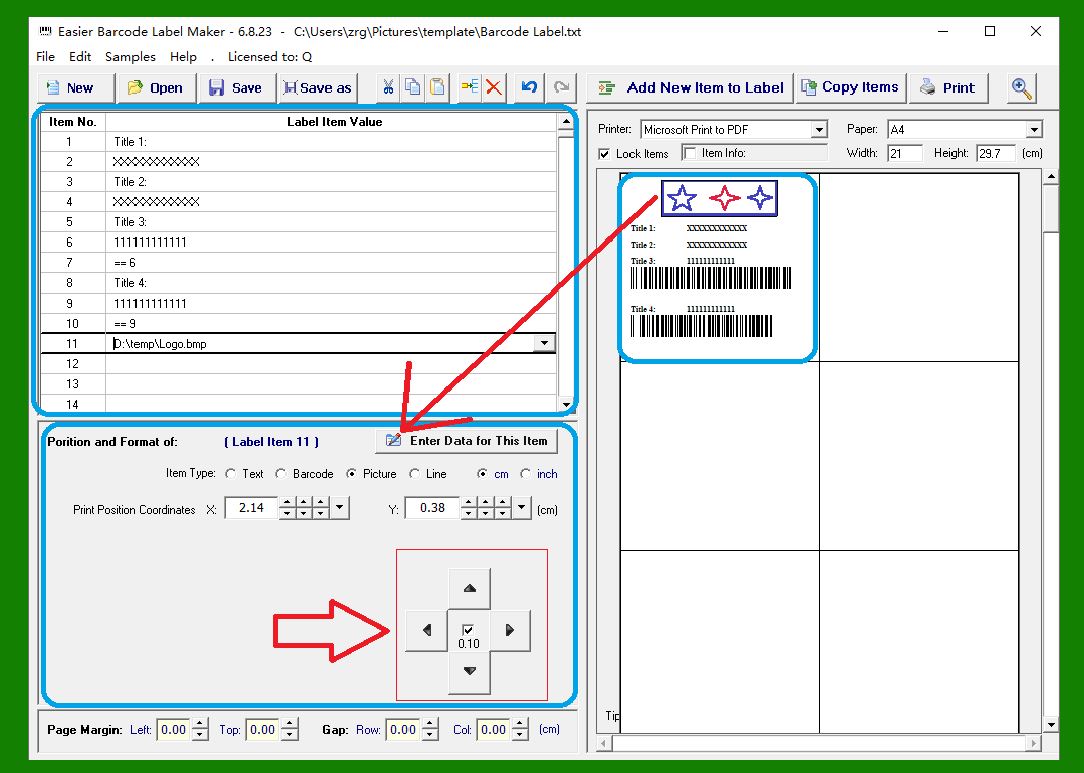
6. The four arrow buttons in the lower-right panel allow you to reposition elements visually. |
Each press of an arrow button moves the selected element in the corresponding direction, producing the same effect as manually editing the element¡¯s X and Y coordinates. |
You may also reposition elements directly by dragging them inside the Label Designer. |
A checkbox between the arrow buttons determines how far the element moves with each button press, effectively controlling movement sensitivity. |
The 'Lock Items' checkbox on the right prevents selected elements from being moved, ensuring that you do not accidentally reposition them. |
|
Additional articles explain advanced methods for fine-tuning the placement and alignment of label elements. |
 cs@easiersoft.com