1. Introduction to Label Printer Driver Installation in Windows |
Installing a label printer driver in Windows may appear straightforward at first glance, but the process actually involves several layers of configuration, system recognition logic, device communication rules, and Windows printing subsystems that work together to ensure that a label printer can successfully accept jobs, interpret print commands, and output labels with consistent accuracy. A label printer is not the same as a standard document printer; most label printers use specialized print languages, such as ZPL, EPL, ESC/POS, TSPL, DPL, or manufacturer-specific protocols. Some label printers require dedicated drivers, while others rely on Windows-class drivers or generic text-based drivers. Therefore, understanding the driver installation process is essential for ensuring compatibility, stability, and correct print formatting. |
In Windows, printing is handled by the Windows Print Spooler, which manages communication between applications and printer drivers. A label printer driver serves as the translation layer between Windows programs and the printers language. Without the correct driver, a label printer may print garbled characters, blank labels, distorted barcodes, misaligned text, or fail to print altogether. Installation becomes more nuanced depending on interfaces such as USB, network Ethernet, Wi-Fi, Bluetooth, or virtual COM over USB. |
Because of these complexities, it is necessary to provide a highly detailed, multi-level explanation of every component involved in the installation process. This includes the conceptual background of printer drivers, Windows' internal print management system, pre-installation preparation, driver package identification, step-by-step installation for different connection types, configuration within Windows Settings and Control Panel, and in-depth troubleshooting of common failure points. Advanced scenarios such as using legacy drivers on new Windows versions, signing driver files, using Windows Update, and deploying drivers across enterprise networks are also addressed in later sections. The goal is to give you a complete and fully elaborated understanding of how Windows handles label printer drivers and how to perform a proper installation in any environment. |
|
2. Understanding What a Label Printer Driver Does in Windows |
A label printer driver is a piece of software that allows Windows to communicate with a label printer. It interprets print commands and translates them into instructions that the label printer understands. Many label printers are thermal printers either direct thermal or thermal transfer and rely on proprietary command sets. Because of this, the driver must convert typical content from applications into a format suitable for printing labels, barcodes, QR codes, text blocks, logos, and graphic elements. |
Unlike normal office printers, label printers rarely use standardized page sizes. A label printer driver must specify exact label dimensions, gaps between labels, black mark detection options, print density, heat settings, and media type selections. It must also define the printable area and the sensor modes used by the printer. Without a proper driver, Windows may treat the device as a generic printer, sometimes showing it under Unspecified Devices instead of Printers & Scanners, which leads to printing inconsistencies. |
A properly installed driver also ensures that the printer appears in Windows with correct name identifiers, correct icon types, and correct communication ports. It establishes a consistent communication workflow between Windows Print Spooler, printing applications, and the thermal print mechanism. |
|
3. Differences Between Label Printer Drivers and Normal Printer Drivers |
Most standard inkjet or laser printers use highly standardized drivers that Windows often detects automatically. They use common printing languages like PCL or PostScript. Label printers, by contrast, may use many different proprietary languages. Some of the typical label printing languages include: |
ZPL (Zebra Programming Language) |
EPL (Eltron Programming Language) |
ZBI (Zebra Basic Interpreter) |
TSPL (TSC Printer Language) |
CPCL (Comtec Portable Command Language) |
ESC/POS (commonly used for receipt printers) |
DPL (Datamax Programming Language) |
Each language controls not only text but barcode rendering, rotation, label positioning, and hardware-specific features. Therefore, the driver must be designed to translate Windows output to this print language. This explains why downloading the correct driver from the manufacturer is important, especially when using advanced labeling software such as design tools, barcode generators, and inventory systems. |
|
4. Pre-Installation Preparation |
Before installing a label printer driver in Windows, you must complete several preparation steps to ensure that the process is smooth, predictable, and error-free. These include: |
4.1 Determine the exact model of your label printer. |
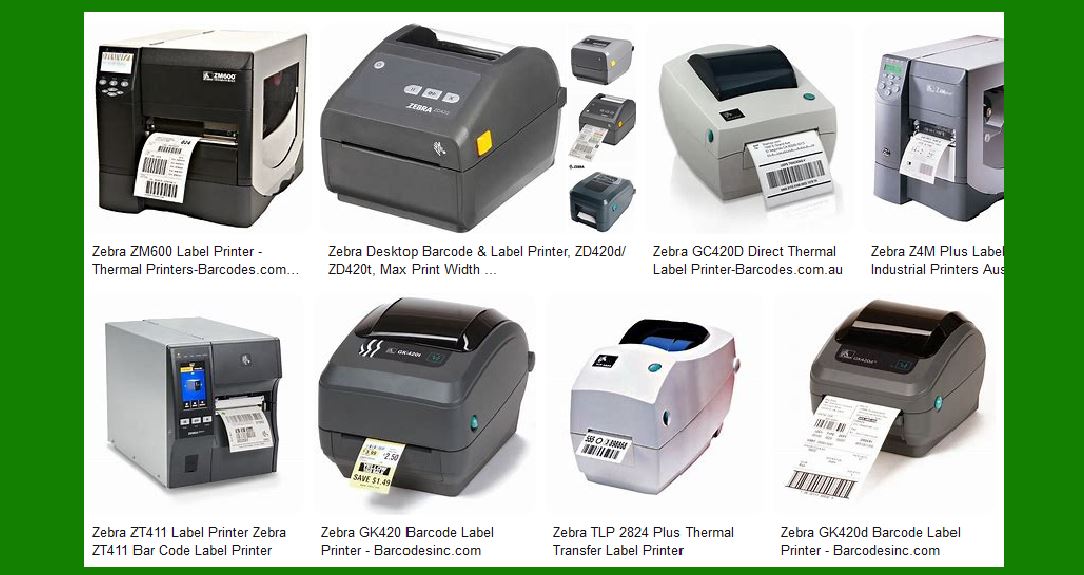
Many label printers share similar names but use different driver sets. For example, a Zebra GK420d driver will not work properly for a Zebra ZD420C, even though both are direct-thermal printers. Identifying the model ensures that you install the correct driver package. |
4.2 Determine your version of Windows. |
Installation steps differ between Windows 10, Windows 11, Windows Server 2016, Windows Server 2019, Windows Server 2022, and older versions. The bit version (32-bit vs 64-bit) also matters. Most modern drivers support only 64-bit systems. |
4.3 Download the correct driver package. |
Driver filenames may end in .exe, .msi, or may contain .inf files. Some drivers come with utilities such as firmware tools or network configuration programs. |
4.4 Disconnect the printer (if required). |
Some manufacturers strictly instruct users NOT to connect the printer before running the installer. Others require you to connect first so Windows can identify it. Following correct order is important. |
4.5 Ensure USB cables, network cables, or Wi-Fi credentials are ready. |
Driver installation for a network label printer requires knowing the printers IP address. USB installation requires a stable cable. |
4.6 Ensure administrative privileges. |
Printer driver installation requires administrator rights in Windows. If you are using a company PC, domain policies may restrict printer driver installation. |
4.7 Temporarily disable interfering software. |
Some security programs may block unsigned drivers. If the driver is officially trusted but not digitally signed, you may need to temporarily disable certain settings. |
Completing these steps improves the chances of success when installing a label printer driver on Windows. |
|
5. Understanding Windows Printer Communication Ports |
Every printer in Windows uses a communication port. Ports define how data flows to the printer. For label printers, port selection is extremely important because an incorrect port can cause the printer to appear installed while being completely nonfunctional. |
Common port types include: |
5.1 USB Ports (USB001, USB002, etc.) |
These ports are automatically created when a USB printer is connected. Most modern label printers use these virtual USB ports. |
5.2 COM Ports (Serial Ports) |
Some industrial label printers connect via serial RS-232. USB-serial adapters also create COM ports. COM naming matters for legacy systems. |
5.3 LPT Ports (Parallel Ports) |
Rare today, but still used by some older industrial printers. |
5.4 TCP/IP Network Ports |
Networked label printers usually require creating a Standard TCP/IP Port with the printers IP address. |
5.5 Bluetooth Ports |
Bluetooth label printers create virtual COM ports or use Bluetooth printing profiles. |
5.6 WSD Ports (Web Services on Devices) |
WSD ports are automatically created by Windows for network discovery. However, they are often unreliable for advanced label printers. Using Standard TCP/IP is preferred. |
Understanding how these ports function is essential to properly installing and configuring a label printer driver. |
|
6. Windows Tools Used for Printer Driver Installation |
Windows includes several built-in interfaces for managing printer installation: |
6.1 Windows Settings (Printers & Scanners) |
This is the modern interface used in Windows 11 and later versions of Windows 10. |
6.2 Control Panel (Devices and Printers) |
This is the classic interface. It allows more detailed configuration options such as port assignment, driver property modification, hardware profiles, and spooler management. |
6.3 Print Management (for Windows Pro and Server editions) |
Print Management allows advanced deployment of printers across networks, driver removal, port configuration, and print queue monitoring. |
6.4 Device Manager |
Device Manager is used when a label printer appears under Other Devices or Unknown Devices, which usually means the driver is missing. Right-clicking the device and installing the driver manually from an .inf file is possible. |
These interfaces will be used throughout the installation process depending on the situation. |
|
7. Step-by-Step Installation for a USB Label Printer Driver |
This section provides a highly detailed walkthrough for installing a USB label printer driver. |
7.1 Step 1: Download the correct driver package. |
Ensure Windows version compatibility and whether the driver is specific to direct thermal or thermal transfer modes. |
7.2 Step 2: Disconnect the printer (if instructed). |
Many installers require the printer to remain unplugged until prompted. |
7.3 Step 3: Run the installer (.exe or .msi). |
The installer usually extracts files, installs the driver, creates Windows registry entries, and installs supporting utilities. |
7.4 Step 4: Connect the printer. |
When you plug in the USB cable, Windows detects the device and assigns a USB virtual port. |
7.5 Step 5: Windows associates the driver. |
If successful, the device will appear under Printers & Scanners. |
7.6 Step 6: Print a test label from Windows. |
A test print confirms correct driver-printer communication. |
7.7 Step 7: Adjust print preferences. |
This includes setting label size, print density, speed, darkness, and media type. |
Completing these steps ensures that a USB label printer driver installs properly. |
|
8. Installation for a Network Label Printer (Ethernet or Wi-Fi) |
Network printers require slightly different steps due to IP address configuration. |
8.1 Step 1: Ensure the printer is on the same network. |
Ethernet printers are easy: plug into router or switch. |
Wi-Fi printers must be configured using their manufacturer utility. |
8.2 Step 2: Identify the printers IP address. |
This can be obtained from the printer status label or via network tools. |
8.3 Step 3: Create a Standard TCP/IP Port. |
Avoid WSD ports because they may cause delays and misprints. |
8.4 Step 4: Install the correct driver. |
Choose from an .inf file if the installer does not automatically detect the printer. |
8.5 Step 5: Confirm connectivity. |
Ping the printers IP address from CMD. |
A successful ping confirms network availability. |
8.6 Step 6: Print a test label. |
If the test succeeds, Windows and the printer are communicating correctly. |
|
9. Manual Installation Using an INF File |
Some label printers do not have an automatic installer. They provide an .inf driver instead. |
Manual installation steps: |
9.1 Open Device Manager. |
If a USB printer is connected without a driver, it appears under Unknown Devices. |
9.2 Right-click the device and select Update Driver. |
9.3 Choose Browse my computer for drivers. |
Select the folder containing the .inf file. |
9.4 Complete installation. |
Windows loads driver files and installs the printer. |
9.5 Set the proper port. |
USB printers must be assigned to the correct USB00X port. |
This installation method is common for older or industrial label printers. |
|
10. How Windows Creates Virtual USB Printer Ports |
Understanding how USB ports are created helps you resolve connection issues: |
10.1 Windows assigns a new USB00X port each time you use a different USB port on your PC. |
For example: |
USB001 is created when plugged into Port 1. |
USB002 is created when plugged into Port 2. |
10.2 A printer will stop working if moved to another physical USB port without driver reassociation. |
Windows sees it as a new device. |
10.3 The solution is to reassign the correct port. |
This is done through the printers Properties menu. |
|
11. Configuring Print Preferences After Installation |
Once the driver is installed, adjusting print settings is essential. |
Key configuration options: |
11.1 Label Size and Page Setup |
Use exact width and height measurements. |
Incorrect dimensions cause misaligned barcodes and cut-off text. |
11.2 Print Density and Darkness |
Thermal printers use heat to activate the label surface. |
Too dark = smudging. |
Too light = faint barcodes. |
11.3 Print Speed |
Higher speed = faster printing but lower print quality. |
Lower speed = better barcode clarity. |
11.4 Media Type |
Choose between: |
Direct thermal |
Thermal transfer |
Continuous |
Gap |
Black mark |
11.5 Sensor Settings |
Sensors detect gaps or markings between labels. |
Incorrect settings cause label skipping. |
|
12. Installing Drivers for Bluetooth Label Printers |
Bluetooth printers require pairing before driver installation: |
12.1 Turn on Bluetooth. |
Both PC and printer must have Bluetooth enabled. |
12.2 Pair the printer. |
Windows assigns a virtual COM port. |
12.3 Install the correct driver. |
During installation, select the correct COM port. |
12.4 Print a test label. |
Confirms communication. |
|
13. Common Installation Problems and Solutions |
Here are some frequent issues: |
13.1 Printer appears under Unspecified |
Cause: Missing driver. |
Fix: Install from .inf manually. |
13.2 Printer prints blank labels |
Cause: Wrong driver. |
Fix: Install model-specific driver. |
13.3 Printer not detected |
Cause: Faulty USB cable or USB port. |
Fix: Try another cable or port. |
13.4 WSD Port problem |
Solution: Replace with Standard TCP/IP Port. |
13.5 Driver signature enforcement |
Solution: Install signed drivers or temporarily enable unsigned installation mode. |
|
14. Windows Print Spooler and Its Role in Driver Installation |
Windows Print Spooler manages print queues. If it fails, drivers may not install properly. |
14.1 Print Spooler must be running. |
Check Services menu. |
14.2 Corrupt spooler files cause installation failures. |
Clearing spooler folder resolves many issues. |
14.3 Restarting the Print Spooler can fix most driver detection problems. |
|
15. Upgrading or Replacing Printer Drivers |
Sometimes you must update drivers: |
15.1 Remove old driver version |
Using Print Management to delete the old driver. |
15.2 Restart Windows. |
15.3 Install the new driver. |
 cs@easiersoft.com