This article provides a detailed explanation of the first section of print settings. |
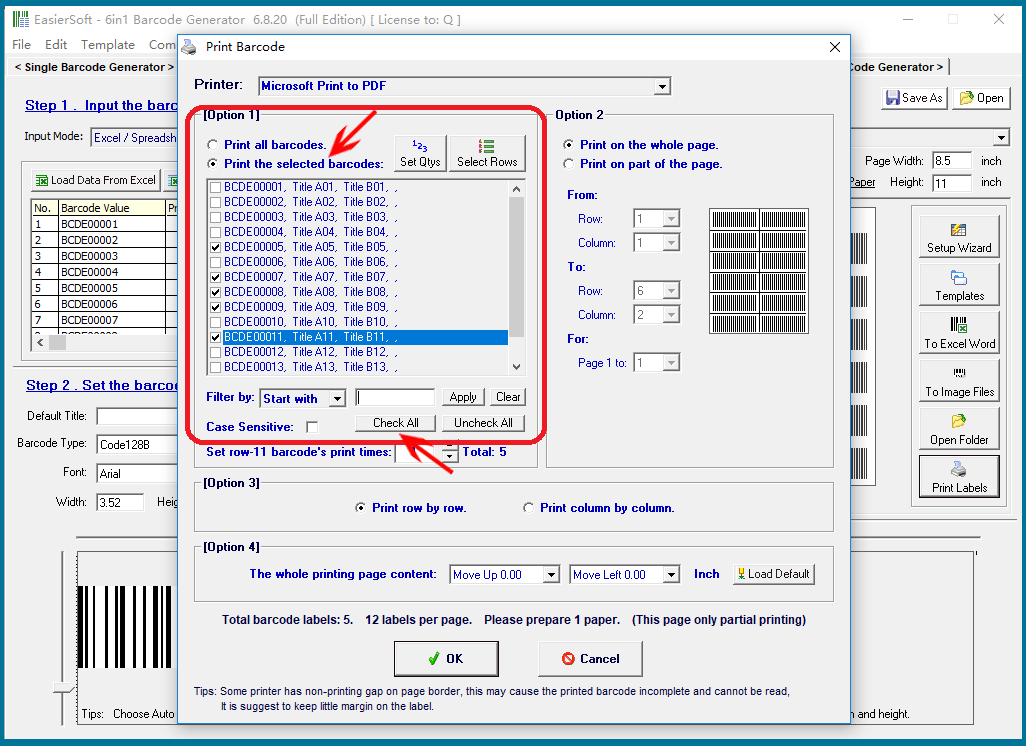
As shown in the image below, after importing data, you can choose to print all of it as barcode labels or filter out only the data you need for printing. This feature can be useful in situations like when you need to reprint damaged barcode labels, for example. |
When you opt to print a subset of the barcodes: You can select one or more barcode values by checking the checkboxes to the left of each barcode value in the list. |
|
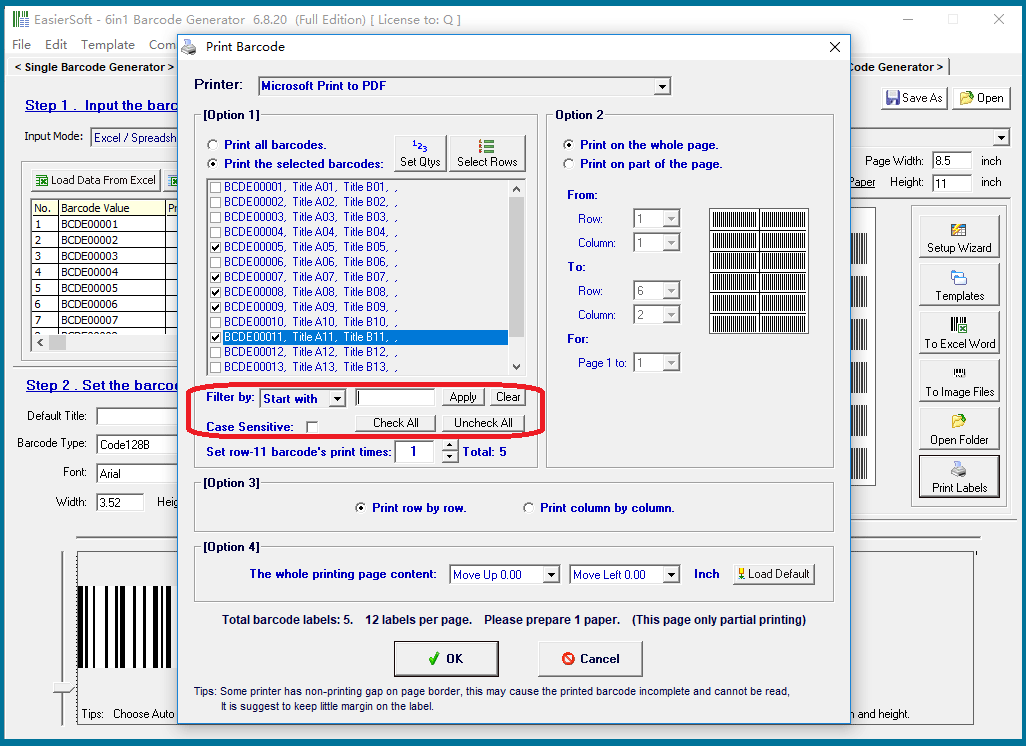
You can also set filter conditions below to select the specific data you need. The filter conditions can be set to look for values that start with, end with, or contain specific characters, with an option to specify case sensitivity. The 'Apply' and 'Clear' buttons allow you to execute or cancel the filter. |
|
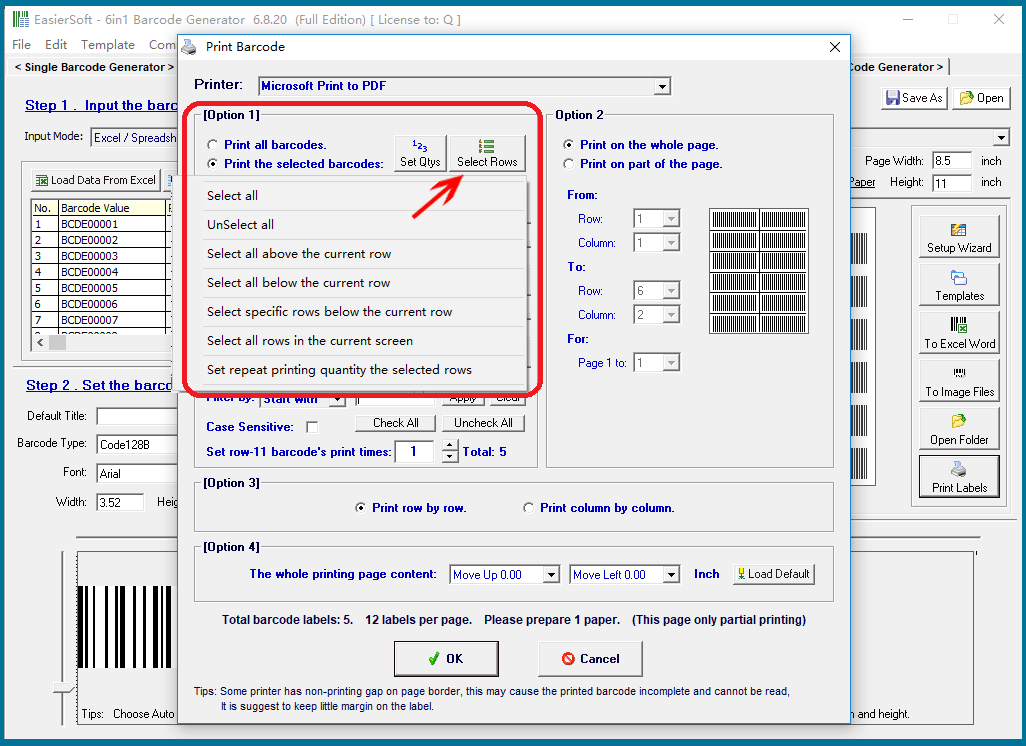
By clicking 'Select Rows', a menu will appear with several options to help you select the rows you want. These options include: |
'Select all' 'Unselect all' 'Select all above the current row' 'Select all below the current row' 'Select specific rows below the current row' 'Select all rows on the current screen' 'Set repeat printing quantity for selected rows' |
|
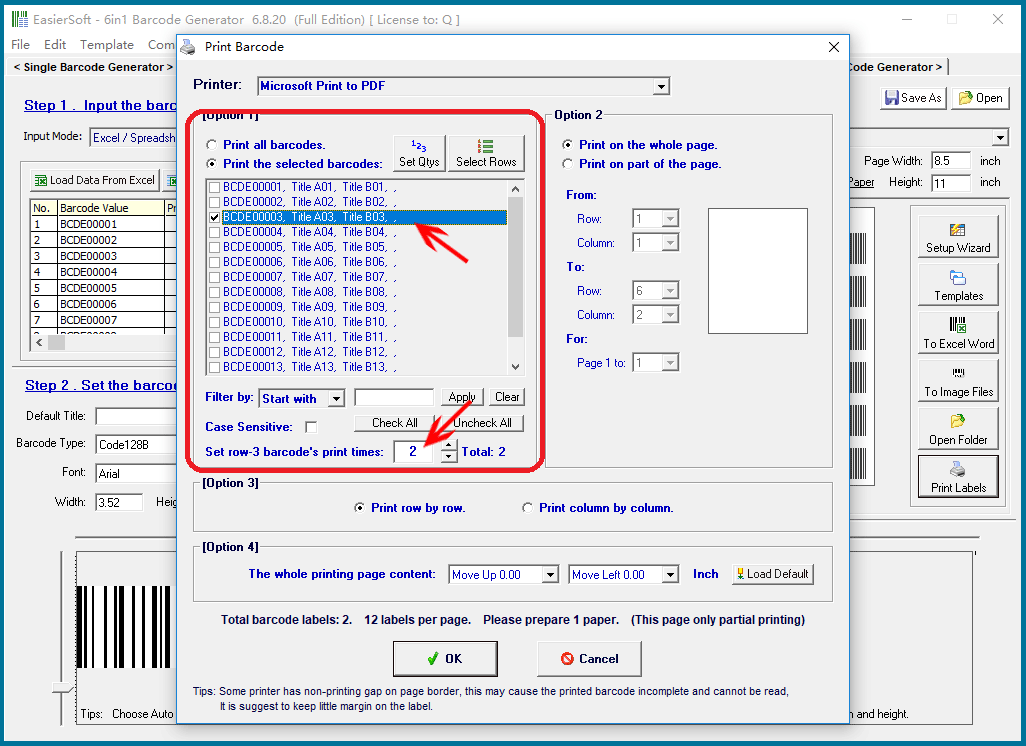
You can also set the repeat print quantity for each barcode. As shown in the image below, when you select a barcode from row 3, you can specify how many times it should be printed. The 'Total' value in the bottom right corner represents the total number of prints for all selected barcodes. |
|
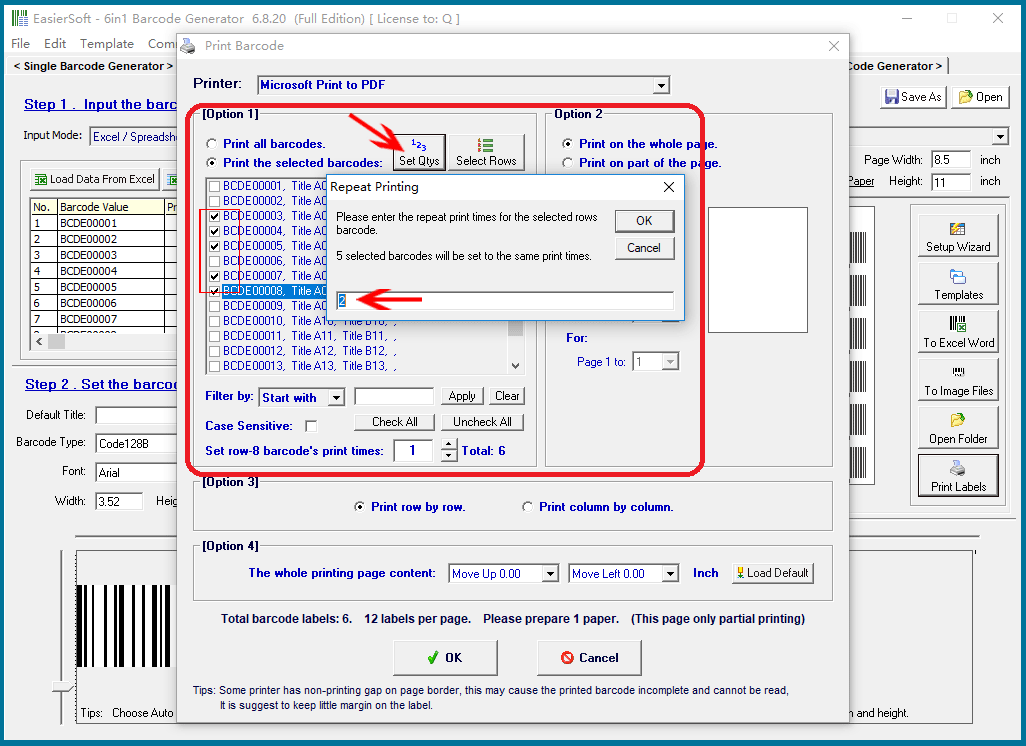
Additionally, you can bulk set the repeat print quantity for a group of barcodes. As shown in the image below, when you select five barcode rows, you can set them all to be printed twice or other quantity. |
|
 cs@easiersoft.com